

Peeling skin can be caused by a variety of factors. To deal with ...


The safety of the device of this structure depends on which pipes are used for installing the chimney of a bath or saunas. Since there is a high risk of the possibility of a fire in the bath, this issue should be approached with all seriousness. It is necessary to think over everything to the smallest detail: pipe material, method of installation and insulation.
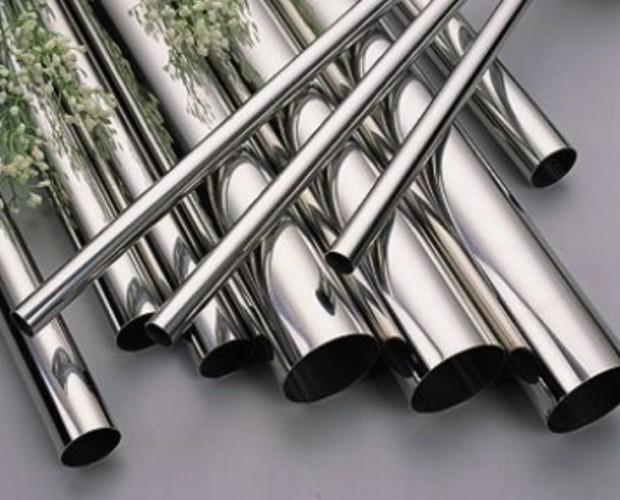
On modern construction market the range of pipes for a bath is very wide. They delight consumers with their appearance, varied designs. The material from which they are made is also varied: ceramics, steel, stainless steel and even thermoplastic.

A sandwich pipe for a bath or sauna is made according to a very simple principle. It consists in arranging several layers, like in a sandwich. Its structure is as follows: two metal pipes that have different sizes diametrical section, are inserted into each other. The free space that has formed between the pipes is filled with heat-resistant insulation. For example, basalt wool. A pipe equipped in this way is able to withstand the effects of moisture and heat. It goes on sale unassembled. Before purchasing it, it is necessary to complete the project of the future chimney, and then collect the necessary parts and connecting elements. It is absolutely not difficult to assemble such a pipe. The installation of a sandwich pipe can be completed in just one day.

Consider all positive and negative characteristics sandwich pipes in terms of using it for a bath or sauna.
But despite the many positive characteristics, there are also disadvantages:
As you can see, there are much fewer minuses than pluses. That is why the sandwich pipe is very popular. And if you try and make it yourself, you can reduce costs. In this case, the arrangement of a sandwich pipe may be cheaper even brick chimney... Having evaluated all the pros and cons, we can come to the conclusion that a sandwich pipe is the best option for arranging a chimney in a bath.
The process of making a pipe with your own hands consists of the following stages:
The work on the device is not very complicated. You just need to wrap the steel structure with heat-insulating material, and then protect the insulation with galvanized coating. But still, there are some nuances that cannot be ignored:

After you have purchased all the materials and parts, you can start building a sandwich pipe for a bath or sauna with your own hands:

It should be remembered that the temperature near the stove is the highest. This leads to a rapid burnout of the pipe, which is connected directly to the furnace nozzle. Taking this into account, experts recommend assembling a chimney for a bath not from a solid structure, but to assemble it in two parts. This greatly simplifies the work of installing the pipe, and also makes it easy to replace the lower burnt-out part at any time.
In this section, we will consider how to properly install a chimney for a bath or sauna. First, you need to decide on the installation method. It is best to install the chimney in a bath or sauna strictly vertically. It is with this method of installation that all the positive factors of the functioning of the chimney are ensured. By mounting the chimney vertically, the outlet is provided through the ceiling and roof of the bath. Therefore, the first step is to make holes in these parts of the bath or sauna.

The installation itself of the chimney structure for a bath is performed in this way:

As you can see, the process is not very complicated, but it requires scrupulousness in the performance of work. More detailed process shown in the video:
To clean the chimney of a bath, several methods are used. This process can be performed using special brushes, or you can use more modern method using chemicals.

If the structure is equipped not vertically, but with transitions, then the listed methods are not effective. In this case, there is only one way out, pour several liters of hot water into the chimney of the bath, and then carry out a serious firebox to dry it. During the heating process, the soot will begin to leave the chimney along with the evaporating water. You should not worry about the formation of extraneous odors. Everything will disappear after complete drying.
The use of a pipe for a high-quality sauna chimney device will provide an optimal indoor climate, as well as confidence in safety. If there is a desire to save money, think carefully about whether it is worth giving in to dubious experiments. Better to put in an effort and arrange everything on high level the first time. Redoing is always more expensive.
Bath pipes can be made of various materials, each with its own strengths and weaknesses. And in order to find out which option is better to use for sewage, water supply or heating, you need to familiarize yourself with each of the options.

The sewage system in the bath is not much different from the sewage system in a private house. The same pipe classification, the same installation methods. V general outline the functions of the pipeline look like this: it takes wastewater dropped from plumbing equipment and ladders, leading them to a cesspool or septic tank.

Sewerage in a bath - an example
Often, the baths are equipped with gravity sewerage (gravity), that is, the drains move on their own, but there is no such pressure as in water pipes.
 The gravity sewer system has a slope towards the collection of wastewater
  Polypropylene pipes for free-flow sewerage
Caustic substances that can destroy its walls will not move through the pipeline, and in this case we are not talking about ultra-high temperatures. Despite this, the choice of pipes for a bath should be taken seriously, and the requirements below can serve as a guideline.

In the construction of a gravity sewer system, concrete, plastic, ceramic, cast iron and asbestos-cement pipes are used. As for concrete products, on the scale of low-rise construction, they are used mainly in sewer and water wells, but now we are talking about a pipeline, so let's get acquainted with other possible options.


Such pipes (GOST 286-74) are made from fireclay or fine refractory clay. No additives - neither modifiers nor pigmentors - are used, therefore the products have all the ecological advantages of natural ceramics. External / internal surfaces are covered with a special glaze that protects the material from acid attack. Sometimes the inner surface is not glazed, but fired.

CERAMIC SEWER PIPES.TECHNICAL CONDITIONS.GOST 286-82. Download file
The ultimate pressure that ceramic products can withstand can reach 0.2 MPa, the minimum resistance to acids is 90%. The length does not exceed 250 cm. More detailed technical characteristics can be found in the table below.
Table. Main characteristics of ceramic pipes
| Inner diameter, cm | Socket inner diameter, cm | Wall thickness |
|---|---|---|
| 60 | 73,4 | 4,1 |
| 55 | 67,8 | 3,9 |
| 50 | 62,2 | 3,6 |
| 45 | 56,8 | 3,4 |
| 40 | 51 | 3 |
| 35 | 45,6 | 2,8 |
| 30 | 39,8 | 2,5 |
| 25 | 34 | 2,2 |
| 20 | 28,2 | 2 |
| 10 | 22,4 | 1,9 |
The best option for sewage in a bath is products with a diameter of 10 cm. As for the connection method, there are several of them in relation to ceramic pipes, and the choice of one or another of them depends on the absence / presence of a socket.


Expanding cement (also called asbestos-cement mortar) is prepared as follows: cement (at least "four hundredth") is mixed with asbestos-cement fiber (grade VI and higher) in a 2: 1 ratio. The mixture is diluted with water (approximately 12% of the total weight) immediately before processing each compound.


Another filling agent - mastic - is made from BN-Sh oil bitumen and asphalt mastic proper (proportions - 3: 2).


To do this, before use, the mastic is heated to a liquid state. If pipes are installed in a vertical position, the mixture is poured directly into the socket; if horizontally, then it is poured through a sprue made in a clay roller (the latter is made around the circumference of the socket and should have a thickness of 5-7 cm, and a width of 20-30 cm), or by means of a metal clamp that ensures flow of the mixture.
It is believed that ceramic pipes have an unlimited life, but due to the high price, people are forced to look for a cheaper alternative. With regard to the shortcomings, then these include heavy weight and the fragility of the material, which significantly complicates transportation.

These pipes are cheaper and are made exclusively by domestic producers. In fact, it is one of the many types of concrete products reinforced with asbestos fibers. According to GOST 1839-80, asbestos-cement products are produced with a diameter of 10 and 15 cm and they can be used exclusively for external lines. Installation inside buildings is strictly prohibited, because the material gives off dust and toxic substances... For the same reason, all work must be done in a mask.


Asbestos-cement pipes are connected by means of a socket located at one end and a smooth cut at the other. The smooth end is placed in the socket, after which a sealed lock is formed (as in the previous version).

 Compound asbestos cement pipes- scheme
Important information! If the pipes are to be used as drainage gutters, certain difficulties may arise during the cutting process.
To cut the product, you need to follow these steps.
Step 1. First, you should prepare everything you need: a grinder, a clamp and a couple of metal corners to create an even cut.
Step 3. After fixing, you need to make a cut along the line, which is outlined by the corners, and clean the surfaces.
Asbestos cement pipes do not corrode and can withstand pressures up to 0.15 MPa. The service life, which depends directly on the wall thickness, ranges from 25 to 50 years. In terms of cost, the material has no competitors. It is also worth noting that cheapness is often overshadowed by defects, so pipes must be carefully inspected before purchasing. There should be no delamination, cracks or chips.
Important information! A minor defect that makes the circular cross section slightly oval is not yet a cause for concern, but it can be a reason for a decrease in cost.
Cast iron, being an incredibly durable material, has been used in sewer construction since the 16th century. Cast iron pipes are made from fusible cast iron together with all the necessary fittings, which greatly simplifies the installation procedure. The inner and outer surfaces are coated with petroleum bitumen to protect the products from rusting.

Cast iron pipes for sewer systems are manufactured in accordance with GOST 6942-98. They are cast already with a socket, the length of which ranges from 6 cm to 7.5 cm (depending on the diameter). The elements are connected according to the traditional "bell-shaped" scheme, and the gap is clogged with a sealant and filled with the appropriate mixture. One of the following materials can be used as such a mixture.
CAST IRON SEWERAGE PIPES AND SHAPED PARTS TO THEM. Technical conditions. INTERSTATE STANDARD. Download file

Transporting cast iron pipes, as well as laying, is quite difficult due to the significant weight of the material. But on the other hand, the products are able to withstand a pressure of more than 0.2 MPa, and operational life can be up to 100 years old.


Polymer products are perfect option for the sewerage system in the bath. They are durable, lightweight, resistant to corrosion and aggressive environments. In terms of their technical parameters, plastic pipes are noticeably ahead of cast iron ones, and in terms of cost they are second only to products made of asbestos cement. The service life is 50 years, the maximum working pressure is from 0.2 MPa.
Polymer pipes are either straight or with socket ends. Domestic manufacturers are guided by GOST standards, starting with 22689.0-77 and ending with 22689.20-77. If the products are straight and long, then they are additionally equipped with shaped elements. There are several ways to connect elements:

Depending on the operating conditions, plastic pipes are divided into several categories.

Important information! For connecting pipes made of plastic with elements of cast iron, steel, etc. special fittings are produced.
File to download. Text for acquaintance
The choice, of course, must be made in favor of polymers. For internal sewer wiring, it is better to use PP or PVC pipes, characterized by an affordable price, ease of installation and durability. For external system you need to use PVC or PP products of increased strength (as a rule, orange). At the same time, the features of the area where the installation will be carried out are also taken into account.

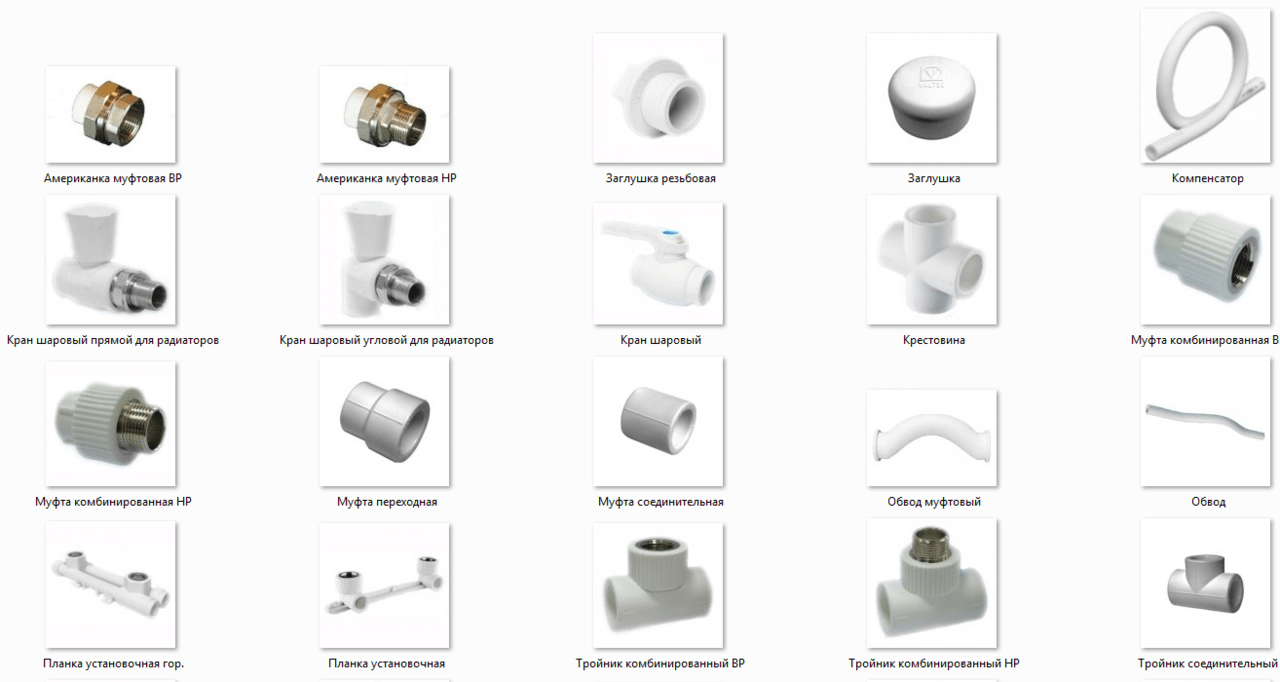
On modern market a wide range of different types of shaped fittings is presented. Moreover, their configuration does not depend on what type of pipes is used - it is almost the same everywhere. With these fittings, you can easily handle the installation even if you do not have the appropriate skills.

The principle of the bath water disposal is simple: the water enters the receivers with a water seal (they are called spillways), which are located in the floor. Further, through pipes located under the floor, the liquid is fed into the septic tank, where it subsequently seeps into the soil. Excrement (if you have a toilet and it is connected to sewer system) are decomposed by certain bacteria and are reduced by several tens of times.

Important information! This scheme will only work if the groundwater is more than 2 m from the surface. If they run higher, then the drains must be discharged into an airtight container, which will be periodically pumped out by a sewage machine.
This type of sewer is known as cesspool, for its organization, you can purchase a plastic septic tank (for a bath, you will need a capacity of at least 3 m³).

The effluent will flow into three water intakes:

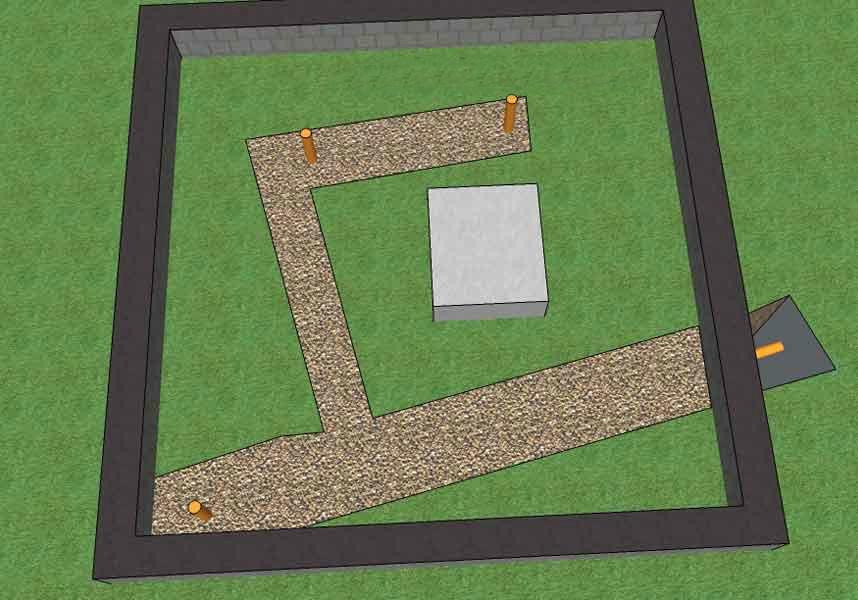
Pipes should be laid before the floor is built. The algorithm of actions should be as follows.
Step 1. First of all, you need to dig trenches according to the previously created scheme.

The depth at points A and B should be 55-60 cm relative to the ground level behind the foundation. If the height of the basement is 30-40 cm, then the depth of the trench should be about 90-100 cm relative to the top of the foundation.

Step 3. The bottom of the trench is covered with a sand cushion 10 cm thick. The sand is carefully compacted, while observing the observance of the slope.
Important information! The hole for the sewer pipe should be taken care of even during the construction of the foundation.

Step 4. PP pipes are used for laying the internal sewerage system, as well as all the necessary accessories:
Diameter horizontal pipes is 110 mm, while for vertical installation under water inlets, products are suitable for both 110 mm and 50 mm. If the second option is used, then additional adapters from 50 mm to 110 mm are required. For external sewage, PVC pipes (orange) are required.


Step 5... Drain pipes are installed vertically: No. 1 and No. 2 under the ladders, No. 3 - under the toilet. For this, sticks about 1 m long are driven into the bottom of the trench in the appropriate places and pipes are tied to them. It is advisable that the height of the latter be with a margin - when installing traps, all unnecessary can be cut off.

At the end of the installation, a container is placed at the end of the outlet pipe, in each drain pipe a certain volume of water is poured (checking the slope), the same amount should pour out at the outlet. If everything is normal, then the trench for the internal sewerage is buried.
Step 6. WITH external sewerage there shouldn't be any difficulties. A trench is dug and covered with sand (as described above). The level creates a slope of 2 cm per linear meter. m. towards the septic tank. Next, the PVC pipes are connected to the internal system, the slope is re-checked. At the end of the check and installation of the septic tank, the trench is buried.

Important information! According to the standard, the depth of the pipes should be 30 cm less than the maximum depth of soil freezing. If the outer pipes were laid at a shallower depth, then they need to be insulated. To do this, they are wrapped in two layers of polyethylene foam 1 cm thick, although you can take any other heat-insulating material.

All pipes that are used in these bath lines are conventionally divided into two large categories:
Some of them can be used exclusively for cold water supply, although there are some that are used for transporting both cold and hot liquids. To choose a suitable option for a bath, you need to familiarize yourself with the characteristics of each of the options.
Available with or without galvanized coating. They can be connected by threaded connections or welding, additional fittings (fittings, adapters, elbows, tees, etc.) are also used. Technical specifications are regulated by GOST 3262-75.
GOST 3262-75. Steel pipes for water and gas supply. Technical conditions

Such pipes are characterized by increased strength, which is why they are very popular. They tolerate well high blood pressure and temperatures up to 100 ° C. According to the characteristics of the production process, they are divided into:
Table. Steel pipe diameters
| Outside diameter, cm | ||
|---|---|---|
| Seamless products | Suture | Inner diameter, cm |
| 15,9 | 16,5 | 15 |
| 13,3 | 14 | 12,5 |
| 10,8 | 11,4 | 10 |
| 10,2 | 10,13 | 9 |
| 8,9 | 8,85 | 8 |
| 7,6 | 7,55 | 6,5 |
| 5,7 | 6 | 5 |
| 4,5 | 4,8 | 4 |
| 4,2 | 4,23 | 3,2 |
| 3,2 | 3,35 | 2,5 |
| 2,6 | 2,68 | 2 |
| 2 | 2,13 | 1,5 |
| 1,6 | 1,7 | 1 |
Standard heating / water systems use pipes with an inner diameter of 1.5 mm, 2 mm or 3.2 mm. It is better to give preference to galvanized seamless products.
Important information! The zinc coating prevents the material from rusting. But the joints - regardless of their type - destroy zinc, so the joints must be additionally protected from rusting (primer + painting).
Among the disadvantages, it is worth noting the susceptibility to corrosion, the difficulty of transportation (significant weight) and installation (welding), the presence of various impurities in the working fluid, the obligatory sealing of joints with tow or FUM tape, a gradual decrease in the internal volume and pressure in general due to the formation of build-ups ...
In terms of their parameters, they are identical to steel pipes, then Maximum temperature here it reaches 350 ° С. They are divided into hot-deformed (GOST 9941-81) and cold-deformed (GOST 9940-81), practically devoid of drawbacks, but due to the high cost (from 363 to 556 rubles per kilogram, depending on the diameter) they are not used in everyday life.
GOST 9941-81. Seamless cold- and heat-deformed pipes made of corrosion-resistant steel. Technical conditions
GOST 9940-81. Seamless hot-deformed pipes made of corrosion-resistant steel. Technical conditions

They have significant advantages, including:
In addition, copper is ideal for water supply as it does not spoil the taste of the water. But due to the high cost (about 600-750 rubles per kilogram), such pipes are rarely used.
Now about non-metallic products. Their main advantage is their resistance to corrosion. Moreover, the surface plastic pipes perfectly smooth, so no build-ups appear on it. Plastic pipelines are intended for transferring liquids at a temperature not exceeding 95 ° C, the maximum pressure is 10 atm. Heating system made of plastic can be used for about 25 years, and water supply - up to 50. For a bath, you can take metal-plastic, PVC, PP, polyethylene products.

These pipes are characterized by a multi-layer construction: an aluminum layer is sandwiched between two plastic layers. They weigh a little, but they are strong enough. They are connected with press fittings, for which of the tools you only need wrench... They are produced in two modifications:
Not the best option for a bath, since when the temperature drops in liquid, aluminum is compressed more than plastic. Therefore, for high pressure the risk of destruction of connections increases.
They are produced with a diameter of 1 cm to 10 cm. They are able to withstand 2.5-16 atmospheres. Of the minuses - a high rate of linear expansion and a narrow temperature range (from -40 ° С to + 40 ° С). For this reason, they are not suitable.

Enjoy the same positive qualities, but are connected by thermal welding, which increases the strength of the connections. For the heating system or hot water supply, only reinforced pipes are used.
Products made of polypropylene are capable of withstanding up to 20 atmospheres, are inexpensive, but at the same time have a long operational life. They retain their properties even when the liquid in the system freezes completely. Suitable for installation under plaster or concrete screed.
Important information! For heating and hot water supply in the bath, it is recommended to use reinforced pipes with a diameter of 1.6 cm to 2.5 cm, for supply cold water universal products with PPR marking are suitable.
The manufacture of such pipes is regulated by GOST R 52134-2003 and SNiP 2.04.01-85.
GOST R 52134-2003. PRESSURE PIPES FROM THERMOPLASTES AND CONNECTING PARTS TO THEM FOR WATER SUPPLY AND HEATING SYSTEMS
SNiP 2.04.01-85. INTERNAL WATER PIPE AND SEWERAGE OF BUILDINGS
Table. PP pipe diameter and wall thickness
| Wall thickness, cm | |||
|---|---|---|---|
| Outside diameter, cm | Universal products (PN20) | Thin-walled, for cold water (PN10) | Reinforced (PN25) |
| 11 | 1,84 | 1 | 1,84 |
| 9 | 1,5 | 0,82 | 1,5 |
| 7,5 | 1,25 | 0,69 | 1,25 |
| 6,3 | 1,05 | 0,58 | 1,05 |
| 5 | 0,84 | 0,46 | 0,84 |
| 4 | 0,67 | 0,37 | 0,67 |
| 3,2 | 0,54 | 0,3 | 0,54 |
| 2,5 | 0,42 | 0,23 | 0,42 |
| 2 | 0,34 | 0,19 | 0,34 |
| 1,6 | 0,27 | - | 0,27 |
From metal products the best option Are steel pipes. But at the same time, polypropylene ones also have excellent characteristics, and they do not rust, they weigh little and are quite easy to install. Therefore, the choice is obvious: it is preferable to use polypropylene for both heating and water supply. If it is planned to use metal pipes, then steel should be preferred here.
The source of water can be either a central water supply system or a well or a well. You should start with outdoor work.
A trench with a depth of 70-100 cm is dug from the water source.Then a metal-plastic pipe (it is more suitable for outdoor use) with a diameter of 3.2 cm is drawn.Turning 90 ° (using a connecting corner), the pipe is brought into the room, connected to the pumping station ( provided that it is provided for by the diagram), is removed from it and closed with a brass fitting that passes to the thread (the same diameter). Next, a tee is attached, equipped with a drain valve, but in the case of high-quality insulation of the outer pipe, you can do without this. Then the "American" is installed, equipped with a shut-off valve to stop / restart the water supply. If necessary, a filter is installed, then a transition to a PP pipeline with a diameter of 2.5 cm is made.

The collector will be the first of these. In fact, it is a pipe equipped with holes for routing. The manifold is necessary so that the wiring starts correctly, and the same pressure is created in the pipes. All pipes leading from the collector must be equipped with shut-off valves that allow shutting off the water in emergency situations or during maintenance.

One of the pipes is led from the collector to the water heater (if water is used often, and the source does not have time to renew, you can install a storage boiler). At the outlet of the boiler for hot water supply, another ball valve is installed, then the pipe is led to the plumbing fixture. To other devices, where hot water not required, pipes are led directly from the manifold.
Important information! In the section of the pipe between the boiler and the collector, an additional fuse and a 5-liter damper tank must be installed. The latter will compensate for the expansion of the liquid during heating, and also prevent shocks in the system after long downtime boiler.
As already noted, all metal elements are connected by means of "American" for the purpose of easy disconnection during repairs.

And now directly to the wiring. After drawing up her project, you need to prepare everything you need for welding work - electric jigsaw and a soldering iron for PP pipes. First, a nozzle of the required diameter is put on the soldering iron, then the temperature is set to the device (usually 270 °) and it heats up. Further actions are performed according to the following algorithm.
Step 1... According to the previously made markings, the pipes are cut into pieces of the required length.
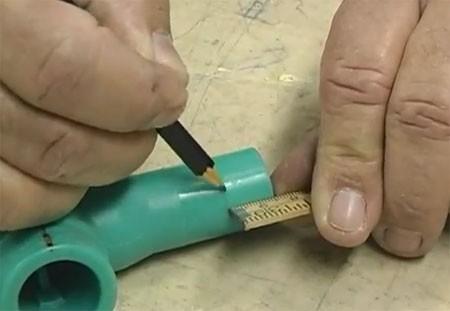
Step 2. Burrs at the ends are carefully removed.
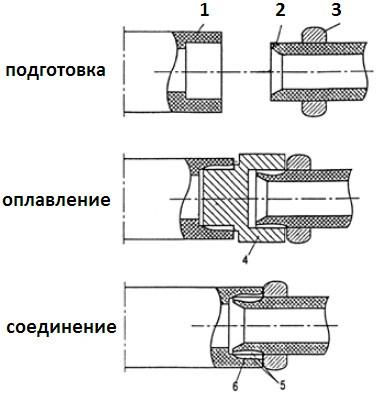
Step 3. The depth of entry of the product into the fitting is indicated by a marker. What is characteristic, the end should not come into contact with the coupling of the fitting - a slight gap is required (about 1 mm).
Step 4. Both elements are put on the nozzle for uniform heating. The heating time, as well as the cooling time, is related to the diameter and is shown in the table below.
Step 5. The heated elements are removed and docked in accordance with the marks, after which they are pushed onto each other with little effort. Do not rotate the elements along the axis during the connection!

Step 6. Corrections can be made within a few seconds after the attachment (see table), then the elements are fixed.
Important information! The order of connection of all parts is determined in advance.
Step 7. The same way all elements of the routing are connected along the pre-marked lines of laying. In order to compensate for thermal expansion, it is desirable to use movable fasteners.
The presence of cracks or gaps in the joints is unacceptable. After 1 hour after the completion of the installation, you can turn on the water supply and check the system. Hydrotesting can be carried out no earlier than in a day.
The installation of the heating system in this case is not much different from the arrangement of the water supply system, unless external work will be carried out. A diagram is also created, in accordance with it, the pipes are laid out from the heater to other elements of the network. If we are talking about heating, and the coolant will circulate in a natural way, then you need to maintain a slight slope (1 cm per 1 running meter); in the presence of a circulation pump, this is not necessary, but desirable - it will be easier for the pump to distill liquid, and the system will continue to function in the event of a power outage.

The procedure for soldering and fixing pipes is similar.

Recently, metal pipes have been used less and less in plumbing / heating networks. Firstly, they weigh a lot, so their transportation and installation are fraught with certain difficulties. Secondly, their connection is quite laborious: for welding work, the appropriate skills and equipment are required; for threaded connection, threading on products must be done manually. Thirdly, one of the main disadvantages of steel pipes is the difficulty in cutting.
 Pipe and roller pipe cutter
 Press the pipe cutter rollers in the marked place
  Wrap the pipe cutter around the pipe
  Slightly tighten the pipe cutter rollers (by turning the pipe cutter handle clockwise) and again wrap the pipe cutter around the pipe. Continuing to act in this way, you can cut the pipe smoothly and quickly.
As for the diameter, 1.5-2 cm is enough for the water supply in the bath, and for heating it is selected depending on the diameter of the boiler outlet. In most heating devices, this is 4-5 cm, and it is necessary that the diameter of the pipes be equal to this figure.
Important information! Bending should be done using a manual hydraulic tube bender - a compact device that can be easily transported to the work site.
 Manual hydraulic pipe bender
  Homemade pipe bender
  Virax electro-hydraulic pipe bender for steel pipes
Steel pipes can be connected with the following types of connections:
Let's get acquainted with each of them.

Both gas and electric can be used here. welding machine... The work requires high qualifications, so it is advisable to involve a specialist. Be that as it may, in this case, you should adhere to certain rules.

Welding steel pipes - example
The number of seams depends on the thickness of the pipes. The first layer should be intermittent, all others should be continuous. You need to be especially careful when applying the first layer: each edge must be completely melted, and all areas must maintain their position (so that the pipes do not "lead").

1 - flange coupling; 2, 3, 4 - rings, respectively - sealing, clamping and clamping; 5 - flange; 6 - clamping bolts
This method is rarely used and consists of the use of flanges. First, the ends are thoroughly cleaned and leveled, then a flange is put on one of the pipes and fixed with bolts. A rubber gasket is laid in place of the joint, and so that it extends at least 1 cm beyond the cut line. A second flange is put on top of the gasket, which is fixed to another pipe. The flanges are attached to the pipes with rings and clamping bolts, and to each other with a coupling.


1 - nut; 2 - clamping ring; 3 - clamping ring; 4 - sealing ring; 5 - clutch housing
Another not very popular way. First of all, the joints are prepared and covered with a sealant, then the coupling is pushed onto pipe # 1 and fastened with a ring and nuts so that the end of the pipe is approximately in the middle of the coupling. Then a nut with rings is screwed onto pipe No. 2, after which it (pipe) is also placed in the sleeve. At the end, the nut is screwed onto the sleeve, thereby ensuring tightness.

Threaded connection means fastening steel pipes with special elements (tees, couplings, fittings, angles, adapters, etc.). To do this, a thread must be cut at the end of each pipe. All joints are sealed with tow, FUM tape or sealant.
A piece of galvanized steel pipe with a thread
For fastening to the walls, special clamps are used. The step of installing the clamps depends on the inner diameter of the pipeline.
At the end, the line is filled with water and, if no leaks are found, you can start full-fledged operation.
According to the overwhelming majority of lovers of bathing traditions, the Russian steam room, like the Finnish sauna, should be heated with wood. For this purpose, a stove is installed in the steam room, and the combustion products are discharged outside. The question is how to properly mount such a chimney in the bath, which will provide good draft and will last a long time, and most importantly, it is safe. This article will allow you to familiarize yourself with existing species chimney pipes and methods of their installation.
Currently, homeowners are installing 3 types of chimneys for a bath:
An ordinary pipe is simplest option, but it is used less and less. People prefer safety over cheapness, and therefore more and more inclined towards sandwiches. Yes, and black drips of condensation, spoiling the entire appearance of the shiny surface of the stainless steel, few people like. Although, if you make some effort and mount the pipe as expected, such troubles can be avoided. Below we will look at how to do this correctly.
For reference. Ordinary metal pipes on steel bath stoves are usually put by the owners, who like to do everything with their own hands and save as much on materials as possible.
The double-walled sandwich channel design greatly simplifies installation work and makes the bath operation much safer in terms of possible fire and fire. Since the stove is in any case inside the building, then on its way the chimney meets various building construction- wall, ceiling, roofing. And they do not always consist of non-combustible materials, which means that an ordinary red-hot flue pipe represents a high fire hazard.

That is why the chimney from the sandwich pipes is good because the temperature on its surface is much lower than the flash point of most building and finishing materials. However, according to the rules fire safety from the double-walled and brick flue, an indent is also made to combustible structures. By the way, the first 2 types of channels are mounted together with steel bath stoves, and the third, respectively, with brick ones.
Note. If the furnace itself is brick, then the pipe for the combustion products is made the same; in other cases, metal gas ducts are installed.

According to the method of laying, the installation of the chimney in the bath with your own hands is done outside or inside the building. When installed outdoors, a horizontal or inclined section extending from the oven penetrates outer wall, and only then joins the vertical section. The internal layout implies the passage of a vertical chimney through the ceiling and roof structures. These nodes represent the greatest fire hazard, the consequences incorrect installation reflected in the photo:

In the photo, when passing through the ceiling, the distance from the pipe to the combustible materials is clearly not maintained, which is why the latter began to smolder. The error in the bottom photo is obvious - unacceptably short vertical section, which should rise in this case above the ridge of the roof.

The places where the passage of the pipe through the ceiling and other building structures is carried out should be considered taking into account the fact that from the inside they are sheathed with wood, that is, with a combustible material. In this case, it does not matter from what material the wall itself or the floor is built, it is enough that there is a combustible lining. In general, the postulates of laying chimney ducts sound like this:

A modern correct brick chimney has an insert of stainless steel or ceramic elements inside. This is necessary in order to avoid the destruction of the walls from the effects of condensation, which, due to the uneven operation of the heat source, freezes in the pores of the brick, chipping it out in pieces.

Starting from the attic floor, it is strongly recommended to protect the single-wall pipe with a heat-insulating layer of non-combustible insulation, the best option is basalt fiber. The outside of the insulation is wrapped in a galvanized steel casing. Then condensation will not appear outside the pipe, and attic space will be protected from fire. When the chimney is installed through the wall, the same indents are observed as for passing through the ceiling.

First, about the brick structures, which are a continuation of the oven masonry. The knot of the passage, called the cutting, is performed by expanding the masonry to the standard dimensions, as shown in the diagram above. It turns out that when crossing the floor, it is necessary to withstand the wall thickness of one and a half bricks (380 mm), and the roofing coating - 1 brick (250 mm).

Steel pipes for venting gases are usually assembled from sections that are inserted into one another. Moreover, it is necessary to mount the chimney in such a way that the condensate inside the gas duct can flow down unhindered. That is, the upper section is inserted into the lower one, this is called a "condensate" assembly. As for modular sandwiches, then inner tube the upper section to be inserted must enter the lower one, and the outer one should grip the casing of the lower one from the outside. In this way, sediment is removed, calmly flowing to the ground.
Important. No smoke-based assembly, that is, inserting sections into one another, on the contrary, is not allowed.

If you decide to make a chimney for the bath through the ceiling, then you should prepare an opening of the required size in the ceiling. Then make a box with a bottom and a hole for a pipe out of roofing steel, fix it in the opening and then install a smoke channel. The space between it and the sides of the box is filled with expanded clay, vermiculite or tightly packed with basalt wool. A detailed detailing of the unit can be taken from the diagram:

Advice. Instead of a complex passageway, you can use a samovar-type water tank built into the ceiling and performing 2 functions at once. Similar successful solutions are offered by many furnace manufacturers, the details are shown in the drawing:

The vertical external chimney is fixed to the wall with brackets in such a way that there is at least 1 fixture for each section. If the sections are long, then the brackets are placed at intervals of 2 m. When making turns, you should avoid installing the elbows at an angle of 90 °, try to use bends at 45 or 30 °. The upper cut of the chimney can be covered from precipitation with an ordinary umbrella or some kind of deflector can be installed. Better is the one that turns after the wind, preventing it from blowing into the pipe.
Brick or stainless chimneys serving sauna stoves should be cleaned as needed. Practice shows that with year-round use of the bath, such a need occurs at least 2 times a year. For this purpose, there are special brushes tied to a rope with a load so that they can be lowered from top to bottom.

It is necessary to drain the condensate through the tap at the bottom of the pipe, climb onto the roof and lower the ruff inside. Before that, you will need to remove the umbrella or deflector. It is very convenient when a chimney with a hole (revision) is mounted in the bath, through which access is opened from below. Then cleaning can be carried out from both sides, and then the poured soot can be removed through the hatch.

In addition to mechanical method, there is also a chemical chimney cleaning. On sale there is a tool called "chimney sweep log", which is put into the firebox of the stove and burned there in accordance with the instructions. The tool is quite versatile, suitable for any solid fuel heaters and has been tested more than once in practice.
Installing a sauna stove is only half the battle. Installation of such an important part as a chimney will take no less time, if not more. It is important to monitor compliance with 2 main requirements: compliance with fire regulations and the presence of good stable traction.
The key element of the bath is the stove installed in the steam room. And so that you can safely steam without fear of suffocating from the smoke, it is necessary to ensure the removal of combustion products. To do this, you will have to think over and create a high-quality chimney design in advance. The exhaust pipe for a bath with your own hands is quite simple to equip, the main thing is to be able to use the tool and understand the essence of the work performed. There are no particular difficulties in how to make a pipe for a bath.
Before making a pipe in a bath correctly, and most importantly - reliably, you need to understand its types, design, size requirements, as well as the features of its installation and operation. Therefore, in order for the chimney in the bath to serve as it should, you will first have to study these issues and make a small design drawing.
The chimney in the bath can be internal or external. Each of these two types has advantages and disadvantages. So external chimney has the least fire hazard, it is easiest to install and fix. But due to the fact that it is located on the street, heat losses through it will be very high. Internal chimney perfectly retains heat, giving it to the inside of the bath, unfortunately, the process of its installation is an order of magnitude more complicated, but main drawback- this is an increased fire hazard. Fortunately, the main disadvantages of the external and internal chimney can be corrected by creating quality insulation. In general, it is recommended to equip an internal exhaust pipe for the bath. This is due to the fact that a high temperature must be maintained in the bath and heat loss is highly undesirable. In addition, an internal chimney will save you fuel costs.

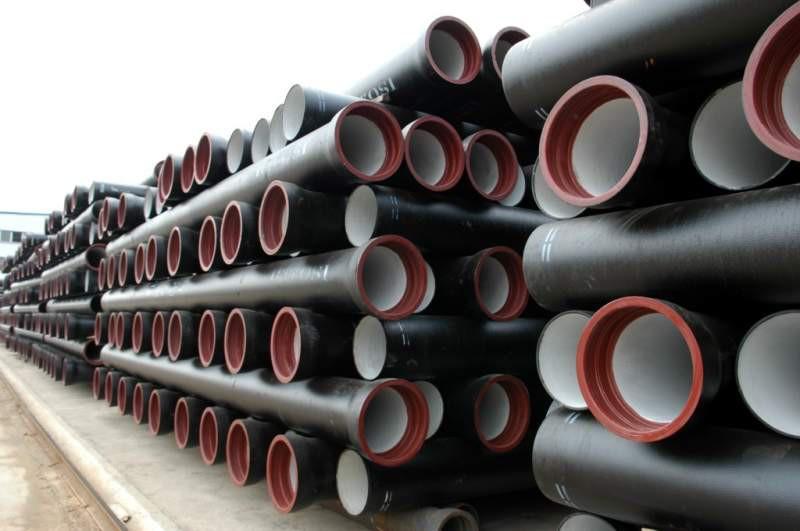
The material for the chimney pipe can be metal, ceramics or brick... These materials do not emit harmful substances and are able to withstand high temperatures. You can also find pipes made of aluminum or asbestos cement on the market, but these materials will not work for the exhaust pipe of a bath.
Depending on the material used and the type of chimney, a pipe for a stove in a bath can consist of several different elements and have different design features... So for a stove built entirely of brick, the chimney can be made of metal, ceramics, completely brick or combined of brick, metal or ceramics. For a metal furnace, only prefabricated pipes made of metal or ceramics are used.

Today it is not so often you can see a stove with a brick chimney due to the complexity of the work on its creation and maintenance. V modern construction more important is the construction of prefabricated structures that are easy to maintain and do not require specialized knowledge and skills to create them.

Such prefabricated chimneys consist of two or three pipes, a pair of elbows, a tee, a deflector, an anti-storm protection, a gate and adapters. Support brackets and clamps are used as fasteners. Particularly noteworthy is the pipe insulation in the bath. It consists of a special intermediate floor adapter, as well as a sandwich pipe, which is an order of magnitude larger than the main chimney. The adapter and the free space between the sandwich pipe and the chimney are filled thermal insulation materials, which can be basalt wool or expanded clay.
The installation of the pipe in the bath is carried out in compliance with the series key features in construction, this is expressed in the materials and pipe elements used. This is due to high temperatures, environmental and sanitary standards, as well as the building of the bath itself, which is often built entirely of wood. And in order for all installation work to be successful, the following basic principles must be observed:


Designing and creating chimney for a bath, it is extremely important to adhere to certain standards in size and shape. The most optimal shape for a chimney is a cylinder. This is due to the fact that the more corners and obstacles in the path of the smoke, the more soot will be deposited on the walls, and the more difficult it will be for the smoke to escape. The main dimensions for chimneys are the diameter of the passage opening and the height of the pipe in the bath.
The cross-section or diameter of the chimney depends on the power of the furnace and is strictly stipulated in SNiPs. Below are the main dimensions of the exhaust opening, depending on the capacity of the oven:
for rectangular and square chimneys
Round pipe for a chimney, its diameter should not be less than the outlet of the furnace or boiler. More is possible, but not less. When calculating the diameter, one should adhere to one simple rule: the total area of the pipe must be at least 8 cm2 for each kW of power. This means that for a stove with a power of 20 kW, the chimney area must be 160 cm2, which is at least 140 mm in diameter. If you need to carry out the calculations yourself, it will be enough to use the formula for the area of a circle.

Chimney height calculated taking into account the height of the building, the type of roof, as well as the size of the adjacent buildings. When creating a project, it is most important to consider the height of the pipe located above the roof of the building, and everything that is located inside is less important. So, according to SNiPs, the chimney pipe must rise above the roof at least:
Another important nuance that must be taken into account when creating a chimney is the presence of horizontal or beveled sections of the chimney. Their total length should not exceed 1 m, this will maintain good draft and will prevent deposits of dust and soot on the walls of the chimney.
When starting to install a pipe in a bath, the first thing to do is either buy or make all the elements of the chimney structure yourself. Unfortunately, you can only make a pipe yourself if you have a special tool and experience in this matter. Therefore, it will be much easier to buy ready-made parts and from them assemble the entire chimney together. Such work is within the power of everyone who knows how and loves to do everything. construction works do it yourself.
For a finished pipe for a bath, the price depends on the material used and the diameter of the chimney itself. So for a one-sided stainless steel pipe, the minimum price will be from $ 13. up to 63 USD per running meter. For a sandwich pipe, the price starts from $ 27. up to $ 100 The cost of one elbow is approximately equal to the cost of one meter of pipe. The price for a tee is from 20 USD. up to $ 100 You also need to consider the cost of fasteners and various related materials. In total, the cost of a 10 m high chimney can reach $ 1,500. Even more expensive will be a chimney assembled from ceramic pipes.
After purchasing everything you need, you can start work. We start installing the pipe in the bath with preparing the holes for the chimney. When a bathhouse is being built from scratch, then these passes can be done in advance. For the internal chimney, holes will have to be made in the ceiling and roof, and for the external only in the wall, next to the stove or boiler.

Important! Before leading the pipe through the roof or wall in the bath, it is necessary to prepare in advance metal protective sheets that cover part of the wall and ceiling from the effects of high temperatures.

The hole for the chimney should be square in size 45x45 cm. This shape is dictated by the need to install a special adapter. You can make this part yourself. To do this, you need to cut out two square sheets of 50x50 size and make a hole for the pipe in their center, and holes for fasteners in the corners. We also cut out 4 more sheets from which we make a box. The height of such a box should be 5-10 cm more than the thickness of the overlap, and the length of each side is 40 cm.All elements are fastened together and sheathed with basalt wool with a foil-clad surface, all joints are glued with aluminum tape. To protect the roof, we install a previously purchased metal apron. It is sometimes also called Master-Flash. After installing and securing these elements in place, you can begin to collect the pipe itself.

First, you need to prepare the places for the fasteners. To do this, on the wall, strictly opposite the outlet, with a step of 20 cm, we outline the places for the fasteners and then drill the holes. After that, we proceed with the installation. All pipes are made in such a way that each subsequent one is included in the previous one, so there are no special difficulties in assembly. First of all, we install the main single-layer pipe 0.5 m long, entering directly into the firebox, and fix it to the wall and to the outlet.

Important! When using pipes larger than the outlet, an adapter is required. Then install it first.
The next step is to install the gate. After that, we again install the single-layer pipe, which will go into the adapter in the ceiling, and fix it to the wall. If the hole in the ceiling is not directly above the stove, use a knee. But it should be remembered that no more than 3 such bends can be used, and the total length of the horizontal section should not exceed 1 linear meter.
Having installed the pipe in the adapter, we fill it with expanded clay or basalt wool. The next element to be installed is a sandwich pipe. By installing it inside the previous one and securing it, you can put the last pipe segment facing the street. We start it from above, through the roof and Master-Flash. On top of the outer pipe, we install a protective fungus against the ingress of precipitation into the pipe.
Assembly and installation of the outer pipe for the bath is carried out in a similar way. But there are some differences. First, before removing the pipe from the bath, we make a hole in the wall. Next, we install the knee, and the main pipe will come out from the knee. We also install an adapter into the hole in the wall and fill it with insulation. We attach a tee to the main pipe from the street. At the bottom of the tee, we install a revision with a window for cleaning. On top of the tee, we install and fix all other parts of the chimney to the wall. The key difference will be the use of a sandwich pipe practically in a circle, only the last section, which extends above the roof, can be supplied from a single-layer pipe.

Deterioration of draft and the appearance of smoke in the sauna room indicates a clogged chimney and the need to clean it. Today, the profession of a chimney sweep is very rare, so you will have to do everything yourself. To do this, you can use a special tool or heat the stove with a certain type of firewood.
For mechanical cleaning, you will need a special scraper and a stiff brush with a link handle. All work is carried out through the top of the chimney, standing on the roof. With this method of cleaning, a lot of soot falls into the firebox. Therefore, it is recommended to take care in advance about protecting the room from soot and dirt. The firebox itself can be covered with a thick cloth, so that there are as few slots as possible for the soot to escape. As additional measures, all doors, windows and furniture should be closed.

The second method is more gentle and does not require such efforts to protect against soot. It consists in heating the stove with aspen wood. During the burning of aspen, a large number of heat and increased traction, which leads to self-cleaning of the pipe. This type of cleaning is recommended once a year. In addition, various chemical agents... But such cleaning can do more harm to the environment.
Making a pipe for a bath is a process that requires attention to detail and trifles. A mistake or oversight during installation can lead to smoke entering the room and quite sad consequences. That is why it is so important to comply with all the recommendations and requirements of specialists. And if you are planning to make a pipe for a bath yourself for the first time, invite experienced master so that he can control and help in the course of work.
Previously, sauna stoves did not have a chimney. Then the ancestors modern people washed in black. Today, there is no longer a need to inhale and there is no soot - all this is so, because modern baths are created according to new design laws. Mostly people build steam rooms on their own. You should also build a stove and build a chimney for the bath. But we must remember that this is a very responsible business that requires a serious approach. You can accidentally make one small mistake, and the steam room will not work as intended. Therefore, it is very important to work without haste and with the utmost care.
The chimney for the steam room can be external or internal. In our country, you can often find it internal options... Among their advantages is the absence of violation architectural style as well as saving heat in the room.
All the heat remains inside the steam room. Internal systems good because they have the best traction. They are also easier to care for. Also, the internal structure does not need insulation.
External systems are more like American traditional chimneys. They were previously used by the Americans on their ranches. They have a rather interesting appearance. If you decide to build an external solution, then there is no need to make a hole in the roof and ceiling, which definitely has advantages. The wall for the chimney inside must be at least 12 cm in thickness, and for outer wall the thickness should be from 38 cm.
How is the smoke outlet structure arranged? Any element is a structure of pipes, flanges, fasteners. The main requirement for this building is the ability to operate at high temperatures without any changes in the properties and emissions of combustion products.
So that the chimney for the bath does not lose large amounts of heat, it is placed as close as possible to the inner wall.

This will produce the most efficient thrust. And if there are reasons why this configuration is not possible, then a thicker wall is created.

Thickness parameters are temperature dependent. For example, if the temperature readings are lower than 20 °, then it is necessary to make thick walls, from 38 cm. If there are severe Russian frosts in the region, then the thickness should be about 58-65 cm.
When there is more than one stove in a steam room or bath, then each of them must be equipped with its own chimney. Otherwise, the thrust will lose strength. Specialists in flue gas systems recommend the following. In cases where multiple oven systems cannot be constructed, a cutting system must be installed at a height of approximately 75 cm. It is also important to consider that the inner surface of the future chimney is as smooth as possible. If there are any roughness inside, soot will accumulate on the walls. This can increase the risk of fire.
This element will be based on a stainless steel pipe. And besides it, you need to prepare one elbow with a diameter of 20x120 cm from galvanized steel, two elbows of 16x120 cm, three stainless steel of 16x10 cm. You will also need a tee with a diameter of 16 cm and a plug for it. You also need a fungus that is suitable in size. The diameter of the chimney for a bath in this particular case will be 16 cm.
The prepared pipes should be connected to each other using self-tapping screws.

It is necessary to make a hole in the ceiling slab, the diameter of which will be 16 cm.Further, it is necessary to remove from the roof surface soft roof and thermal insulation 15 cm from the hole made.
The section of the pipe that will be outside is wrapped with basalt wool. The layer should be about 16 cm. You should also additionally wrap the cotton wool with an asbestos cord. Then a pipe with a diameter of 20 cm is connected, which is fixed and carefully coated with bitumen mastic. An asbestos cord is placed in the gap between the two pipes. This is necessary to protect against rain.
This is how you can independently design and install stainless steel chimneys for a bath. This is a very affordable solution.
Modern equipment for baths is equipped with brick smoke extraction systems.

Pipes made of ordinary or stainless steel are also used. Each material has advantages and disadvantages, and there are also certain nuances in the installation.
After the installation of the stove has been completed, you can immediately proceed with the arrangement of the chimney. The first step is to attach several expansion supports to the pipe. It is good if these are pipes made of asbestos or "Sandwich". The latter can withstand significantly higher temperatures than other analogs. However, you should not allow direct flame to be exposed to such a pipe. That is why it is first mounted steel pipe, and then, after the first knee, there is a sandwich or asbestos cement construction.
Now all that remains is to organize the protection of the upper part from the rain. A plug may be suitable for this. From below, another is mounted on the pipe, which will then facilitate the process of condensate drainage and cleaning.
This chimney for a bath is easy to build with your own hands. When the row of masonry blocks the stove, the construction of the chimney system begins.
So, on the 21st row of brickwork, it is necessary to form two channels. Then they will be merged. Further - on the right, the space above the core should be blocked. The gap between the core and the masonry will be 2-3 cm. Any voids are filled with mineral wool insulation. With the 22nd row of masonry, the opening will already be closed, and after that you can begin to lay and shift the channels to the middle. To prevent this overlap from cracking in the future, it is advisable to lay out another row of masonry above the core of the furnace.
For those who managed to build a brick oven, making a chimney will not be difficult. The main thing is that there are no cracks. Also, the norm for the cross-section of the pipe should not be exceeded. Otherwise, the gases will quickly cool.
They are often built from pine. This wood sometimes overheats. The smoke passage must be created with the utmost care. The wall should be fenced with any non-combustible material. Can be rinsed steel sheets, mineral wool or brickwork is also suitable.
One more effective method protection - a special ceiling-pass unit.

To do this, cut holes in the ceiling where this box will be installed. After this operation, a pipe is pulled through the assembly. She, in turn, must be insulated on each side.
In the next step, the pipe is erected over the roof. Its height should be at least 1.5 m. When it passes through the roof covering, it is necessary to apply a sealing cover. With this operation, you can tightly connect the chimney pipes.
In order to get good traction and a long service life, you need to clean the pipe from accumulated soot and debris once every six months. And then the bathhouse will delight its owner for a very long time.
The chimney plays a very important role in creating a comfortable microclimate. The choice of pipe material for it is also important. A chimney is not only a chimney system, but safety in case of fire as well as health. Let's find out which chimneys are best for a bath.
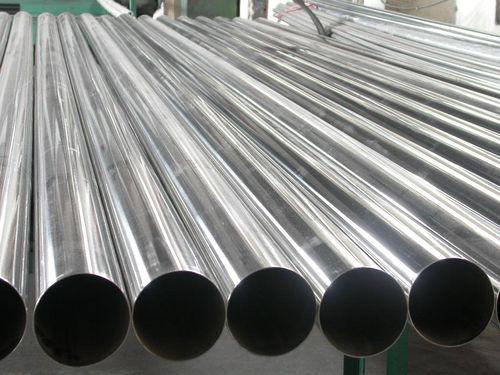
The steam room pipe can be made from a wide variety of materials. However, it is best to use stainless steel. This material has a lot of important characteristics, such as resistance to high temperatures, light weight, ease of use, good traction, resistance to aggressive environments. The best chimney for a bath is made of stainless steel.
Asbestos cement pipes are not very desirable. They poorly comply with fire safety standards.

When exposed to high temperatures, a product made of this material can collapse and start a fire, which is very dangerous in a steam room, where the walls are made of wood. These are pretty dubious savings.
Ceramic is reliability and durability. Such chimneys are able to withstand high temperatures up to 600 degrees. But for a bath, these pipes are also poorly suited. The big weight is to blame. They are definitely not suitable for wooden structures.
This is a modern version. Chimneys for a wood-burning bath are collected from it.

This product consists of two pipes. Non-combustible insulation is provided between them. Modern materials are used as it, such as basalt or ceramic wool, vermiculite. The smaller pipe acts as a chimney. The large one is the outer casing. Its task is to keep the insulation dry. The casing can be made of galvanized or stainless steel.
These are the types and everyone can make such a design with their own hands.
Peeling skin can be caused by a variety of factors. To deal with ...

Today, many people know what scoliosis is. This disease in the last ...

An even spine is not only a beautiful posture, but also the health of everything ...