Recipes for cold crumble soup with kvass, classic recipe 25 minutes 80 kcal...


Springs, rubber bands, counterweights and other devices traditionally used to ensure “automatic” closing of doors are a thing of the past. Now there are inexpensive mechanisms on sale that collectively solve all these problems. If you know how to properly install a door closer, you won’t have to pay for someone else’s services. Moreover, the method of attaching and adjusting it is simple.
Door closers are available in different designs. The technology of their fastening and the method of regulation have some peculiarities. How are the products different?

This characteristic is called differently - closing force, door closer size, EN class. When choosing a mechanism, the determining factors are the parameters of the door leaf: its weight (kg) and width (mm). This is taken into account when determining the installation option for the device.

In residential buildings (apartments), rack-and-pinion closers with hydraulics are mainly installed. Using the example of a device from this group, we will consider the recommended procedure for the wizard. Having understood the specifics of the work, it is easy to understand the nuances of fastening other types of products.
Installing the closer on plastic door absolutely identical to the order of its installation on wooden and metal analogues.
If the door swings outward, then a lever is fixed on the leaf; accordingly, the body is on the jamb. When opening inward, everything is exactly the opposite. But in any case, the closer is installed so that the adjustment screws are on the side door hinges. This will facilitate the process of “adjusting” the position of the canvas and its further adjustment. And this will have to be done, since its “subsidence” will gradually appear. It’s not difficult to figure it out, especially since the product always comes with instructions that contain standard schemes installing a door closer.

The closer should be installed so that its “body” is always inside the building. External placement is impractical for a number of reasons - metal corrosion; low temperatures, as a result of which the oil thickens (and at high temperatures it becomes more liquid), and the hydraulic part of the mechanism begins to work incorrectly; possible icing, which interferes with the free movement of the lever.
And here the master’s task is greatly simplified. The products are supplied with special installation templates. They are made on a 1:1 scale and are universal, as they take into account various ways opening doors and curtains. All that remains is to place the closer stencil in place and mark the drilling points for the channels for installing fasteners.

After marking, secure the lever and the mechanism body to the base with hardware (included with the product), and then everyone can connect the halves of the rod.

Installing a door closer with your own hands requires utmost attention and accuracy. The slightest mistakes often result in a loose fit of the canvas to the doorframe and drafts in the room. Or vice versa, slow closing of the sash and increased heat loss. You shouldn’t hope that everything will be resolved just by adjusting the door closer - this is not always possible.
It is for this reason that the installation stage of the device is the most critical part of the work. Moreover, the service life of the canopies depends on this. If the mechanism is installed incorrectly, then in the near future the skew of the canvas is inevitable, with all that it implies.
You can determine how correctly the door closer was installed by the following signs:
There are two “adjusting” screws for this purpose. Each of them sets the speed of the web in a certain mode. To understand the principle of regulation, you need to understand the following:
How to adjust:
Screw 1 – sets the speed in the range from an angle of 180º (the blade is fully open) to 150.
Screw 2 – regulates the movement of the leaf on the last segment of the path from 15 to 0 (its fine-tuning, that is, until the leaf is completely adjacent to the door block).

What to consider:
Installing a door closer is not only about ease of use. Smooth, accurate closing significantly reduces the load on the hinges, thereby preventing increased wear and distortion of the canvas. It is advisable to install such a device not only at the entrance to the home, but also in ancillary buildings on the site, as well as in the house if the interior door is quite massive. Well, the reader already knows how to install and adjust the mechanism.
A door closer is a mechanical device whose main function is to automatically close an open door. Basically, in the production of door closers, manufacturers use European standards EN 1154, which determine the main parameters of these devices. It is necessary to consider the types of these mechanisms and the algorithm for how to install a door closer.
Using a closer opened door closes automatically.
Depending on the technical characteristics closers are divided into the following classes:

Door closer device diagram.

Table of requirements for the moment of closing the door.
Before selecting and installing door closers, measure the dimensions of the canvas (width, weight). These are the main parameters that determine the force of inertia, according to which the class of the mechanism is selected. Also, when choosing, you should take into account the temperature conditions of the device and the features of its installation location, for example, whether it is possible to install a door closer.
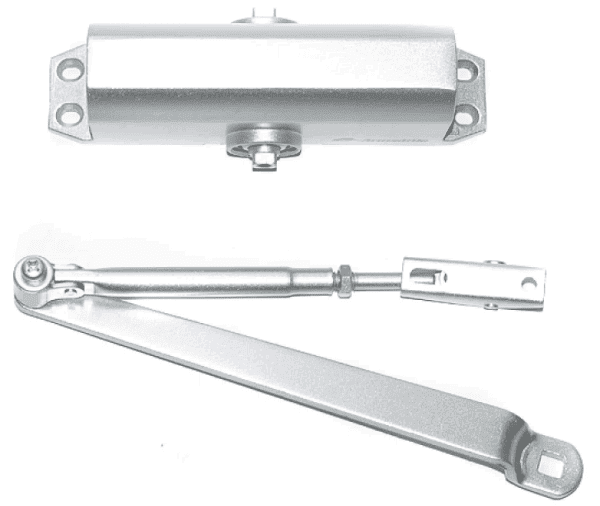
The standard configuration of a lever closer contains the following components:
In order to properly install the door closer, you need the following tools:

Door closer installation sequence.
Installing a door closer consists of several stages. This work itself is not difficult if you know some of the nuances. As an example, we can consider how to correctly install a common type of door closer - top, overhead, with a lever rod. In this case, the closer itself with the first part of the lever is installed on the sash, and the second part of the lever and the shoe are installed on the upper quarter of the frame. This mechanical device is supplied with:
So, you need to understand what the sequence of actions is and how to correctly install a door closer with a lever:

Adjusting the door closer.
This type of door installation is the most common. It can be done either with the help of specialists or independently.
It should be noted that in the question of how to install a closer on a door, if it is installed and operated on external surfaces, it is necessary to adjust the speed of closing the door depending on the season. This allows you to extend the service life of the product.
How to install the mechanism correctly when installing a floor-standing option for swing doors or doors with a one-way door? Before installing door closers, check that they are complete. Typically, the delivery set of such devices consists of:
The installation sequence of such a mechanism consists of the following steps.
Mount the door on special hinges: in this case, the hinge located at the bottom acts as a lever, attached at one end to the shaft, and at the other to the door itself.
After installation, checking the correct installation and before installing closers, remove the canvas, leaving the hinges on door frame.

Types of door closer installation.
In the floor, on the side where the hinges are attached, mark using a paper wiring diagram and drill a recess according to the dimensions of the casing. If the canvas has a protrusion that hides the gap between the canvas itself and the quarters of the box, then the axis of the mounted mechanism must be vertical with respect to this protrusion. In this case, the upper edge of the prepared recess should extend under the quarter of the box by about 0.03 cm. If the above-mentioned gap is closed by a recess in the box, then the axis of the device should be positioned so that it coincides with the end of the recess.
In the case of a swing door, when marking the location of the recess before installing the closers, position the installation diagram so that it is parallel and symmetrical to the door leaf.
Place the mechanism casing in the prepared recess and check the horizontal installation with a building level. Fill the gaps between the casing and the recess with special glue ( cement mortar). After the glue (solution) has dried, continue installing the device.
Insert the device body into the housing and secure it lightly with screws before final installation.
Check the alignment of the axes of the upper loop and the axis of the center of the shaft: a vertical plumb line passed through the hole in the loop (in the center) should point to the center of the shaft. Adjust this indicator by moving the mechanism body, after loosening the set screws.
Check that the housing is installed parallel to the door leaf. Tighten the mounting screws.
Place the dustproof plate on the output shaft. Install the door block assembly. Set the opening speed with a special screw.
Attach the decorative protective cover.
Using pliers, remove the part that interferes with work.
In the case of swing doors, there is no need to change the shape of the lid. Attach the decorative cover to the body.
It should be noted that such installation of doors can be done by a non-professional and does not require special skills and knowledge. Enough to have necessary tools and follow the instructions.
A metal door is one of the most necessary realities of modern city life. Most apartments are in high-rise buildings, not to mention office buildings and entrances of houses, is equipped with just such doors. This influx of fans of metal doors is explained by the increased crime rate and the need for people to secure their homes. In addition, a metal door looks much more representative and solid than a wooden one, which gives status and a certain respectability to the room from the outside.
But to prevent a metal door, especially one facing an entrance or leading to public places, from slamming, scaring everyone around, special door closers have been invented for its smooth movement. These elements make the door move smoothly and also protect it from premature failure. In the article we will consider the issue of installing a door closer on a metal door, and find out the prices for these products.
The door closer is a modern invention. This device appeared after metal doors quickly rushed to be installed in all entrances of our country. Due to the fact that when opened inaccurately, the door produced a deafening roar throughout the entire entrance, a need arose for a device that would soften the speed of opening/closing the metal door.
Closer on a metal door
And so a closer appeared that solved the existing problem. And now not a single office, entrance, or store can do without this incredible convenient device. The device operates on the hydraulic principle: thanks to external force pressure on a spring located in the closer.
It is interesting that at the dawn of their appearance, only a few reputable companies and the entrances of wealthy residential buildings could afford to install door closers due to their exclusivity and lack of mass production. But with the establishment of conveyor production, the problem of the high cost of door closers disappeared, and now these products are quite affordable for everyone. In addition, the design of the device has been extremely simplified.
And if earlier, installing a door closer required calling a specialist, now any man with “hands” can easily handle installing the device on his own, guided by common sense and detailed instructions. In addition, no special tools or expensive fasteners are needed.
On video installation closer on a metal door:
Let's find out why this device is needed.
Let's find out what types of these devices exist on the modern market.
All door closers are divided into three types depending on where they are attached to the door. Based on this feature, devices are divided into the following types.
The most popular and frequently used door closer model. In this case, the device is located in the upper corner of the door, without interfering with the movement of people at all. Installation of such a closer is possible on any metal door.

Top closer on a metal door
This type of device is used much less frequently due to the frequent inability to attach it. As the name implies, in this case the device is mounted at the bottom of the door.

Bottom mount
Many experts consider this type optimal choice. It is also called “frame”, since in this case the main structure of the closer is located inside the door frame. Installation of a hidden closer on an already installed door will be quite labor-intensive, since it will be necessary to process the metal sheet with special tools, which not every home has.

Therefore, a specialist is usually invited to install this device. Due to the complexity of installation, a hidden closer is built into some metal doors during production, selling the entire structure at finished form. This option is the most preferable.
Let's find out what stages of work will need to be done to install a door closer on a metal door. Will disassemble the installation of the top closer, as the simplest and most popular type.
At this stage, you need to familiarize yourself with the instructions supplied with the device and read it carefully. This will eliminate possible “jambs” during work. In addition, you need to make sure that the necessary fasteners and tools are fully available. Each device is supplied with a corresponding template, with which you can easily and effortlessly carry out installation.
This stage is necessary in order to determine exactly where the device will be mounted. Precisely marking the mounting location will greatly simplify subsequent work. The marking includes attaching the template included with the device with tape to the door. Then, using this template, all the holes that will need to be made in the door are marked with a core. The template should be secured closer to the door hinges at the top of the door block. Keep in mind that the device mechanism is located on the door leaf itself, and the lever is located on the frame.
The video shows how the door closer is installed and operated:
To make sure that the selected drill diameter is suitable for the closer’s fastenings, take an unnecessary sheet of metal and make several test holes on it, then checking it with the device’s fastenings. This measure will help you avoid making a mistake with your choice, especially if great experience there are no similar works.
If the test was successful and you are sure that the holes will fit the door closer mounts, you can start drilling according to the template markings. After the holes are ready, the closer is attached and its progress is checked. Position the closer body so that the speed control valves are directed towards the door hinges.
The lever must be divided into two parts, and then the side lever tab must be screwed to the door frame. For this we need. Place the main lever on the tetrahedral shaft available for each closer, and then secure it with a screw and washer. Move the side lever to a perpendicular position and connect it to the main lever. Make sure that the device is level, without distortions: securely and firmly.
Once the device is locked in place, it must be adjusted to ensure perfect smoothness. Adjustment is carried out by rotating certain screws. How exactly to rotate, and in which direction, is indicated in the instructions. This work is carried out using a hex wrench.

Adjusting the closer
It is necessary to clarify that the typical door closer model has only two adjusting screws. In this case, the first is responsible for the speed of opening and closing the door, and the second is responsible for closing at the last stage - completely reaching (finishing) the door leaf to its destination. Some, more functional devices, equipped with additional adjustment options. So, you can set a forced slowdown, which will not allow you to suddenly open the door with a jerk. But you can see how the apecs door closer is adjusted
After adjustment, put the protective cap on the lower part of the closer.
Video of door closer adjustment:
Let's find out what it is like today average cost closers for metal doors.
Prices are given for the economy segment. If you choose a closer high level and a well-known manufacturer, the cost of the product will be significantly more expensive: at least 1,300 rubles for the simplest model.
Some tips for using and caring for your door closer
During use of the device, additional adjustments may be necessary. In this case, you can simply tighten the screws to achieve the desired result.
The product itself special care does not require: no washing, no lubrication, no cleaning. However, especially responsible owners still periodically lubricate the mechanism and remove dirt if it appears. Those closers that are installed on the street side of the doors require seasonal adjustment.
When using a door equipped with this useful mechanism, remember that you cannot speed up its progress by force. Trying to close the sash faster, you can disrupt the adjustment of the screws of the device.
It is also forbidden to insert wedges or other objects to keep the door open for some time. This sometimes leads to damage to the entire mechanism, in particular to oil leaking out of it. Sometimes such an oversight leads to the need to change the device.
We looked at the features of installing door closers on a metal door. As you can see, these devices are truly irreplaceable, and their installation is not difficult. Thanks to our tips, you can easily equip your door with a convenient and practical mechanism.
Many of us remember the simple devices that were previously used to ensure independent and tight closure of entrances, gates, entrances, etc. For this, ordinary springs, counterweights with cables and block systems were used, and often craftsmen even adapted rubber bands or pieces of old tires for such purposes. Today, such problems are solved much easier and more efficiently, since there is always the opportunity to buy a door closer - the range of them on sale is very wide.

Purchasing such a mechanism is only half the battle, since you still need to install it correctly. You can, of course, turn to the services of craftsmen, however, if you carefully figure out how to install a door closer, it turns out that such work can be done independently.
A door closer is a mechanical device that accumulates potential energy when a door is opened, which is then used to close it tightly. The “battery” is most often a powerful spring.
The transfer of force to the spring and back to the door leaf can be carried out according to one of two schemes:
1. Closers with an internal hydraulic circuit and rack and pinion force transmission.


Smooth operation is ensured by a system of cavities and channels through which oil flows, which fills the entire body of the closer. By changing the internal clearance of the channels, you can precisely adjust the smooth operation of the entire mechanism.
Such a scheme is the most widespread, especially on closers with lever transmission.
2. Closers with cam mechanism

On the axis of the lever there is a cam of a complex eccentric shape (“heart-shaped”), supported on both sides by rollers. When the door is opened, the protruding part of the cam compresses the spring, which, on its return stroke, causes the cam to rotate in the opposite side, which leads to a smooth closing of the door. The torque is adjusted by changing the geometry of the eccentric profile.
This scheme is more often used in closers with a channel arrangement of traction or in hidden placement mechanisms.
The next parameter for the classification of door closers is their installation location. The vast majority of devices are designed for surface mounting at the top. However, sometimes for reasons of unesthetics or the impossibility of installing the mechanism on top (for example, glass doors, or in cases where the closer’s appearance will disrupt the intended design of the room), other schemes can be used - hidden installation in the floor, frame or door leaf.
In turn, overhead door closers are divided into two types:


Closer with a guide channel - slider system
If you want to equip the door in your apartment or house with a closer, before purchasing this mechanism you need to decide on its “size”. Under this concept lies the classification according to the European standard EN 1154. Thus, there are seven gradations of closers according to the magnitude of the closing force, which are selected based on the size and weight of the door leaf:

Standard gradation of door closer “sizes”
— A special adjustable hydraulic damper will help prevent sudden opening of doors due to excessive force or in a draft or gusty wind. He will protect the doors from breakage, from impact along adjacent walls, will prevent accidental injury.
— Often the operating conditions of the premises require leaving the door open for a long time. To do this, you will need a closer with a locking mechanism in the open position.
— There are situations when after each opening of the doors and before they begin to close, a certain pause is required, about half a minute (for example, warehouses, storage rooms, utility rooms). This feature can also be implemented in closers with a closing delay function.
— If the doors have an elastic seal, or they are equipped with latches, the function of precise control of the speed and closing force will be useful.
- If the doors are double-leaf, then an additional mechanism may be needed to coordinate the uniform closing of both leaves.
— For “cold” doors, it is better to purchase a closer with a “thermal damper” system, which, in response to changes in external temperature, expands or contracts, compensating for changes in the viscosity of the oil in the hydraulic system.
Since the most common in apartment conditions are closers with hydraulic rack and pinion system and a lever mechanism, the installation process will be discussed using their example. By and large. Installing door closers with a slider system is not particularly different, and in some cases it is even a simpler task.

— If the door opens towards the location of the closer, then its body will be attached to the door leaf, and the lever system will be attached to the door frame.
— When opening the door outward, away from you, the pattern changes to the opposite - the body is on the jamb, and the bracket lever system or a sliding channel - on the door.
In both cases, the adjustment screws on the closer body should face the hinges.

Typically, templates are available for all intended installation methods - on left and right doors, opening outward or inward.
In addition, if the closer has the ability to work in several standard classes according to EN, then this will also be indicated on the template. There are different lines for its application to the corner of the door (as in the example presented), or the centers for drilling mounting holes for each level (size) are indicated in different colors.
So, if the master has decided on the required size and location of the parts, you can proceed to installation.


If the parts of the lever mechanism included in the delivery set are connected to each other, then this hinge must be temporarily disassembled - its final assembly will be carried out when adjusting the closer.

One more nuance. The bracket may be asymmetrical, so you should check its location with the required door closing force. In the case under consideration (in the figure) two positions are shown - for EN -2 and for EN -3 and 4.


— In the case where the priority is to close the door smoothly without knocking, and the door itself is not equipped with a latch or seal, the adjustable lever arm is placed perpendicular to the surface of the door, and the rigid lever is placed at an angle to it. The connection is made at full closed door. The length of the adjustable lever can be easily changed by tightening or unscrewing the screw part of it a few turns.

Door slam closing required
— If an accentuated finishing force is required to close the door (a lock with latch or seal), then the scheme changes slightly. In this case, the rigid lever must be perpendicular to the door leaf, and the length of the adjustable elbow is adjusted to this location. Thus, the closer spring initially becomes slightly loaded, which will increase the force when the door is completely closed.
In fact, this is where the standard procedure for installing the closer ends and you can proceed to adjustment. However, as practice shows, the door design can present certain “surprises”, which will require the use of special mounting strips (plates) or corners:


The opposite situation - the closer body is installed on the mounting angle


Mounting angles or plates, as a rule, are not included in the delivery package of the closer, but are usually available for sale in a fairly wide assortment for most models.
Find out an interesting interior solution from our new article -
After installing the closer, it is necessary to make the necessary adjustments so that its operation is most comfortable for the owners.
The door closing speed is adjustable in two ranges. The location and markings of the installation screws may vary significantly between models - this should be clarified in the instructions supplied with the product. The principle of adjustment is approximately the same.


As already mentioned, some models also have a door closer additional functions. The installation and operating instructions for a specific product will indicate adjustment rules that must be strictly followed.
Find out installation instructions from our new article.
If the owners comply with the operating rules, the door closer must conscientiously work out the period guaranteed by the manufacturer.
Today, many people install door closers both at entrances and at interior doors. This device requires constant careful maintenance. After all, the constant opening and closing of the door causes an imbalance of its mechanisms. All malfunctions of the device are eliminated by adjusting it. Let's try to figure out how to adjust the door closer with your own hands.
This job is not at all difficult to do. Even a person without experience in such matters can install the device independently.
Usually the closer kit includes a template. He helps with installation work. Installation is carried out as follows:

Instructions for use will help adjust the device yourself. Correct adjustment of the closer occurs as follows:
The mechanism lock is activated and constantly holds the door leaf in the desired position for the required time period. To close the door, you need to pull it slightly towards closing. Then the commit will be canceled. When opened incompletely, the door leaf moves in its usual mode without delay.
Video about self-adjustment devices:
 In the closer mechanism, it is possible to configure only a few parameters: delay, clap and door closing speed. Modern mechanisms can be equipped with speed control in the range of 80-90 degrees.
When adjusting the mechanism with your own hands, it is important to know the following nuances:
 Often required auxiliary door closer adjustment. Sometimes it works hard. Then you need to put in extra effort to open the door. To make the door operate more smoothly, you need to loosen the screws. If you unscrew them completely, the door will remain open all the time.
The location of the screws may vary. They can be located in front or on the side, it depends on the design of the mechanism. The instructions will help you determine the location of the screws. In it, the manufacturer indicates the position of all elements of the closer. Today there are several models door closers, which are very popular. Their advantages are ease of operation, ease of installation and even adjustment.
The most popular models include:
The models listed above have a number of advantages. Therefore, they will become more and more popular every year. Most of Manufacturers produce door closers from high quality materials. Due to this, the products last longer even in the most difficult conditions.
 Dorma produces strong and reliable door closers. Therefore, their products are popular. Today, the door closer mechanism is in great demand. Dorma TS-68.
This model is mounted at the top of the door. This option is distinguished by its versatility and functionality.
After all, such a device can be installed on almost any door. During installation no need to use mounting plates. Due to this, work is greatly simplified.
The Dorma model contains a special lever, through which the locking force of the door leaf is adjusted.
The closer of this model can be installed on both left and right type doors. Installation work are quite simple. Almost everyone can handle them. There are the following methods for installing the mechanism:
 It should be noted that often Replacing a device is cheaper than repairing it. After all, many manufacturers make a non-separable case. Therefore, replacing an inexpensive part, for example, a cuff, is not possible. And the user is forced to purchase a new door closer.
But a number of malfunctions can be eliminated with your own hands. The most common failure of the lever assembly occurs. The main reasons for such a malfunction are a break in the lever, destruction at the place where it is secured. Also, the lever assembly becomes faulty when the rod breaks as a result of damage to the housing. Such defects are eliminated by welding.
However, first you need to find out how advisable it is to repair the door closer. Perhaps a new rod will cost less welding work. When buying a new spare part, you should keep in mind that it must be from the same company as the closer mechanism.
If the device body is disassembled, repairs can be performed using the following tools::
 Abrupt closing of the door is caused by wear of the cuffs or seals. With such a breakdown Oil leaks from the device. When the closer mechanism is collapsible, then it is possible to replace these elements. Otherwise, you will need to purchase a new case or the entire mechanism.
It happens that the door closer opens too slowly. The cause of this malfunction may be high oil thickness. As a rule, this occurs after 4-6 years of using the device. In this case, it might be worth trying an oil change. But, as a rule, this is not provided for by the design.
There is another way to change the oil. But to implement this repair requires plumbing skills. It consists of the following:
Recipes for cold crumble soup with kvass, classic recipe 25 minutes 80 kcal...

Gratin is a dish with a crispy crust. Translated into Russian, gratin...

Shish kebab is an incredibly tasty and satisfying dish, about which legends are made, and...