Proverbs and sayings about May HORIZONTALLY: 2. May will deceive - in ... will leave.4 ....


To work with the listed materials do not need special tools.
By combining different techniques, you will make a garden sculpture for your own with your own hands.
Paper torn to shreds mixed with PVA glue - this is papier mache. Moreover, any paper - newspapers, toilet paper for small parts, egg packaging. But nothing will work out of paper alone. It is glued over a frame made of wire or plastic bottles. For rounded pieces, roll up bags or newspaper. Pour sand into the bottles so that the figure comes out heavy.
The work begins with a rough papier-mâché from newspaper strips, the last layers are a mass of finely chopped egg trays soaked in boiling water. Dry each layer. So the work will take not a day, but a couple of weeks. The figure is kept in a warm, ventilated place. For a fortress, you can paste over with gauze, alternating with newsprint.
The sculpture will turn out solid, despite the material. But it must be protected from moisture and frost. Go rough before painting sandpaper, cut and glue the flaws of the work. Now, with a wide brush, saturate the material with a wood primer with additives from fungus and mold. You can impregnate with hot drying oil, but then use all the materials - putty, oil-based paints, water paints lie down with difficulty.
Protected from the fungus, go to the putty. We take the cheapest, based on PVA, apply with a hard brush to small details.

We sand the figure, level the surface. Here you can once again soak with a primer. Or paint right away. First, we prime with white paint, then we paint the details starting from large to small.
Not resistant to water we cover the paints with alkyd varnish, preferably furniture, although it dries for 2-3 days. If the paints are based on organic solvents, then a layer of varnish is not required.
How long do garden paper figures stand on the street? 1-2 seasons, just do not forget to cover them from the rain with a film and put them in a dry place for the winter. Then your crafts will last much longer.
In production, hollow decorative figures for the garden are cast in large silicone molds. The frame of the figure is sometimes reinforced with wire. In gypsum, during solidification, shells are formed - voids from air bubbles that did not have time to leave the hardening material. Therefore, the figurines in the molds stand on a vibrating table that expels air from the plaster. Can this be repeated at home? Yes, if there is a desire. But there are other easy ways.
The figurine is not hollow, on a wire frame and plastic bottles filled with pebbles. Details, such as the cap and leg of the mushroom, can be cast separately, fastened with putty or gypsum solution.

For garden crafts take alabaster or building plaster Of course, if possible, take sculptural plaster. It is harder and was created specifically for casting. For strength, a plasticizer is added to simple gypsum. This is any glue - PVA, bustilat. The latter is cheaper, and the properties of the gypsum mortar are the same as those of the mixture with PVA. Work with small portions. Dilute the gypsum with water, add glue, apply to the frame.
The mixture gradually heats up and thickens. Gradually, the moisture evaporates and the plaster turns white. Leave it to dry in a dark, dry place. The sculpture will dry within 4-5 days. Although after a couple of hours at first glance it is completely dry, inside there is chemical reaction. When you do not feel moisture to the touch, you can continue to decorate the figure.
Gypsum is protected from dampness with drying oil or paraffin (wax). Under the coloring, heated drying oil in a water bath, applied with a wide brush. Gypsum will instantly absorb the composition and dry. The surface will become dark and matte, then brighten. Apply 2-3 coats as desired. But you will have to paint with alkyd and oil paints, water-based paints will not be able to saturate the material through the varnish layer. For final protection from the weather, take the same drying oil or wax. Drying oil will give yellowness, if this does not suit you - heat the wax and apply it with a hard brush. Polish the wax finish with a rag. You can take a medical plaster bandage for making figurines. It is convenient for them to wrap flat and voluminous parts. Bandage strips are soaked in water for a couple of minutes and quickly applied to the sculpture. As it dries, smooth out wrinkles, close the voids with the remnants of gypsum. On plaster figurines, you can carve, mark details for painting with a sharp awl or nail. They can not only be painted, but also decorated with mosaics, broken pieces of dishes and pebbles. The next most popular and accessible material for creativity is concrete. It is more difficult to work with it than with plaster. It spreads quickly, dries more slowly, if you choose the wrong density, it will crack when it dries. But the garden decor comes out strong and durable. To make concrete figures for the garden with your own hands, you need to prepare a frame. To do this, use a thick wire in the work, iron bars and metal mesh. Concrete is heavier than gypsum and the mesh forms volume. You can use foam as a base, and cover it with a layer of concrete on top. For small sculptures, use water bottles. The composition from which the figures for the garden are made is a mixture of cement and sand (sand concrete) 1: 2. For plasticity, glue (PVA, bustilat) or liquid soap is added. Concrete dries slowly. This is a plus - you can work on the sculpture while it dries. Suitable and tile adhesive. It will give the composition plasticity and it is easier to work with concrete. You can use fiberglass and other materials in modeling. Try to work with them.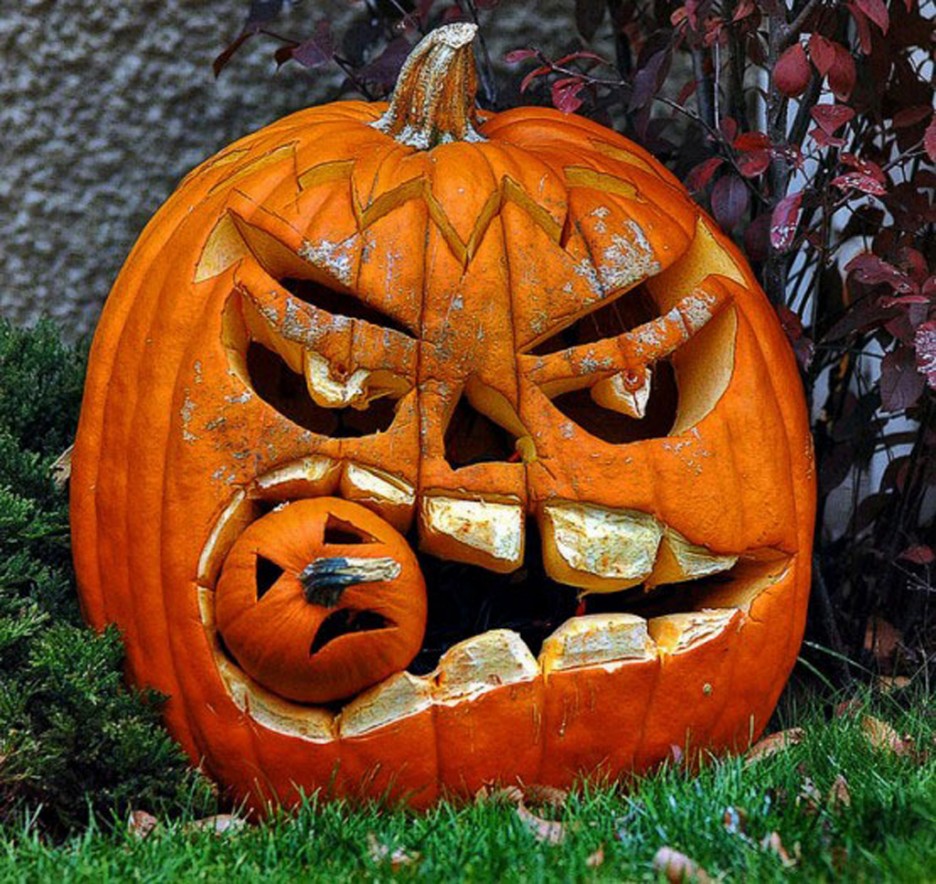
Concrete garden sculpture
The garden is not its own master and its magnificence depends entirely on you: what style you are interested in, what flowers and trees you choose and how to plant them, how many figures your flower beds and paths will decorate - the answer is yours!
This article is dedicated to interesting topic, which captivates lovers to make their corner more beautiful. Do you like to create things that at first glance seem very complicated? Or do you bring everything that seems beautiful into the house? So you are lucky, as luck smiled, and you stumbled upon the right address and this publication was written for you.
So, figurines for the garden - that's what now occupies the top of the pedestal in popularity. Thanks to this opportunity, you can get into a fairy tale, but such beauty costs decent money, so the article will tell you how to make garden figurines yourself.
It is enough to understand simple principles so that the process of making a figurine does not become a mistake. The right style, a couple of figurines and here it is - the garden of your dreams! So, let's begin.
All these figures are beautiful, but from what to make such a charm? You can use any material at hand, the main thing is the presence of desire and creative potential. At this stage, it is worth stopping and disassembling in more detail. Commonly used material for garden figurines:
Let's take a look at each item.

Wood is a piece of our nature. Wooden figures look very interesting and attractive. They keep warm. Many believe that woodwork protects our planet from unexpected guests.
The stone seems to be alive when we create a figure out of it. For such creativity, a suitable stone is required. He must be right size. You also need the magic hands of the artist. You need to be able to see in an ordinary cobblestone a small kitten, a puppy joyfully meeting the owner, a lion cub learning to walk, or a family of dragonflies. Such specimens, created by nature, can be used as decoration, and they will forever remain in memory.
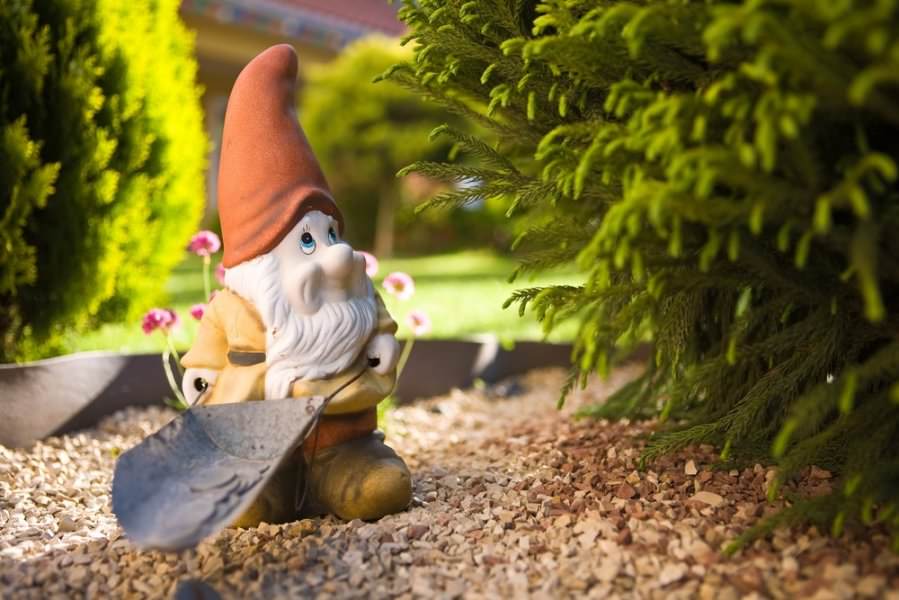
The polyurethane foam also shows miracles. A minimum of expenses will leave behind durable, interesting and funny figures. Created a figurine polyurethane foam, you will get a reliable wet-strength result. With the help of this material, masterpieces are often created in the form of dolphins, gnomes, snails, swans, storks and many more different characters. You can create a hero for any style of garden.
As for the garden figures of their gypsum, they must be very durable and waterproof. Special clarity does not play a role here. You can create a small figure without a base. If you are planning to create a large model, then you will need reinforced frame. Having cut pieces of reinforcement, you need to connect them into a frame so that it looks like a future craft. Such creations must be fastened on the foundation.
Garden figurines decorate the garden. It is believed that gnomes play the role of guards. It might be good for your harvest.
Today, your attention will be given a master class on creating garden figures from polyurethane foam. Make beautiful figures that you can proudly show to friends and family.
Two interesting models will be described. You'll like it. Sit down comfortably, we are starting to move into the world of beauty and fairy tales!
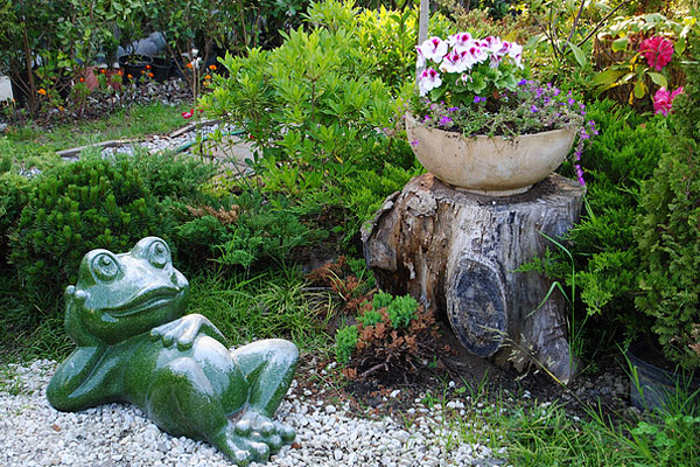
Our first character frog, which can decorate absolutely any garden. What you need to purchase to create a garden figurine:
We take 2 containers, completely fill them with mounting foam, creating the body and head of the frog. As soon as the images are dry, we combine them with wire or hairpins.
Immediately fix with mounting foam.
Paste wire(strong, but so that it bends well) to where the future paws will be, and give them a shape. Carefully apply the foam in thin layers to the place where the paws will be. Each of the layers should dry thoroughly.
Once the layers are all dry, you can start paint our frog. For convenience, you can use a narrow brush. When our figure is completely dry, glue the beads to where the eyes should be. The frog is ready! Can safely call guests for tea, show and talk about the manufacturing process. You will see, they will be delighted with your talent to create masterpieces!

The second character will be fox. We write down what is needed for work:
So let's get started. It is necessary to fill the plastic bottle with sand so that it becomes stable, and cover it with a layer of mounting foam on top. Apply carefully in several layers, waiting for each layer to dry.
Estimated drying time is 15 minutes.
We insert the wire into a hollow tube and create a frame for the fox's legs and tail. We create a neck from a stick of the desired length and insert it into the body of the fox. After foam the joints.
Several layers must be applied to the paws, head, tail, creating the shape of an animal figure. We use thick cardboard, cut out the ears and insert them into the head. Carefully sing the place of the ears. The mode of cutting from fishing line of the same length, paint in black. Thus, we have created a mustache that needs to be inserted into the muzzle of the fox. We also paint rubber balls with black paint (you can purchase small black balls in advance) and place them where the eyes will be.
The dried ready-made garden foam figure should be covered oil paint, if desired, you can also varnish. Our cunning beauty is ready! Now you can install this wonderful specimen in a suitable place in your garden.
By creating such wonderful figures, you can not only please yourself when you see them in the garden, but also make your loved ones happy. As they say, the best surprise is a handmade gift. So why not create an elegant gift and give it as a gift? A good option. But there is another advantage that many have taken advantage of.
More on video:
Building a business around this idea is easy. Knowing all the secrets, pros and cons, you may well become the master of your life and have your own business, which will be a pleasure to implement. Create, enjoy, admire and delight others! All in your hands!


If you go back for a moment Soviet times, then there was only one decoration for the garden at that time - called the "garden scarecrow". After all, even such a thing as landscape design did not exist. Nowadays, colorful flower beds with tropical plants, bright green lawns, fragrant rose gardens, restless garden fountains, strict alpine slides, colorful wells with decorative log cabins and intricate garden figurines.
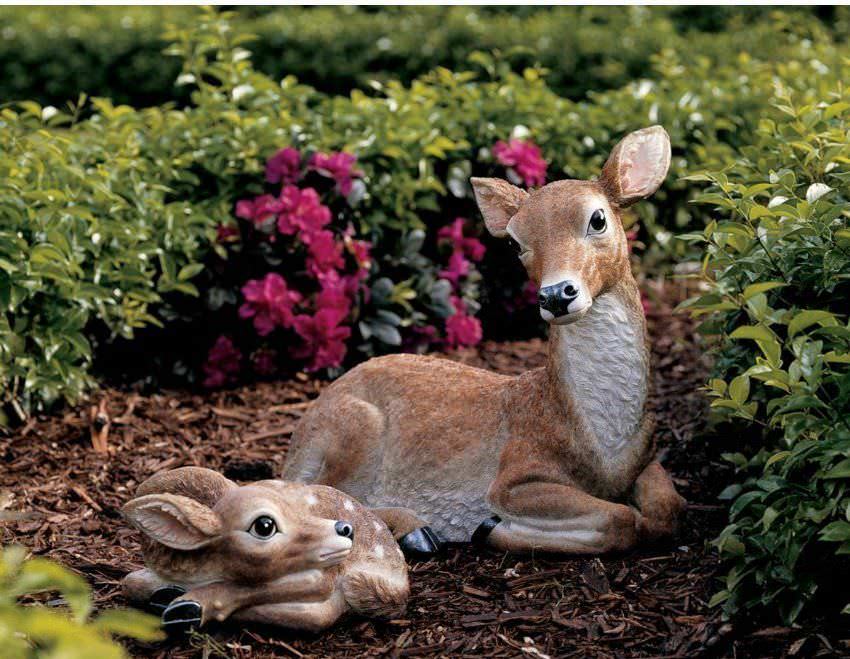
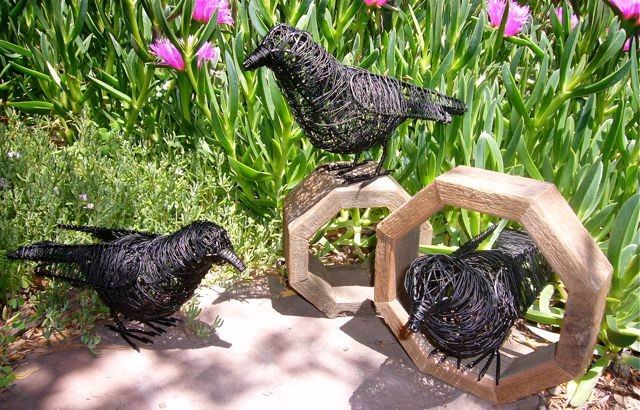
There is now a new popular trend in landscape design- installation of garden figures. They give a special attraction to the territory. It can be, for example, figurines of fabulous gnomes guarding your peace. You can also put a couple of fairy-tale characters in the form of birds perched on the lawn, caterpillars and frogs, beautifully located on your pond. If you wish and have free time, you can recreate a whole fairy-tale plot that will bring zest to your garden.

Let's talk in more detail about the features of the use of garden figures on suburban area:
Figurines for garden decoration today are made from different material- wood, stone, ceramics, plaster, plastic. Whatever you have on hand will do. For example, old car tires or mounting foam. Let's talk in more detail - with what you can make garden decor.
The tree is part of mother nature, the source of life. That is why the warmth of living wood attracts so much, and the sculptures made from it can breathe life into your garden. Even the evil spirits of the forest, made of wood, will not seem scary in the most remote and dark areas of the territory. To create garden figures from wood, it is recommended to use raw material: ordinary logs, branches with knots, original driftwood.

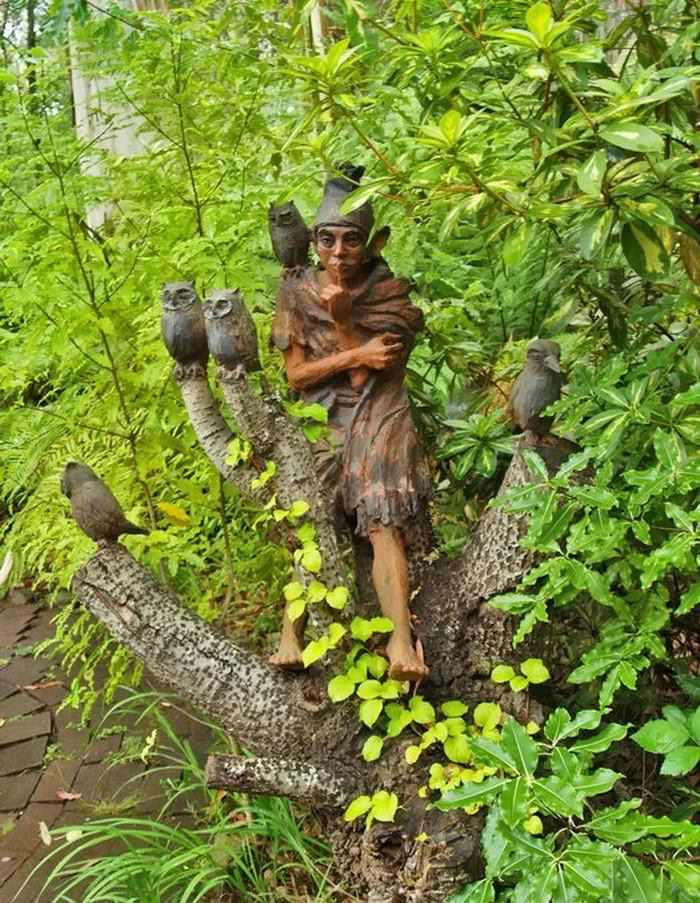
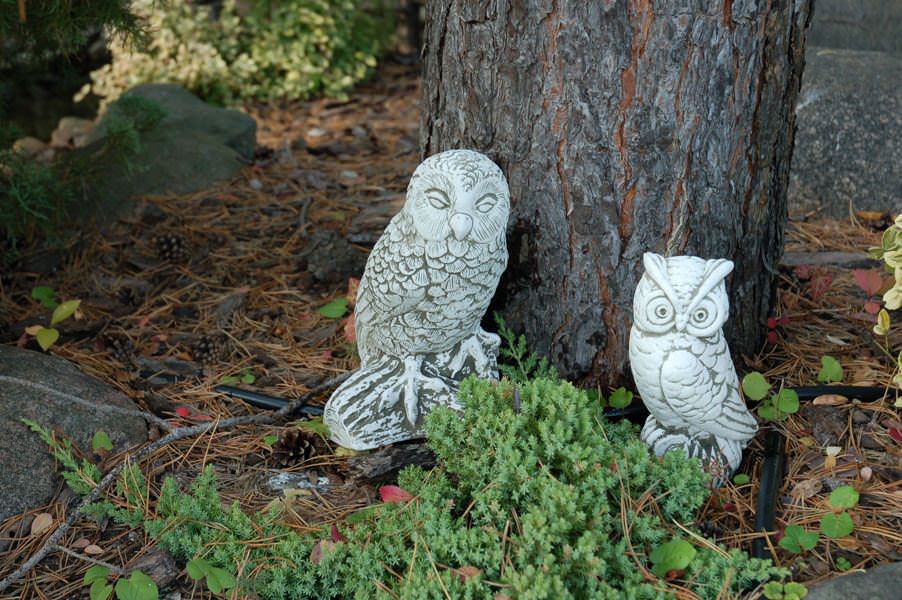
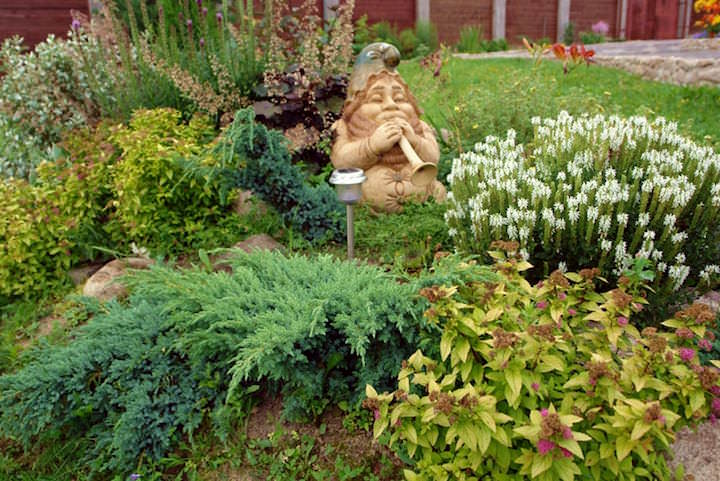
In addition to perfumes, you can make an intricate pianist with a piano located in the bushes, an old forest man who proudly wears a hat of evergreen moss. You will get a rather interesting owl, as in the photo of a garden figure, if you take a spruce log with two knots on the sides, draw a face, wings and paws. And the most traditional character made of wood is, of course, an uncouth butarinka.
For self-production of figures for decorating the garden, it may also be suitable a natural stone. However, you must be able to determine by eye a stone of the desired shape and size, to consider an unusual creation in an ordinary boulder. For example, you may come across a stone that looks like a sleeping cat or dog, funny turtles. It can even be a family of ladybugs. If the image appeared in front of you, just paint the stone at your discretion.

In addition, stones brought from the seashore can be used to decorate the garden. They are magnificent without any processing, they are valued precisely for their pristine condition. But if you wish, you can add a little imagination and varnish to bring such a figure to life.
Fairly new and optimal material for garden crafts, according to experts, is polystone. This artificial material, which consists of aluminum hydroxide, acrylic resin and various pigments and is a stone. It is durable, not afraid of temperature changes, does not deform. In addition, polystone is not expensive.

As you know, gypsum is used to make many do-it-yourself crafts, including when creating garden sculptures. This material is very popular, as it allows you to give figures any shape. However, remember that the plaster sculpture is quite fragile, being close to such a decor, do not damage it.

In the manufacture of plaster garden figures, special forms are used. Although it will be possible to mold a figurine without them. For example, the most a simple product considered a caterpillar. To do this, it is enough to blind only a dozen flattened circles, it is better if they are different sizes, and connect with each other. The caterpillar's head should be round. On top of it, put two small balls as an eye, which should then be painted.
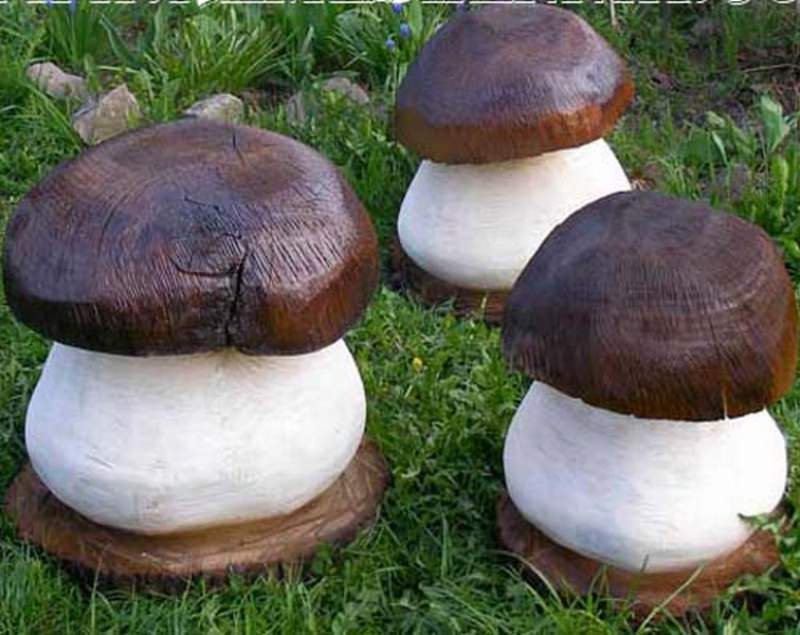
Also suitable for making garden figures cement mortar. To make a figure out of this material, you can proceed in two ways. The solution can be poured into a ready-made form for a garden figure, which is often used by improvised means. By cutting a rubber ball, you get a form for creating a well-known fairy-tale character named Gingerbread Man. If you pour the solution into a small basin, you can make the body of a ladybug, a turtle, or a mushroom cap.

And there is also an option when the prepared frame is covered with cement. You can make a frame for garden figures using the most ordinary wire. If you chose the second method of making garden figures, then you should add PVA glue and gypsum to the cement mortar to make it more plastic.
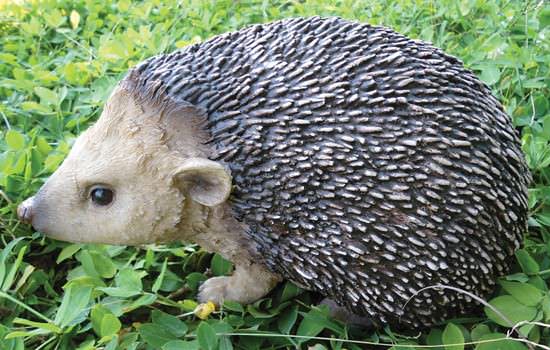
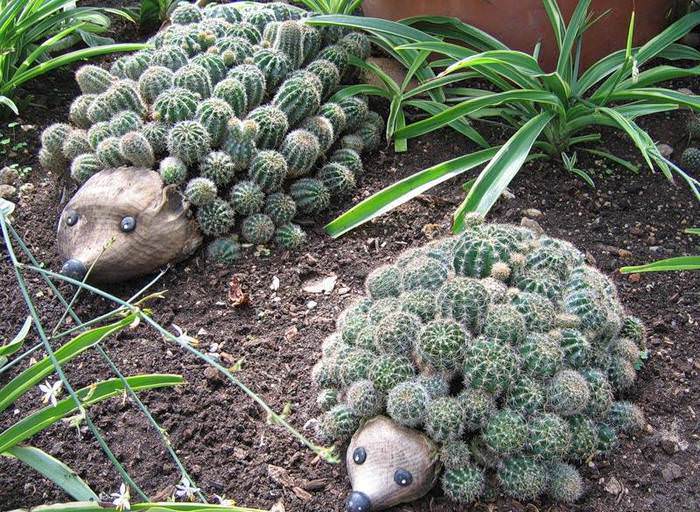
Hay is great for making small and large figurines for the garden. From dry grass you can make a beautiful hedgehog. To do this, you should twist the material into a tight oval, which acts as a body for the animal. After that, you need to carefully push the muzzle out of the oval, fix the needles on the body, which will serve as bunches of hay. At the last stage, glue the eyes and nose using beads.

Among the materials at hand that can be used to make garden figures, utensils unsuitable for everyday use (basins, barrels, pots, plastic cups and bottles), car tires are used. The most popular figures that can be made of plastic are different plants. You can make a Christmas tree, cactus, palm tree with your own hands.

Car tires themselves are ready-made elements of figures. Using a large tire, it will turn out to create the body of a bear, a small one - his head. Make paws from two small tires, covering the holes with plywood. If desired, tires can be cut, making them different patterns- for example, a long snake.
If you adapt an ordinary barrel, painting it using alkyd enamel, you get an original cheerful little man. By cutting the barrel, it can be stylized under the forest fairytale house. Figures from small pots can be strung on top of each other using ropes.
If you are looking for original material for garden figurines, then pay attention to the mounting foam. Such sculptures will be durable, waterproof and durable. These qualities are indispensable for garden decor, as it must withstand bad weather and sudden temperature fluctuations with success. Using polyurethane foam, it will be possible to make a snail, swan, dolphin, stork, donkey and even a gnome.

The creation of any character begins with the fact that you must form his skeleton. There are a lot of options for this: plastic bottles and cups, sticks and wire, buckets and other items. In the process of making a garden figure, apply the foam in stages. Make sure each layer has time to dry well. If you want to touch up the product, then do it before the foam dries. You can also cut off the excess after hardening with a clerical knife. Paint the finished sculpture in any color and varnish it.
The most optimal material for creating sculptures for the garden at home is gypsum. He is quite stable. The products are well tolerated and high humidity, and precipitation, whether it be rain or snow, and heat and cold. But it should also be remembered that this is a fragile material, and figurines from it should never be dropped. Let's find out how to make a plaster garden figurine:
Now you know how to make a garden figure. It is the garden decor, made by hand, that will become the main decoration of the summer cottage. You have already made sure that even a novice owner can make a sculpture for a summer residence. Choose the model you like, add your imagination to create not a copy, but an original product that no one else will have. It is possible that you will become interested in making garden decor, and this will become a serious hobby for you.
The garden is the place where you want to relax. At the same time, no one prevents you from realizing your creative potential. Often a specialist comes up with a landscape for a garden. And you can decorate the territory with garden figures yourself!
In order to decorate the garden correctly, you must be guided simple rules. First of all, garden figurines should be combined with nature and the design of the site.

How to do it?
garden figures form the magic of the site. This means that they should look harmonious and be combined with other design elements.

For anyone style decision you can choose a suitable figurine made of metal, wood, plaster. It does not matter whether you buy a product in a store or make it yourself.
Anything can be made from metal. Perhaps a faithful metal dog will appear in your garden, or maybe a garden nymph, a grasshopper or a charming pig.

Often store options are not suitable for realizing your own ideas. But do not despair, because you can make garden figurines with your own hands. Materials such as gypsum or polyurethane foam are best suited for this.
They are easy to cut, the product can be painted at your discretion, and to facilitate the task, the use of stencils is not forbidden.
The most common option, which everyone can do, is a kolobok figure. Everything is simple. Make a hole in the rubber ball and fill it with mounting foam. Then carefully cut the ball and take out the ball. It remains only to paint the product.

So, figurines made of completely different materials. At the same time, you can make a worthy decoration of the site yourself. But don't forget that decorative elements must match the style of the garden.


(9
ratings, average: 4,39
out of 5)
Inna 11/21/2014
I live in a private house, I have a small garden, and a recreation area with a gazebo, a hammock and a barbecue. I really like to decorate my site with various squirrels, mushrooms and gnomes. the rest of the creativity will also soon reach the hands!
Sasha 11/21/2014
Garden figurines are very cool idea to decorate your cottage. And I've perfectly decorated my site with the help of all sorts of gnomes and squirrels. And I'll tell you that the whole thing looks just great)
Oleg 28.11.2014
For me - so very much for an amateur. I definitely don't like gnomes, and the rest of this type. They are like such a direction in art, called "naive", that is, primitive in technique. Some of the samples in the photo are pretty, but not for the garden in my opinion. there are already well-established classical ideas, if not naturalness, then about geometry and sculpture.
love 04.12.2014
And I like that there is something else on the site besides beds with greenhouses, flowers with cabbage heads, etc. Figures somehow enliven the whole country * flora *,
I agree with the author, it is necessary to create harmony, and not to poke in different places or all in a bunch. Nikolay 02.04.2015
When I studied at the school, we were taught to make various statues and figures from plaster. It's pretty easy, it just takes some imagination. At the dacha, almost every month I make figures for decoration. In the children's corner Masha and the bear, swans around the well. Near front door placed two lions. Inside the figures, I insert metal rods and around I make a small frame of metal construction mesh. Then I stick it with plaster and make a figure.
Margarita S. 03.10.2015
I liked all the photos, except for the one that shows a lot of gnomes behind the fence. I would call such an image: “The hour of reckoning. Dwarf Invasion." Well, such an abundance of figures does not look on narrow section!
Liza 18.08.2017Cool! And in my summer cottage, red gnomes stand in a chaotic manner ... They also look very nice and decorate the garden and the plot as a whole. 🙂 I also think a cranes nest with cranes to imitate. 🙂
Add a commentIn this article we will talk about how to make garden figures for giving with your own hands from available materials. The theme of making garden sculptures and other crafts is relevant and most in demand with the beginning of the summer season.
Of course, you can buy ready-made garden decorations in specialized stores, but the price of such a solution is high, and therefore it would be advisable to do everything yourself.
In the photo - a sculpture made of polyurethane foam

We decided to make garden decorations decorative figurines with their own hands?
In this case, it's time to decide on the choice of materials that can be used in the manufacture of these crafts.


Near every or almost every dacha you can find one or another amount of large pebbles and smooth cobblestones that have a rounded shape. By collecting these stones and washing them from pollution, it is possible to make both single sculptures and entire compositions. For example, a large oval stone can be painted and turned into a large ladybug or a cat.

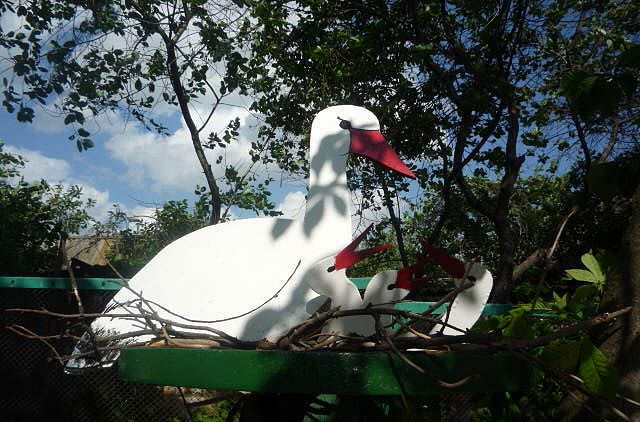
Smaller pebbles can be painted in White color and build a makeshift bird's nest. Of course, ideas for decorating a garden using natural stone an order of magnitude more and to achieve a better result, it is enough to use imagination.
Important: For painting natural stone, it is advisable to use acrylic primers and paints, as well as acrylic lacquer, which, when dried, forms a strong durable film.
garden, as well as household plot- This is the decoration of the cottage. But sometimes, in order to make the garden truly attractive, you need to apply additional decorative elements, such as, for example, self-made garden figures.
Now we know what the instructions for making these decorative elements are. In addition, we know what materials these decorative elements can be made from. More useful information and can be found by watching the video in this article.

Proverbs and sayings about May HORIZONTALLY: 2. May will deceive - in ... will leave.4 ....

Popova V.N. primary school teacher MBOU "Kishertskaya secondary school" Rebus is ...

To learn how to compose and understand puzzles, you should figure out what they are from ...