


INSTRUCTIONS AND PROPHECIES OF THE Blessed MOTHER ALIPIA GOLOSEEVSKY, Kyiv...


The most common type of lock for doors between rooms is a latch handle. Regardless of the design and shape of the product, installation is very easy. Consider the installation procedure for such a handle on interior door with your own hands.
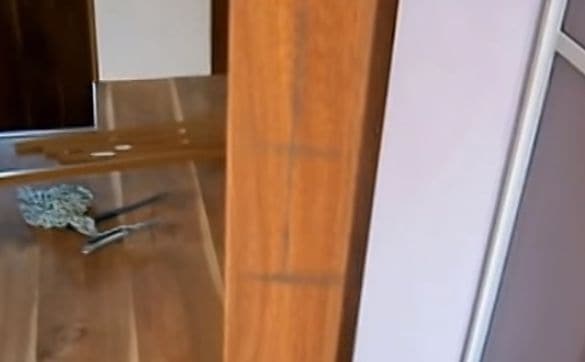
The models of this plan consist of two main elements: the product itself and the working mechanism. Both parts of the handle cut into the door leaf separately.
Latch models are available with or without a latch. The lock is an additional rotary mechanism. If it is not there, the door cannot be locked from the inside with a lamb, as well as with a key (a keyhole is placed on one side, and a latch tongue on the other, as in the photo).
Door handles differ in design type, but this does not affect the installation process.
The internal element (latch) is uniform, so it is installed the same for different pens with latching mechanism. The height from the bottom of the door and the distance from the edge are standard.
For latch handles, there are two options for inserting into the canvas: 60 or 70 millimeters from the edge. The rotary latch mechanism can "walk" to the right or left by about 1 cm, and this must also be taken into account.
The standard handle installation height (distance from the floor to the center of the latch) is 900–1100 mm. If the door is usually used by one person, optimal height will be located at the level of his belt.
Installation of the product on the interior door is carried out on the right or left side. For models with a round handle, you only need to turn the latch design over. At the same time, the tongue should look towards the closing of the interior door. If the device is not symmetrical, the elements simply need to be swapped, focusing on the opening side.
To make the insertion process as simple as possible, prepare the following:
Step-by-step instructions for installing a latch include several steps.
The procedure begins with marking the door leaf.
At this stage, we do the following:
At this stage, we have two holes ready. We proceed in the following order:
In the absence of a drill, all holes can be cut with a chisel. However, the installation process door handle will require some experience and skill and will take more time.
The following video will help to visualize the process more clearly.
Will require minimum set tools:
So, let's start embedding the lock.

Drill a hole in the center with a 4mm drill

We put the lock flush with the door and make a mark in fact

We drill through the hole with the same drill, observing a right angle.

With a 50 mm crown, we make a tie-in on one side of the door.
Attention!
Your specific case may require a different size crown.

We finish on the other side.


We take a self-tapping screw of a suitable length, close the door when the box slams, and through the 50 mm hole, we insert the self-tapping screw into the remaining 4 mm hole and, by pressing, make a mark in door frame.


According to the mark with a 23mm drill bit, we cut a hole to a depth sufficient for the lock latch to enter.

With the same drill at the mark, we drill a hole for the lock.

We insert the lock and make a mark with a sharp pencil to drown it in the door leaf.


With a chisel we make notches strictly according to the marks and make a selection so that the lock sits in a pot, then we fasten it with self-tapping screws.

We begin to assemble the lock, insert the outer part into the grooves (it usually does not require disassembly).


Then carefully remove the decorative "cup" sitting in the grooves, then press the latch and remove the handle.


We connect the two sides with screws.

We insert the handle so that the latch works.

We snap the decorative "cup".


We attach the reciprocal bar, make a mark, select the excess with a chisel and fasten it.

Done!))) Properly embedded lock is freely closed by pressing the door leaf until it clicks.
1. Door marking

On the door leaf, apply markings for installing the knob (lock) according to the template. The recommended distance from the floor is 965 mm.
2. Hole marking

After you have marked out, drill two holes: 50 mm in diameter for the knob (lock) handle and 23 mm in diameter for the latch mechanism.
H. Mounting the striker

Install the keep at the same height as the latch in such a way that the additional tongue of the latch remains recessed into the body of the latch when closing, which is an obstacle when wringing out.
4 Dismantling the knob (lock)

To disassemble the knob (lock), press the spring-loaded latch at the handle attachment point with a special key and remove it.
5. Latch length adjustment

6. Latch installation

Install the latch in the groove of the door (make sure that the bevel of the latch is directed towards the closing of the door). Install the cover plate with the rod so that the rod and withdrawal sleeves exactly fit into the grooves on the latch body.
7. Installing the knob cover(of the castle)

First, put the inner plate of the jujube overlay on the rod and fix it with screws (or screws). Then screw on the outer part of the lining.
8. Installing the handle

Install the handle in such a way that the groove on the rod coincides with the groove on the knob handle, press the handle until it “clicks”.
9. Rearrangement of the mechanism in the file handle

Latch models with a square handle (options 01 and 03) can also be installed on both left and right doors. To do this, you need to take out cylinder mechanism and the locking mechanism from the body of the handles and swap them (according to the figure), in accordance with the side of the door opening.
Installation order.
1.Determine the location of the knob and apply the markup, guided by the template and installation instructions.

2. Based on the installed latch body, mark the installation location of the striker on the door jamb and select the groove for the striker.
3.Install the keep and fix it with screws.
4. Alternately check the functionality of the knob outside and inside the room.
5. For models of latches with a square handle (options 01.03), installation on left and right doors is also provided. To do this, it is necessary to interchange the locking mechanism and the cylinder mechanism from the handle body.

As you can see, the insertion of the lock into the door is not so difficult task, the main thing is not to rush.
—————————————-
Photographer: Vladislav Mazitov
Apartment renovation quite often occurs with the installation of windows and doors. But modern fashion trends, lately, sometimes force us to completely abandon the doors, as an example, in the kitchen. If the purchase has happened, and you have installed an interior door, then you need to install door handles next. In this material, we will analyze the steps for installing a door handle with our own hands.
Stationary, motionless;
Push, with a lock;
Rotary, often the lock in such handles is embedded inside.
Entering the building materials store, you need to choose door handles according to certain criteria:
1. Appearance and unlocking element of the handle. Usually, the handle is characterized by an oblong shape, if the handle is equipped with a push mechanism, or a ball-like handle with a rotation mechanism.
2. What is the handle made of and how does it feel to the touch. The door handle can be crafted from both wood and metal materials. As a rule, it is aluminum, brass, and several other alloys. Also, handles are stone, plastic, glass. The most common, of course, is a metal handle with a wide choice of coatings, as an example - chrome, nickel and others. The coating affects not only the kinesthetic personal sensations of a person, but also the color, durability.
What are the door handles
3. Is there a lock in the handle? The handle may or may not have a lock. Locks can be built into the handle, usually, you will remember such a handle as a round type. On the one hand, such a lock opens with a key, on the other it has a latch.
Attention! In hardware stores, handles are for the left hand, and for the right. Before buying, it is important to tell the seller which pen you need.
Door handle diagram (video)
In order to put the door handle, you will need certain tools:

We will analyze the installation using Apecs handles. They are very popular and most common in the Russian market. These handles are made of brass, given material also the most common in pens today. It is easy to process, not expensive, but how pleasant to the touch - many owners of such pens have already appreciated.

Below is a step-by-step recommendation for installing door handles that have a latch but don't lock mechanism. Please note that the insertion of a round type door handle does not have any major differences from the installation that we give as an example.
Apecs door handle
Principle mechanical work the door handle is unpretentious: the handle turns, the lock tongue goes into the door. For this reason, the very first step is to create holes for the handle, as well as cut a groove for the tongue and rotary mechanism. First you need to decide on the height at which the handle will be located. Professionals advise making a mark at the level of the belt, taking into account how much the arm will bend when turning. As a rule, this is a meter from the floor.
Attention! By specifications, which are regulated by GOST 6629-88, the height of the door handle must be exactly and exclusively 1 meter from the floor level. But if the house is your own, choose any height that is convenient for you.

Please note that when installing the handle in the rooms where the bedrooms are located, the handles must be installed at the same height. Otherwise, it is easy for residents to get confused in the dark.
But there are also cases when there are already connectors for handles in the door, but they are located only at certain points. AT this case If you decide to put the pen in a place other than the one provided by the manufacturer, then bad consequences are possible. Including, if children live in the house for any length of time, the height of the handle must also be lowered to at least 75 cm from the floor.
Once you have resolved the issue with the height, then at the measured height, you must immediately draw a line horizontally. A simple ruler will help you with this. 6 cm from the door edge marks the center of the hole with a dot or a circle. Mirror the markup to the other side.
The next step will be the marking of the lock tongue. To do this, mark the center at the end of the door between the future door handles. Attach the striker plate, and then carefully circle it. Before installing all the elements, you need to erase the pencil as much as possible, because after installation it will be difficult to do. Leave only the elements that you understand, for orientation.

Having made markings on the door, you need to start drilling holes for fastening the door handles. It's not hard to make them yourself. Using a drill and a pen-type drill, make suitable holes for connecting the door handles with a square.
At the end of the door, similarly, using a drill and a pen drill, make a hole, the depth of which will be equal to the length of the latch mechanism. Then, using a chisel, having measured the thickness of the lining in advance, remove the extra elements to a distance that will allow the bar to completely enter the door leaf. The whole process is clearly demonstrated in the video.

When you have installed the latch, you need to put the purchased door handles. Initially, a square is inserted from the kit. It will move the tongue as the knob is turned.

Then, remove the trims, which are round, threaded, decorative. They have in inside there is a special thread in the base, which is screwed to the door with screws.

Now you need to properly fix the locking screw of both handles, a special hex wrench will help you with this, usually it is included in the kit. The locking screw itself is needed to press the door handle firmly enough against the turning square, while at the same time preventing any slipping during operation.
Do-it-yourself door handle installation
The last step is to properly position the doorknob. Those. make installation of the mating part of the latch. To do this, it is necessary to lubricate the key tongue with oil, cover the door, and make a mark on the tongue with the tongue. door frame, in a simple way, scribble. At the same time, make a few trial openings and closings with a pen. Then, you need to attach an overlay, which should turn directly to the jamb, and circle it along the contour, including the inner hole.
The drill needs to drill a hole under the lock tongue of the latch, while the rest must be deepened with a chisel and a chisel. Make the depth 2 millimeters, or 1, depending on the depth of the bar itself. It remains only to fasten our bar with two screws. With an awl, make marks for the screws, and appropriately drill holes of the required diameter with a drill. Using a screwdriver, or by hand, we fix the bar in the door jamb.
Cut the appropriate holes in the door for the door handle
Installing door handles with your own hands is a simple process, but it requires certain knowledge and accuracy when doing the work. In this review, we will look at the three most common types of pens and understand the advantages and disadvantages of each of the options. We need to choose optimal solution and install it according to the instructions below.
Currently, there is no shortage of pens, the choice is so large that it can be a problem to determine the most suitable option.
The oldest type of product that has been used for thousands of years.
First, let's look at their main advantages:


Also often found forged options, they too can be very, very skillful;


Of course, there are also disadvantages, the main ones are:
This type of product is quite common, and its main feature is that the door opens by turning the outer part.
This is a fairly simple and convenient mechanism, let's analyze its main advantages:
Note! Round form pens has several names -. The difference between them lies in the presence of a locking mechanism, which is activated by turning the handle itself to the left or right. The handle-button does not have it, therefore it belongs to stationary views.


Now let's deal with the disadvantages of rotary knobs:
Advice! As practice shows, chrome-plated products are much more reliable options in gold and bronze. Keep this in mind when choosing a specific solution.


This is without a doubt the most popular and common option, which is found literally everywhere. It consists of two L-shaped handles connected by a square, with which the door latch opens when pressed.

As for the main advantages, they are as follows:


It should be noted that such products are of two types:


Of the minuses, one can single out perhaps more difficult process installation, as the work requires precision, and any errors can lead to damage to the door leaf.
Now let's figure out how to put the handles yourself. Two options will be considered - rotary and pressure structures. There is no point in disassembling stationary ones, everything is simple there - you determine the installation location, and screw it on.
To get started, you should stock up on everything you need.
Naturally, you need a set of door handles, the following tools will also be used:

Installation instructions for door handles of a rotary type look like this:
| Illustration | Description |
|
|
The location of the element is determined. European standards for door handles and domestic GOST prescribe a height of 1 meter, it is considered convenient for a person. Therefore, first of all, draw lines a hundred centimeters from the floor. |
|
|
Your lock is taken, and markings are made on the door leaf. It makes no sense to give specific recommendations - it all depends on the model and size of the pen. Read the instructions, and everything will immediately become clear to you. Usually you need to drill two small holes for the through fasteners, and one larger one for the mechanism.
|
|
|
After finishing the work, you should get something like this - a large hole in the middle and two small ones on the side. The main thing is to ensure that drilling is carried out on the same line. Otherwise, an offset will result, due to which installation can become very complicated. |
|
|
If you can purchase a special template for inserting door handles, then the work will be greatly simplified. You will need to set it at the required height, fix it on the canvas and drill holes in the right places. No measurements and no error. But templates are not suitable for all pens, so check in advance if this system can be used in your case. |
|
|
A hole is also drilled under the core, its diameter is usually 25-27 mm. It is important to find the middle at the end of the door leaf and keep the drill strictly horizontal during operation. If anything, you can make certain edits, the main thing is not to move the hole too much. |
|
|
sidebar door hinges and handles is impossible without sampling the grooves for the elements, in our case it is necessary to make a recess under the latch platform. To do this, the mechanism is placed in the hole, and its outer part is outlined along the perimeter. Then, using a chisel, a layer of wood about 3 mm thick is removed. First, punch the material around the perimeter, and then remove layer by layer until you get the desired result. |
|
|
In the process of sampling the recess, constantly check how the latch becomes. Better do it once again rather than overdo it and take off too much. The work is simple, but painstaking, it is important to do everything as carefully as possible, the appearance of the structure depends on it. |
|
|
After the latch is perfectly in place, it must be fixed with the screws that come with the kit. Tighten them carefully so as not to turn the fastener in the material and thereby weaken it. |
|
|
The design of the handle is divided into two parts, one of them will have mounting bushings, which is what we need in the first place. |
|
|
First, a part with bushings and a square is placed under the latch. It must be carefully positioned and pressed firmly to make sure that everything is in order and the socket fits snugly against the door leaf. |
|
|
The handle is placed on the other side, the holes on it are combined with the bushings. Then two coupling screws are screwed in, which will hold the structure. The work is almost finished, but most likely you still have spare parts for door handles, namely the counterpart and fasteners for it. Let's figure out what to do with it. |
|
|
Close the door and note at what level the latch is located. Then attach the counterpart according to the marks and mark the place where you need to drill a recess for the tongue. Lastly, the bar is screwed to the door, this is the end of the job. |
|
|
The photo shows how it looks right assembled structure. Everything is neat and safe. The door can be used. |
Now let's deal with this option. Naturally, the technology can be different, since the production of door handles is established in many countries and everywhere there are standards. We will analyze the most common latch option, which is great for interior doors.
| Illustration | Description |
|
|
Marking work is being done. We said above that standard height the installation of door handles is 1 meter, although you can arrange them as you like, it's all up to you. With the help of a tape measure, a clear mark is placed. |
|
|
To clearly mark the door on both sides and from the end, the easiest way is to use a construction square. It is pressed tightly against the edge of the canvas, after which a line is drawn. So you will achieve perfect marking accuracy on both sides of the door leaf. |
|
|
Now you need to decide where to drill a hole for the latch square. To do this, the latch is applied to the door so that the drawn line is in the middle of the square hole. Keep in mind that the mounting plate will sink into the surface, so position it flush with the end of the door. Do the same for the other side of the door. |
|
|
This is how your result should look like. There is no need to chase the accuracy of the markup, it is important to determine exactly where the center of our hole will be, anyway we will make it a little over size tetrahedron so that the element can move. |
|
|
A hole is made using a drill or screwdriver. For work, a drill with a diameter of 12 mm is used, you can take the 10 mm option, but then you have to slightly drill the hole so that a tetrahedron enters it. The work is done as follows: first, on one side, you need to go deep by about half the thickness of the canvas, then the same is done on the other side, and then you can go through. This is the most accurate way, if you go through on one side, then there is a high probability of displacement. |
|
|
This is how the result of the work looks, everything is clear and even. Make sure the square fits and can spin inside. |
|
|
Now you need to mark the end for the core. To do this, a tetrahedron is inserted into the hole, a core is put on it and marks are made from above and below. Next, you need to mark a point strictly in the middle of the canvas, this will be our main guideline in the first stage. |
|
|
First, a hole is drilled in the middle. Any suitable drill is used for work, but usually a thicker option is taken so that later there is less work to expand the recess with a chisel. |
|
|
Since the core has a rectangular or square shape, the hole for it is completed with a chisel. Just knock out a recess according to the required size to the desired depth. This is perhaps the most time-consuming and lengthy stage. It's simple, but it takes a lot of time. |
|
|
After the hole is made, the latch is inserted and a notch is marked, which must be made for recessing the mounting plate. It's simple: align the element so that it is parallel door leaf and carefully draw around the perimeter of the line. |
|
|
In order not to remove the excess when removing wood, first of all, you need to cut through the material along the perimeter to a depth of 3 mm. It's simple: the chisel is attached to the surface, after which it must be hit 2-3 times with a hammer. And so around the perimeter. |
|
|
The removal of wood is carried out carefully and little by little - a little tweak later is easier than removing too much. Periodically insert the latch to control where and how much to remove. If necessary, you can cut the tree around the perimeter again. |
|
|
Next, you need to make holes for the fasteners. They must be through, as the handle is pulled together with special fasteners. Measurements are made and holes are drilled at the required distance. Everything is done here, as in the case above: work is done on both sides at half the depth of the door leaf. |
|
|
The core is fastened with two screws, after which you need to check its performance. Insert the square and turn it, the latch should move with little resistance. |
|
|
The handles are aligned along the holes, after which special screws are screwed into them, they enter the sleeve and securely fix the structure on the canvas. |
|
|
For reliability, it is screwed into the handles under two more self-tapping screws. They are included in the delivery. |
|
|
Last of all, decorative covers are placed on the sockets, they cover the fasteners and give the handle a more attractive look. This completes the work, it remains to put only the counterpart, this process is described above, it makes no sense to repeat here. |
Now you all know about the types of door handles and how to install them. As you can see, putting the handles is not as difficult as it seems at first glance. You must follow all the recommendations and do everything very carefully. The video in this article will help you understand the issue even better, watch it if you are going to do the work yourself.
Sections of the article:
In most cases, canvases for interior doors are sold in one piece without holes for fittings, which you will have to cut yourself. How to install handles various types on interior doors with your own hands - we will tell in this article.
On the shelves in specialized departments there are many models of handles for room doors. Overhead, push or rotary (knob) mechanisms are usually placed on swing doors, which can be equipped with latches or locks. For compartment doors, mortise models in the form of an oblong ellipse are most often purchased, but it is also possible to use elongated overhead handles in the form of brackets or handrails.

To set the handle to door leaf you will need the following tools:

For easier installation of door handles on interior doors, you can use a paper template that looks like a 1: 1 handle body diagram. Such a scheme is attached in the box along with the product or printed on a printer. According to the template attached to the canvas, markings and grooves under the handle are applied.
Installation of the handle begins with determining the height of its location on the interior door from the floor, most often this figure is 90-100 cm. All handles on room doors are placed at the same level for harmonious visual perception.

The next step is to mark the holes and grooves for the product. Experienced installers recommend tapping the canvas before marking, since most interior doors are made in the form of a frame and lintels made of bars, covered on top with MDF panels, natural or eco-veneer. The locking fittings must be installed exactly in the bar, since the outer panels are not able to support the weight of the mechanism due to the presence of a void between them.

It is better to put the handle on the canvas removed from the hinges or carefully fixed in the open position. Products for opening / closing the door may differ in size, location of mounting holes and installation methods, therefore, before installation, read the manufacturer's recommendations in the instructions.
Before installation, the marking of the main recesses for fasteners is first applied according to the template, in the absence of which the marking is carried out simultaneously with the insertion of the components.
At a height of 90-100 cm from the floor and an indent of 6 cm from the outer end side of the canvas, the first mark is outlined. An axial line is applied at the end and the center of the recess for the tongue is marked.

In order for the reciprocal latch plate to be flush with the leaf cover, a small rectangular recess is selected in the outer end of the door with a chisel and a hammer according to the size of the side plate and a depth of 0.3-0.4 cm.

Using an overlay in the form of a 50 mm crown, a drill cuts a hole through at the site of the first mark. Try to keep the edges of the saw cut smooth, without damage and loss of attractiveness of the door.

From the end of the door on the marked center, a recess is sawn with a pen drill, the depth and diameter of which correspond to the body of the constipation. Do not cut through the hole, as this can cause damage to the panel. The latch is inserted into the recess and fixed with hardware.

Before you put the knob-knob, it will have to be disassembled into parts using the hex key that comes with the kit. Half of the knob with a rectangular pin is inserted into the through hole through the latch on the interior door and screwed on one side. On the other hand, the second part of the knob is strung on the pin and screwed with a bolt. Self-tapping screws are screwed from each part, which are then hidden behind decorative overlays.

The sash with the handle installed is slightly covered, the location of the upper and lower parts of the tongue is outlined on the door frame. The square measures the gap between the edge of the sash and the center of the end plate of the lock, after which the resulting parameters are duplicated on the door frame.
A second bar is superimposed on the markings made on the door frame, according to the dimensions of which a small recess is knocked out with a chisel and a hammer. The box is knocked out to such a depth that the extended tongue and side plank. After that, the bar is screwed with hardware over the groove.

Some models of knobs are equipped with special plastic inserts that are inserted into the grooved hole under the tongue and hide the fasteners. Such an insert can be purchased separately in specialized departments.
The installation of lever handles is carried out in a similar way.
Before you put the handle on the interior compartment door, you need to prepare an electric drill, a Phillips screwdriver and a chisel. Handles for this type of door opening are made in the form of a plastic insert in the form of an elongated oval and a decorative latch in the plastic part.

The size of the plastic insert is marked on the canvas with a simple pencil. With a pen drill and a chisel, a recess is knocked out in the full-bodied part of the canvas along the height and length of the liner. An insert is inserted into the prepared groove and fixed from above and below with hardware. The decorative part of the product simply snaps into place inside the plastic component.

A similar procedure is carried out with the second part of the handle on the back of the canvas.
Handles for room doors with a magnetic lock can have different shape handles, and the locking mechanism itself is shaped like a conventional mortise lock and is mounted in the same way as it is. For smooth slamming of the sash, you will need to set the striker of the handle as accurately as possible. On the door in the closed position, the markings of the upper and lower edges of the lock are carefully transferred on the loot. A reciprocal bar is superimposed on the markup and the position of the groove for the magnet is outlined, which is then drilled using a pen drill of the desired diameter. After that, a magnet is placed in the prepared recess, which is fixed on top with a counterplate with self-tapping screws to the frame. On the interior door, the bar on the frame of the magnetic lock is never flush, because over time, in a similar position, the magnet weakens and ceases to hold the sash tightly.

Stationary handles are divided into two main categories according to the type of attachment: overhead and mortise. The first, in a matter of seconds, are screwed in the right place of the canvas onto hardware that is suitable in size. Before installing the embedded stationary door handle, holes are drilled through in the interior door leaf, into which the threaded stud is screwed. Handles are screwed along the edges of the stud.

Possession of both basic plumbing skills and necessary tool allows you to put the door handle on the interior door without much difficulty. The main condition is to accurately mark and not get into possible voids in the door.
INSTRUCTIONS AND PROPHECIES OF THE Blessed MOTHER ALIPIA GOLOSEEVSKY, Kyiv...

Eufillin dropper in ampoules is used to treat pathologies that ...

Among all ointments for the treatment and prevention of joint diseases, the most ...