Khasanzyanova Aisylu Gera Summary of the myth Gera Ludovisi. Sculpture, 5...


The fabric on the walls should be in complete harmony with the rest of the textiles used in the design of the room.
Wall upholstery with fabric is one of the most modern ways finishing, which allows not only to create a unique design in the room, but also to hide some imperfections on the surface of the walls. Decorating walls with fabric is in particular demand among owners of suburban housing, whose rooms are distinguished by high ceilings and large area walls. It is beautiful, durable and very original finish, which has become an excellent alternative to all existing finishing materials. Work is no different high level complexity and does not require the participation of qualified craftsmen. To succeed, it is important to strictly follow the rules of the technological process and choose the most suitable fabric correctly.
Upholstery of walls with fabric is carried out using artificial and natural materials, which can be purchased at specialized stores. trade organizations. When choosing fabric for walls, you should first of all pay attention to:
It's not only natural materials They also have a number of other advantages. So, for example, by fixing such a fabric on the walls instead of wallpaper, you don’t have to worry about the correctly chosen direction of the thread and how daylight will fall on the surface. Mixed fabrics, which include natural fibers and viscose, are very popular. For work on finishing the premises, the form of release of such material is very convenient. These are rolls with a width of 140 to 280 cm and a fabric length of 100 m.
Artificial materials are used in cases where do-it-yourself wall decoration is carried out with fabric. Viscose and polyester, polyacryl and polyamide attract the attention of those who want to change inner space their homes by the fact that they stretch perfectly, easily take any desired shape, and do not lose their attractiveness for a long time.
Before proceeding with the work, you need to choose the right not only the fabric intended for wall upholstery, but also the very place of its fixation.
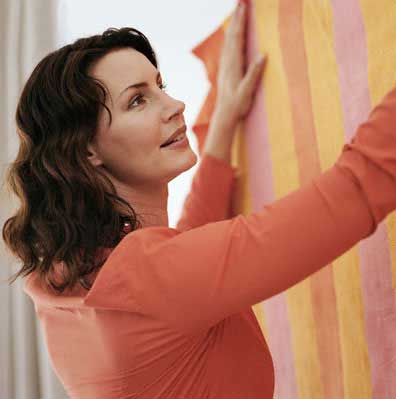
Such decoration is not performed in the kitchen and hallway, passage area and rooms with high humidity. The photo shows exactly how you can decorate the room using bright expressive fabrics.
Wall decor with fabric is performed in strict accordance with technological process designed specifically for decorating walls with fabric. Compared to wallpaper, decoration material is more durable, easy to work with and durable. Fabrics for such decoration are easy to clean and do not accumulate household dust.
Synthetic fabrics are dense and moderately stretchy. They perfectly fit on any surface and hide the existing flaws and small defects.
Fabric fabrics made from synthetic fibers have a high level of moisture resistance, are suitable for creating draperies, and keep their shape for a long time. long period time, do not succumb to the negative effects of ultraviolet rays.
All these qualities are taken into account when choosing a fabric for use in the interior as a decorative wall covering.
There are several ways, using which you can quickly and efficiently sheathe the walls with fabric on your own, without resorting to the help of qualified specialists. To stretch the synthetic fabric with your own hands, you need to prepare the appropriate tools and fasteners:
You will need a pencil and a ruler to measure desired distance and make notes. The advantage of this method of decoration is that in the space between the canvas and the wall, formed during the work, soundproofing material can be laid.
The process begins with the installation of a kind of frame. A horizontal rail is attached around the entire perimeter of the room under the ceiling with the help of a dowel of nails. This design is also assembled along the skirting boards.
Fixing the fabric is carried out with the help of furniture brackets, but when using a fairly dense fabric, you can use a hammer and furniture studs. The entire area of the sheathed surface must be covered with a cloth. Stretching is important to perform evenly, avoiding sagging of the fabric.
If furniture brackets are used for fixing, then it is quite enough to simply tuck the edge of the fabric, but when doing work with nails, a small piece of genuine leather should be placed under the head of each of them.
These measures will help to avoid tearing the fabric during stretching:

During operation, it is necessary to constantly control the degree of tension in order to prevent either sagging or tearing of the fabric. At the end of the process, all attachment points are covered with moldings and skirting boards. The photo shows that the strict implementation of the rules allows you to achieve a positive result.
Sheathing the walls with fabric will not only hide the defects on the surface of the walls, but also create additional heat and sound insulation.
Before sticking the fabric on the wall, it is necessary to prepare the surface for the upcoming decoration. The use of this method of designing even small surfaces in the interior allows you to radically change the perception of the surrounding space. A wall pasted over with a spectacular fabric is a real decoration of the room, but in addition, this method of decoration allows you to clearly mark the boundaries of a certain area when zoning the space.
First you need to thoroughly prepare the surface of the wall:
After this, the preparation of the wall to be glued can be considered completed, and it's time to start marking the material. When starting to decorate the walls with a fabric that will be fixed on the adhesive composition, you need to accurately measure all the surfaces that are to be pasted over. You will also have to accurately measure the canvases of the fabric.

Gluing one large canvas covering the entire wall at once is quite difficult. To simplify the solution of the task, you can divide the fabric into several small canvases. Having chosen the adhesive composition, you need to prepare it, stir it, let the glue brew and proceed with its application to the wall surface. Preparatory work with fabric are visible in the photo.
If you have to paste over the entire wall completely, then stick a whole canvas. It is quite difficult to perform such work on your own, and the master will need the participation of assistants. Before you can start cutting the fabric, a small cut is placed in hot water to test the fabric for shrinkage and color fastness.
After 10-15 minutes, the flap is taken out of the water, dried, ironed and measured again. If all the parameters remain the same, then the fabric does not shrink and you can attach it to the adhesive composition. Furniture or casein glue is considered the most convenient for working with fabric. It dries and gains strength under the influence of high temperatures when the decorated surface is heated. With this glue, you can cover the entire surface of the wall at once, without fear of premature drying.
They begin to stick the fabric, like wallpaper, from above. One of the workers holds the canvas, and the second, pulling it, rolls it with a roller, achieving uniform pressing. For more reliable fixation, furniture brackets are used, which, if necessary, are removed later. By pressing the fabric with a roller to the treated adhesive composition surface, it is best to iron it with a hot iron, but in some cases you can use a hair dryer (not necessarily a building one) to achieve complete drying of the glue and material as quickly as possible.
Smooth the entire surface of the wall several times. After 3 days, it is necessary to check the fit and the absence of air bubbles under the fabric. If such are found, they are pierced with a needle and the entire surface is again ironed with an iron. Under the influence of high temperature, the fabric is firmly glued to the wall. Excess material under the ceiling and above the floor is carefully cut off and the edges are covered with moldings, baguettes and skirting boards.
No less popular is such a way of decorating space as drapery with fabrics, but similar Finishing work often carried out in country cottages. On the walls modern apartments a glued canvas or stretched fabric looks better.
The order of work is shown in the video, which can become detailed instructions to carry out the above tasks.
Conducting redecorating apartment, one of the rooms, Alexander Zaitsev finished with fabric, and not only the walls, but also partially the furniture. What he did, read in this article.
When choosing a fabric, I settled on an inexpensive plain cotton fabric resembling a canvas. This so-called twin thread.
Previously, the wallpaper was completely removed from the walls, wetting them with warm water and scraping with a spatula. In order not to mess around with putty and leveling the walls, I first glued the fabric on HDF panels 3 mm thick (hard fiberboard can be used), and already them on the walls, which I previously primed with diluted PVA.
I used liquid nails to glue the plates. This method is, of course, more expensive, but more convenient. And the walls as a result are smooth. The method was tested on a small piece of panel (600 x 400 mm). I glued the fabric first in a “raw” way - on PVA and soaking the fabric on top with it. But, as it turned out, the double thread does not shrink - and as it dries, the fabric began to wrinkle and gather into folds.
Therefore, the further sticker was made in a “dry” way: the panel was primed with PVA, after drying it was smeared with glue again, covered with a cloth, which I smoothed with light hand movements (small wetting is not terrible, since the PVA glue does not leave marks when it dries), after which it was ironed with a hot iron before polymerization of the adhesive. The fabric was glued to the non-laminated side of the HDF. The color of the lamination does not play any role, so I used the cheapest white-coated panels. I glued the fabric with an allowance of 15-20 mm, which I then cut with a clerical knife.
Here it is necessary to dwell on PVA glue. It is issued three types- carpentry (the most durable, but also the most expensive), universal and construction. The latter in our business can be used for a primer, but it is necessary to glue or universal - this best option, or a mixture of carpentry (30-50%) and universal.
After gluing the panels on the walls, the joints between them were decorated with a wooden layout 30 mm wide, carefully gluing it with the Transparent Gel glue produced under the Moment brand. As a plinth and upper curb, I used a 50 mm wide layout, putting it on “liquid nails”.
Using the same technology, I pasted over two visible planes of a cabinet with a mezzanine - doors and right side surfaces. Only glued not on HDF, but on the prepared surfaces of the cabinet and mezzanines. Doors and sides for this dismantled. I have a wardrobe of a classic design of the sixties of the last century with polished doors (the mezzanine is home-made, from veneered carpentry boards).
Tape grinder with a rough skin ruthlessly tore off the polish from the doors and sidewalls, getting an excellent rough surface for pasting. I trimmed all the planes decorated with fabric along the perimeter with a PVC corner 25 x 25 and 20 x 25 mm, cutting off a 5 mm corner at one of the shelves. I did the same for the edges of the doors. The edge of the doors on the side of the piano hinges was trimmed with a 25 mm strip, which I got by cutting off one of the shelves at the corner.
The cost per square meter of HDF-panel is 60-80 rubles, used fabric - 70-100 rubles. And the cost of industrial textile wallpaper(on a non-woven basis) - about 1,000 rubles. per square meter. Feel the difference, as they say!
The door to the room (mass Soviet design - fiberboard on a frame, pasted over with a film), dismantled it before finishing, removed the film without great difficulties, but - with top layer hardboard.
The result was a porous rough surface, which I primed twice with diluted PVA and, after drying, pasted over with a double-thread according to an already proven technology. The perimeter is also trimmed with 25*25mm PVC corner. In the same style, I designed a panel that closes the sliding mechanism above the door.
He completed the work by making a screen for a heating radiator, into which he introduced decorative panel covered with double thread.
One of the walls large quantity bookshelves and once paneled under a light tree - did not touch: it fit well into the updated interior of the room.
Wooden interior details - layouts, cornices, skirting boards, as well as elements of the radiator screen covered with two layers water stain under mahogany and - after good drying - with three layers of colorless "Senezh Akvadecor".
The plane of the window sill was also decorated under mahogany - there was a back wall from the old one in stock bookcase, I cut it to size and glued it to the "liquid nails".
One of the walls is occupied by a large one, which was not touched during the repair; when gluing the panels, cutouts were made in them to bypass the showcase
1. Room decoration materials - beige double-thread fabric and HDF panel (reverse side).
2. Wardrobe with mezzanine united by decoration into an ensemble. Color solution based on the contrast of light planes and darker stripes along their borders.
3. Sliding door. The upper suspension mechanism is covered by a screen.
4. A fragment of the door trim. In the open position, the door protrudes into the opening by 80 mm, so I installed ordinary handles, not recessed.
5. Screen of the heating battery. The grating is made from waste slats, the lower part is a HDF-panel, covered with fabric, on a wooden frame.
6. Wall decoration with bookshelves during the repair, it was decided not to change: it fit well into the new interior.
Decorating the walls with carpets and fabrics began many centuries ago. In the East, the tradition has survived to this day to hang a tapestry instead of partitions or paint the walls and paint them with gilding to imitate expensive embroidered material.
Drapery of walls with cloth adorned palaces in Greece and Rome. Even when the first paper tapestries appeared, the interior of the living room looked more luxurious with drapery with expensive fabrics. Wallpapers were glued by low-income people, the nobility and wealthy merchants preferred to drape the walls of the house with fabric.
long time upholstery with fabric was an expensive pleasure, accessible to a few. Gradually, the quality of the fabric changed; relatively inexpensive textiles appeared that met modern requirements interior. Kirill was interested in handsome wall material, suitable for any style and turning into a decor. Now my assistant wanted to know how to decorate the walls with fabric with his own hands. There are several technologies for finishing fabric on walls instead of wallpaper:

By analogy with the walls, a stretch ceiling is made. The material must be prepared in size, create a pattern, wet and pull on the prepared frame, attach with clips around the perimeter and glue with moldings or ceiling plinth. Fabric wall decoration is better than paint:
There are disadvantages, for example, the kitchen, with its dampness and smells, is not suitable for covering with absorbent material. Lining is possible in the dining area, but it is desirable that it be leather or upholstery impregnated protective compounds. Textured and loose material traps dust on its surface, absorbs dirt and moisture.
Decoration with soft falling waves is used in halls for celebrations and banquets, in living rooms, in preparation for the holiday. The photo shows a fabric decor that can be replaced quickly by repeating simple steps step by step with the already finished material. The fabric must be prepared:

The advantage of this method is that you can quickly clad the walls, give the hall a decorative and festive look. Then for a short time change the style and theme, decorate the room for the next celebration. The decoration does not need to be glued, it is enough to temporarily hang a soft drape material.
The advantage of drapery is the ability to quickly change the design, wash the fabric, use any finishing option in turn, inexpensively creating a stylish and elegant look. This option did not suit Kirill and me, since we are doing overhaul residential buildings and apartments.
Instead of paper wallpaper, strips of fabric are glued to the wall. The texture is selected dense. The technology is partially different from the method of gluing with a roll finishing material. We had to stick fabric with a luxurious pattern in the living room with our own hands.

Before finishing, it is recommended to check a piece of fabric for shrinkage. I prefer to soak all the fabric that is taken for finishing. Industrial dust and oil from the equipment are washed from it. At the same time I dissolve salt in water, fix the paint, make brighter colors fabric base, I make the material non-combustible. The texture of the fabric is thickened. Now it fits better on the wall and attracts less dust. I had a large work table on which the fabric was smoothed before cutting. The stripes are narrow, so they were glued like ordinary wallpaper.
The top edge can be fastened with carnations, then trimmed using lace or fringe.
The height of the children's wall made it possible to glue the fabric across. We did a seamless wall covering.

It’s hard for me alone to fit the walls and smooth them out. We dealt with my nephew quickly. But I already have experience, and several times finished the walls with fabric in this way.
The bedroom was next in line. We used the seamless method, fixing the viscose fabric wallpaper for the walls under the plank. The width of the cloth made it possible to cover the entire wall. I prepared the fabric and, with the help of my nephew, wound it into a roll. Then we acted according to the instructions.

The procedure can be seen in the video.

To close the rail, you can stick a fabric border, put moldings on glue or decorate with braid, lace, paint. The idea of finishing can be any. The main thing is to do it carefully and in accordance with the style of the interior. In place of the socket and switch, I cut through the fabric, made a hole with an allowance of 2 cm per side and fixed it around the perimeter with the same rail as the entire panel. The office needs silence for work, so the fabric was attached to a rail, a thin layer of foam rubber was laid.
You can pre-glue the frame from the rails to the size and sheathe them with a cloth. The insulating substrate is inserted into the frame. Sheathing is done imperceptibly with carnations on the reverse side. Ready-made sections are mounted on the walls with glue. It remains to mask the joints of the frames.
Advice! The method of frame covering is convenient if it is necessary to frequently replace the lining with another one. Or update in places where the surface is quickly wiped and smeared, for example, in hallways and corridors.
A beautiful finish is obtained by creating a relief surface. The underlayment is installed on the frame. A thick layer of foam rubber is attached to it. Everything is covered with fabric. The fabric is cut out with an allowance of 10 - 15 cm. It is fixed with a stapler from the back. Then, on a convex surface, along the markings, a fabric with foam rubber breaks through to the base, resulting in a recess. Fragmented decoration perfectly decorates the walls at the head of the bed, zones soft corners in the living room.
Textiles have long been used by people to decorate residential premises, and such rooms looked very solemn and luxurious. Once upon a time, wall decoration with fabric was carried out only with noble and expensive materials - velvet, silk, brocade.
Previously, a space with such walls seemed purely royal. Now various fabrics with certain quality characteristics can be used, which are selected according to general style premises.
With the help of textiles in the room, a special feeling of coziness, warmth and comfort is created, which is difficult to achieve using ordinary paper wallpaper, plastic and wood panels or other finishing methods. There are several ways in which walls are finished with fabric, each of which has its own advantages and disadvantages, including the method of installation. Below we consider the main of these methods, their features and applicability in various styles interior.
Common ways of textile wall decoration are: wall upholstery with fabric, similar to the installation procedure stretch ceilings, pasting the walls with fabric, similar to pasting the surface with ordinary wallpaper, and draping the walls with fabric, thanks to which you can decorate the room or part of it in an original way. In principle, any of these procedures can be performed independently, but this is a rather laborious process.

When these methods seem too complicated or energy-intensive, and you still want to finish the room with textiles, they often resort to using textile wallpapers, the procedure for gluing which is practically the same as gluing paper wallpaper.
The upholstery of the walls with fabric is, rather, a close-fitting, since a special frame is covered with a certain material around the perimeter. It is difficult to perform such a procedure on your own, but it is possible. Most often, people turn to construction companies, which shape surfaces in a similar way. In specialized firms, a choice of materials is presented from which the frame for the wall or part of it is made. They can be made from wood, metal, plastic or rubber.

Wall upholstery with fabric involves special fastening devices, thanks to which the fabric does not stick and is not nailed to the frame, but passes into the gaps on it and is fixed. To increase the soundproofing of the wall, you can use a foam rubber or synthetic winterizer backing, which will also make the surface soft.
If the procedure is performed independently, the easiest way is to make a frame of wooden planks and nail or glue the canvas to them.
But such wall decoration with fabric means that during the repair the entire structure will change along with the frame. When using the special mounting systems described above, it is possible to simply change the textile fabric by reattaching the new one to the old frame.
Often, only part of the surface is performed in this technique, making it out as a panoramic picture of fabric, which is also used for curtains, tablecloths or furniture upholstery.

Given the choice of a certain color, walls are decorated in a similar way in interiors in the style of classic, modern, and some ethnic styles. Different colors and textures allow you to use this method of wall decoration in almost any style, except for high-tech and techno styles.

The textile fabric can also be glued to the wall surface, having prepared both the fabric and the wall surface in advance. The walls are prepared as follows: first they are cleaned, then puttied and primed.
Walls to be covered with fabric must be clean, smooth and dry in order for the textile to adhere well to the surface.
Pasting the walls with fabric also implies the preparation of the fabric itself. First of all, for this, a small piece of the material used is measured, and then soaked and dried in a warm place. If the fabric has not shrunk, it is used without pretreatment. If she has sat down, then the entire textile fabric is then wetted and dried so that it does not sit down already in the process of gluing. In any case, before gluing the fabric, it must be carefully ironed.

The fabric is cut into strips from ceiling to floor with allowances of 10-20 cm. Then these strips are sewn together into a large canvas, which should be equal to the area of \u200b\u200bthe wall with allowances along each edge. It is desirable that the canvas be as wide as possible, so that there are as few seams as possible. Some sew a canvas equal to the entire surface area of \u200b\u200bthe walls, but it is very difficult to work with such a large area of \u200b\u200bmaterial. Before gluing the canvas to the wall surface, it is ironed again, especially at the seams, and then rolled up along the height of the wall.
Pasting the walls with a cloth is usually carried out by two people. The fabric is glued not over the entire area, but along the edges of the canvas - from above, on the sides and below. The order of gluing can be different: first one side, then the top, and at the end the second side and bottom, or first the top, then the sides and bottom.

More often, one edge of the wall is first glued, for example, the right one, then a fabric is applied to it along the entire height from floor to ceiling and ironed with a roller. Then the roll is unwound further and the upper edge is glued.
If the fabric is too heavy, it can be additionally secured with slats so that the glue "grabs".
After these two edges of the canvas are glued, i.e. the glue dries, the two remaining edges of the canvas begin to be glued. To do this, the fabric is stretched and glued to the left. Then the canvas is again slightly stretched and glued from below.
Once the glue has dried, carefully remove the slats using pliers while holding the fabric. The stock of textiles along the edges is removed or folded and left under the plinth. The choice of skirting boards at the edges depends on the style of the room. The advantage of this method is that the places where there were slats, or instead of a plinth, you can use textile decor - fringe, small draperies from the same material, etc.
Most often in modern interiors Not all walls are covered with fabric. One or two walls are chosen, most often in the living room, which will be the main ones in the room - it is they who are pasted over with silk or velvet. Mirrors, pictures or a TV are hung on them, i.e. the textile wall becomes the center of attention in the room.

by the most in a simple way among others is the drapery of the walls with fabric, but the same method provides unlimited scope for imagination, since you can skillfully apply it in a variety of rooms.
Draping the walls with fabric provides for the installation of a decorative strip under the ceiling, which closes the semblance of a cornice. It is on the eaves that the canvas is fixed, which is much wider than the width of the room, due to which the folds necessary for drapery are formed. The installation method of the cornice is very simple, so you can easily do it yourself.

Khasanzyanova Aisylu Gera Summary of the myth Gera Ludovisi. Sculpture, 5...

Indians have a calm attitude towards death. The reason is simple. They believe in...

It is known that at the moment of death the soul leaves the physical body. But left...