


INSTRUCTIONS AND PROPHECIES OF THE Blessed MOTHER ALIPIA GOLOSEEVSKY, Kyiv...


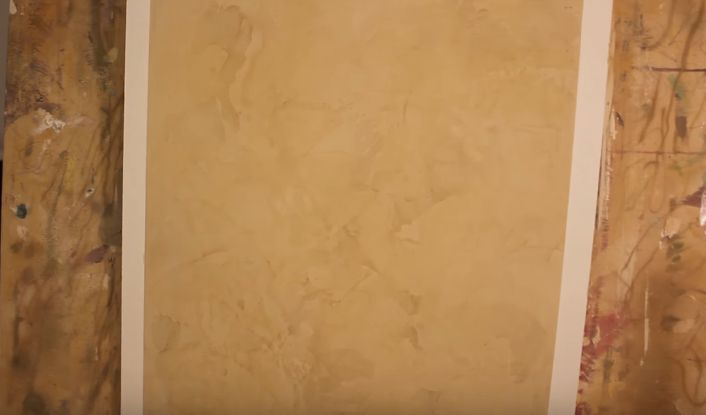
Many people are surprised by the Venetian plaster glowing from the inside, which has the effect of translucency: only professionals know how to apply a coating of amazing beauty. But even beginners in the painting business can master simple techniques for working with Venetian mixtures. The main thing is to follow the correct procedure. Before starting work, it is worth making test samples on pieces of plywood or drywall to get a feel for how the delicate Venetian behaves.
All methods of applying Venetian plaster require the obligatory alignment of the walls. Alignment is carried out in 2 stages: the wall is prepared for puttying with the starting compositions, the finishing putty mixture is brought to perfect smoothness. If leveling is carried out by hired workers, you should order putty for painting or clarify that the decoration will be done with Venetian plaster.
After leveling, the wall is dried for 24-48 hours. The final polishing of the surface is done with a fine-grained emery cloth. Dust must be carefully removed.
soak the wall primer composition under lime and gypsum plasters(with quartz filler). The choice of primers is quite large, and their characteristics practically do not differ from each other. It is advisable to apply 2 coats of primer to ensure good adhesion of the decorative coating to the wall.
Applying Venetian plaster will require little:
The material for Venetian plaster consists of a lime binder and a filler (marble dust) and is laid in a very thin layer.
If the spatulas and trowel are new, then you need to carefully inspect all their edges, corners and work surface. There should not be the slightest defect on the instrument. Professional craftsmen old, well-served trowels are used for applying the Venetian: they have sharpened rounded corners and a very smooth surface.
New tools can be prepared specially:
Since Venetian plaster must be applied in a very thin layer (1-2 mm), the possibility of the appearance of the smallest scratches must be avoided. For this, such a thorough preparation of the working tool is needed.
Before applying Venetian plaster, you need to mix the finished composition (in the form of a paste) until smooth or combine the dry mixture with water. The proportions of the components are indicated on the packaging of the Venetian, and the ratio of water and mixture must be very strictly observed. It is very important to pour the dry ingredients into the liquid, and not vice versa. During the filling of the dry mixture, the mass must be mixed, bringing it to uniformity. Leave the mass to infuse for 5-7 minutes and mix again.
The classic scheme for decorating walls with Venetian plaster consists of 3 stages:
To get a color coating, you need to add color to the plaster. This can be done directly in the store where the mixture is purchased. You can also tint it yourself, given that the plaster will be lighter when it dries. In order not to make a mistake in choosing a shade, you can apply a smear of the colored mixture on a white surface and dry it.
The rules for applying the base layer are not particularly complicated. It is very convenient to take the mixture with a spatula, laying it on the edge of the trowel. After that, the tool must be pressed against the wall surface at a slight angle: the front edge must be raised by about the thickness of a finger. Rub the mass into the surface with a free arcuate motion. Cover the entire wall gradually, in small squares.
It is very important to apply strokes so that they overlap the neighboring ones by 0.5-1 cm. The plastered wall must be dried for 6-8 hours (you can leave it overnight). Apply the following layer on the prepared surface:
In conclusion, the coating is glazed. Apply a strip of mortar on a wide spatula, press the tool against the wall, holding it at a very large angle to the wall surface (75-80º). Make an extensive stroke in one continuous movement, pressing the spatula firmly against the wall.
On the applied stroke, you need to draw the spatula again, smoothing it and making the paste layer very thin. Glazing is desirable to produce separate squares (about 1 m²). Having processed 1 square, you need to move on to the next. Having finished applying the solution, return to the previous one and polish it with a clean spatula to a light gloss. Apply the solution on the 3rd square, polish the 2nd area and cover the new part of the wall with paste.
It is convenient to arrange the squares when glazing with a ladder, starting from the upper corner of the wall and gradually moving to the side and down. The boundaries of individual sections need to be joined with a slight overlap, combining them together. Having finished finishing, polish the wall again with a spatula and dry it.
A high-quality plastered surface will not need sanding. In the presence of the smallest irregularities, it is worth wiping it a little with very fine sandpaper, smoothing it to perfect condition. Dust must be removed very carefully so that the wax lays evenly. That is why the craftsmen prefer to polish the wall well, avoiding the use of an abrasive: the smallest dust particles constantly settle on the wall and complicate the work.
For wall waxing, special compositions based on natural wax are used. You can buy them in the same construction departments where the mixture for Venetian plaster was purchased. The composition is applied in a thin layer:
When applying wax, try to leave a very thin layer without streaks at the edges of the stroke. All flaws reduce the quality of the coating, as they become very noticeable after polishing. The most convenient way to process small areas, which the master will have time to finish in 20-30 minutes. When applying wax, you need to use a glazing scheme: starting from the top corner, with a ladder, processing a section of the wall and returning to the previous one.
The wax has time to dry while the wall is being finished. Having finished the work, you need to immediately proceed to the final stage - polishing. To add shine, use a soft dry cloth. With a rag, you need to perform circular movements, achieving the appearance of gloss.

Another very easy-to-perform method is to imitate an old, cracked wall from time to time. Thanks to various additives in the polishing layer (wax or varnish), the decorative effect of such a coating is very high. This technology of applying Venetian plaster requires less time than the classic version.
Except standard set Venetian plaster tools this case It is advisable to purchase a building hair dryer. This will significantly speed up the drying process of the coating. For finishing you can use glitters, metallic powder (for gold or silver), phosphor (TAT33 noxton, for example) or leave wax or varnish colorless.
The effect of cracking lies in the method of applying a layer of plaster:
After drying, the wall is completely ready for use. Lacquering gives the plaster greater resistance to wet cleaning. But such a coating is devoid of the mysterious volumetric effect inherent in wax.

The technique of applying Venetian plaster imitating the surface of marble is not particularly complicated, but rather time consuming. With this method, the master actually draws a pattern inherent in the stone. The creative process implies the presence of artistic skill and a sense of color.
The pattern of marble slabs consists of smooth transitions of shades of the same color with occasional splashes of black. Almost parallel layers are visible on the polished plane, formed during the sedimentation of calcareous crystals. You can create a similar pattern using colors and conventional working tools: a spatula and a trowel.
The technology for applying marbled Venetian plaster includes laying the base layer. It can be left white or tinted in one of the shades. Strokes should be long and located along the future layering of the pattern. After slightly drying the surface (5-7 minutes), you can additionally draw uneven long lines with a trowel.
Color the Venetian in 2-3 shades of color. Separately, make some black paste. Apply different plasters to the trowel without mixing it. Add a few drops of black. Observing the previously chosen direction of layering, stretch the paste over the surface with long uneven strokes. At the borders of strokes and areas, you should try to overlap, continuing the drawing. Finishing the next square, dry it for 15-20 minutes and polish with a spatula to a gloss.
Decorative Venetian plaster, the application technology of which is quite simple, is becoming increasingly popular. You can make it with your own hands, it is important to follow the rules that are the same for all methods: apply with separate strokes. Overlapping each other, they create color transitions that can be emphasized by applying wax or varnish.
Venetian plaster- a vivid example of a beautiful decorative design, known for about two thousand years. It retains great popularity to this day. With its help, walls, fireplaces, cornices, columns, ceilings are trimmed both in private houses and public buildings. Applying Venetian plaster is a rather complicated process that requires special knowledge, work skills and financial investments. But the result is the realization of the most diverse design solutions, giving the interior a unique, luxurious, majestic look (the photo below is one of the possible options).
Venetian plaster is used for interior decoration houses and apartments, where it can be used in the design of any room: bedroom, hall, hall, living room. It can be found in the premises of offices, bars, restaurants, hotels, hotels, saunas, baths.
For the design of facades, the material is used extremely rarely. This is due to its high price and harsher operating conditions outside.
The surfaces to be decorated in the course of the work being carried out are completely covered with a finishing layer, or it is applied in fragments, harmoniously combining with another cladding.
Materials for obtaining Venetian plaster:
The first can be both natural and artificial origin. Dyes help to get a wide variety of shades. They can be easily selected for a specific design project.
For production plaster composition use flour from marble, granite, onyx, quartz and other stones.
Lime or acrylic is used as a binder, which makes the working mixture very plastic.
An aqueous solution is more environmentally friendly than a latex emulsion.

Venetian facing concrete, brick, stone and wooden surfaces.
The market is filled with all sorts of ready-made solutions sold in plastic buckets. Using them, you can achieve different visual effects on the surface: its dullness, velvety, gloss.
It should be borne in mind that the topcoat of the Venetian is translucent. Defects of the rough base are visible through it, therefore, its careful preparation is required.
Venetian - one of the varieties of decorative plaster compositions (this can be seen from the photograph). It differs from finishing materials similar in purpose to its appearance, composition, application technology, and operational characteristics.
The technology of applying Venetian plaster involves obtaining a final coating that has a number of positive characteristics. Despite this, the material has minor flaws. All of them are presented in the table.
Advantages and disadvantages of Venetian plaster
| № | Positive properties | Characteristic cons |
|---|---|---|
| 1 | decorative indicators of the material are pronounced, allowing to achieve a mirror effect on the decorated surface | very high cost, both of the Venetian woman herself and of the work to attract specialists |
| 2 | plaster is environmentally friendly, because it is made from natural (natural) components | to achieve different effects, it is necessary to apply different methods of work |
| 3 | the formed coating is resistant to direct exposure to water and steam, which makes it possible to use the material in bathrooms, swimming pools and other wet areas | fairly complex technologies for creating coatings, often requiring the involvement of professionals |
| 4 | the plaster layer does not burn | the final finish is very demanding on the state of the rough base, which should be leveled almost perfectly |
In view of a large number advantages, the main of which is the decorative variety of results achieved, the Venetian remains popular in decorating rooms. Although the work takes quite a long time, but the result (photo below) is worth the cost.
The mixtures are divided according to the composition and technique of forming the final coating. Venetian plaster, the application technology of which consists in creating many layers of marble chips, additives and an astringent component, is called classical. Its types:
With the help of these materials, the interior is given beauty, style and originality.

Before applying Venetian plaster to a working base, you will need to prepare it and stock up on tools. The preparation process consists of a series of manipulations performed sequentially:
The primer for the second layer can be painted to match the color of the plaster.
Work activities will require the following tools:
Preliminary preparation is designed to speed up the application of plaster and properly prepare the base for this. Otherwise, the resulting final decorative design will have defects in the working surface.
There are basic ways to apply Venetian plaster. Their use can be used to simulate various surfaces. Plastering techniques differ in the order and method of performing actions. Let's consider them in detail.
It is often required to obtain the effect of marble on the finished surface. It is recreated in the following order of manipulations:
The solution is applied by moving the tool in different directions.

An approximate result can be seen from the photo.
The classic way is to decorate the wall, created by several multi-colored layers of the mixture. The solution is prepared in advance with some margin. To do this, use several containers, the shades of the material in which differ due to the use of different colors. Operation steps:
The polishing process will speed up the use of the grinder.
The effect of the cork tree is obtained by forming the primary level from a solution of different colors. Next, they act like this:

An example of a "wooden" finish is the following photo.
The working mixture is stirred until a non-uniform shade is obtained. Hairdryer allows you to give the plaster an original texture. To do this, it is either brought closer or removed. It is clear that you need to make movements periodically.
Venetian compositions allow you to create relief patterns and patterns. Here's how to properly apply Venetian plaster to create texture:

The photo below shows a vine relief pattern.
All the variety of technologies for applying the composition to the base is caused by the need to achieve different effects. Application various techniques allows you to simulate the appearance of a large number of natural materials.
Before choosing a plaster for work, it is necessary to clearly represent the desired result. A number of factors play an important role in this. The main prerequisites are:
Based on the purpose of the premises, the following tips for choosing the working staff are distinguished:
The Venetian allows you to imitate marble, jasper, malachite, onyx, quartz, pearl facings. With its help, wooden, leather, fabric textures, various drawings are created. The applied coating is both matte and glossy.
Before buying, you should first calculate the amount of material needed for work. It is advisable to read reviews about him and his manufacturer. Instructions for applying Venetian plaster will help you understand the technology of coating.

The nuances of the plastering process are as follows:
When purchasing a ready-made plaster composition, you can see the final result in the photograph from the package. Choose the material that is most appropriate to achieve the desired effects. Taking into account the nuances improves the quality of the result (photo).

There are no special rules for caring for applied Venetian plaster. It must be taken into account that during the first two months the received decoration do not wash (during this time it completely hardens). During this period, it is recommended to protect the surface from water and dirt.
After the specified time, the resulting contamination is removed with a sponge (rag) moistened with water. Can be used detergents containing no abrasive particles.
The wax layer will need to be updated periodically: at least 1 time per year. This will preserve the appearance of the surface for a long period. She will have pervoz this species.
The technique of applying Venetian plaster allows you to get many unique effects in interior design. The achievement of this is facilitated by the observance of the order of actions and all the nuances, the choice suitable material. Ready formulations have a high price. The process of their independent production will reduce the cost. You can also apply the solution with your own hands. To do this, you need to be completely confident in your skills. If in doubt, it is better to involve professionals. An example of the Venetian application technology is discussed in the following video.
An economical version of creating Venetian plaster with your own hands is shown in the following video.
Venetian plaster is a special type of decorative finishing materials. It is used exclusively to decorate the room, since the starting layer will require a large number of material, and its price is quite high. Therefore, leveling the walls with such plaster is unprofitable. Do-it-yourself Venetian plaster must be laid on certain rules and taking into account climatic features, the material of the treated surface and many other factors. Therefore, if there is no self-confidence and experience in carrying out such work or the qualifications of a finisher, it is better to contact a specialized company.
Key Benefits this material are the following:
 Venetian plaster – “Glow effect”
 The main disadvantage is the high cost of the material. In addition, it is quite difficult to work with it, and before applying Venetian plaster, the surface to be treated must be perfectly leveled.
Venetian plaster is made from 3 main ingredients: crushed natural stone(quartz, onyx, granite, marble), binder and color pigments. Previously, slaked lime was used as a binder, but now acrylic resins are increasingly used instead. Synthetic or natural substances can be used to tint the composition.
Such plaster can be laid on surfaces made of brick, concrete, natural stone or wood. The main feature of the composition is its transparency, due to which the effect of highlighting the surfaces is obtained. Even small defects are visible under a layer of translucent finish, so they must be carefully hidden with starting plaster, putty or drywall.
 Venetian plaster is very capricious, so the walls must be perfectly even.
 There are 4 main types of Venetian plaster:
 The main types of Venetian plaster
 Before buying Venetian plaster, it is important to decide what kind of coating is planned. The material can imitate marble surfaces, malachite, onyx, quartz, pearl and so on. Some types of "Venetian women" can imitate the texture of fabric, natural leather or wood. It is also important to decide whether you need a matte or glossy surface.
 Venetian plaster: imitation of fabric, leather, stone, wood
 Also, when choosing, you need to take into account the features of the interior and the purpose of the room where the work will be carried out. For example, surfaces in bedrooms are best finished with pastel-colored materials. For living rooms, dark or saturated colors are suitable. For children, it is recommended to use colorful mixtures. Also, before buying, it is better to clarify all the nuances that are associated with the operation, application of Venetian plaster and the peculiarities of caring for it.
Calculating the consumption of this material is quite simple. First you need to calculate the total area of all treated surfaces, moreover, you need to round up. Layer thickness and material consumption per square meter indicated by the manufacturer on the packaging. Provided that the plaster layer recommended by the manufacturer is applied, the consumption calculation formula is as follows: N = R x S x K, where N is the amount of material, R is the amount of material per square meter, S is the total surface area, K is the number of layers.
To finish the surfaces with Venetian plaster, you will need the following:
Preparatory work includes the following steps:
If a dry mix was purchased at a hardware store, then how to make Venetian plaster is written by the manufacturer on the package. Usually the mixture is poured out of the bag and diluted with water, only after that color is added, if necessary. For stirring, use an electric drill with a mixer attachment. The consistency of the finished mixture should resemble sour cream. After preparation, the composition is left for 10-15 minutes, and then mixed again.
 Preparation of Venetian plaster mortar
 It should be remembered! The air temperature during the preparation of the mixture should not be below 10°C. One portion of the solution should be enough to process the entire wall, otherwise the boundaries of materials from different batches will be clearly visible.
Now about how Venetian plaster is done on your own. To do this, mix flour from natural stone (marble, malachite, quartz, granite or others) with slaked lime in equal proportions. Then add a little soap to the mixture, then mix the components, as indicated above. Color is added at the end.
There are some rules for decorating walls with Venetian plaster. The material application technology is as follows:
It should also be noted that Venetian plaster dries rather quickly, so it is not recommended to work on the entire wall at once - it is better to limit yourself to an area of 1 square meter.
 When applying Venetian plaster, it is necessary to work with small sections of the wall
 Material consumption largely depends on the number of layers, as well as the desired effect. Most manufacturers give an average figure of 0.5 kg per square meter. meter. Colors for also differ in some features: after drying, they can retain a shade, darken or lighten by several tones. Therefore, it is recommended to clarify all the nuances with the supplier or seller in advance.
There are different techniques for applying Venetian plaster. Consider only the most popular options.
The mixture is collected on a spatula and applied to the wall with chaotic strokes, while it is important to process the entire area without gaps. Without waiting for the solution to dry, the surfaces are textured with a trowel. After that, work is suspended for 2 hours. Now you need to prepare 2-4 types of solution using a different number of colors. They are collected in small portions on a spatula or trowel, after which they are applied with long arcuate strokes. After processing the entire surface, it is left to dry for a day. If necessary, repeat the above procedure 2-3 times, while drying each layer requires at least a day. The dried surface is treated three times with a grinder, each time changing the nozzles. At the end, the so-called “ironization” is carried out - processing with a trowel, during which the tool is pressed against the surface with force. The last procedure is waxing or varnishing.
 Venetian plaster allows you to create a marble effect
 First, the first layer is applied in the same way as in the case of marble imitation, after which it is left for two hours. With the help of a trowel, all excess material is removed, and then ironing is carried out until the surface acquires a metallic sheen. Then a monophonic plaster is prepared and applied in a thin layer, after which the “iron” is carried out again, but now it is enough to wait about 40 minutes. All subsequent layers (no more than 10) are applied using the same technology. After the coating has completely dried, it is treated grinder three different nozzles, and at the end they are covered with wax or varnish.
VIDEO: applying Venetian plaster
In translation, this word means "antique". The technology for applying Venetian plaster involves the use of a spatula, and the layer must be thick, and the movements must be chaotic. Then turn on the building hair dryer and warm the surface. Due to a sharp increase in temperature, the plaster will crack. Upon reaching the desired effect, the heat treatment is stopped and the coating is left to dry in the usual mode throughout the day. Next, a finishing thin layer of a different color is applied, and at the end, standard grinding in three stages and ironing.
 Craquelure - artistic cracks or the effect of artificial aging
 To achieve this effect, the first layer is made of different colors. Making this type of Venetian plaster with your own hands is quite simple. First you need to prepare 2-3 portions of a solution of different tones, then mix them, but not completely. The mixture is collected on a trowel or wide spatula and laid in a thick layer on the surface. Applying the composition in this case is not enough, you also need to dry the coating with a building hair dryer. Keep the device at different distances from different parts of the wall to get a non-uniform texture. Characteristic cracks should appear on the surface. Then the coating is left alone for 48 hours to dry naturally. Next, a second layer of plaster of a different shade is applied. At the end, the surface is treated with a grinder or sandpaper, and then waxed or varnished.
VIDEO LESSON:
Before doing this type of Venetian plastering, you need to cover the wall with a penetrating primer, and after it dries, treat the surface with a covering primer. After 2 hours, start the main work. To carry them out, you will need a fur roller. With it, Venetian plaster is stretched along the wall in a thin, even layer and left to dry. After 3-4 hours, when the material has set, it is necessary to “pass” with a narrow metal spatula along the most protruding places and cut them off. A trowel is required to apply the next layer. After completing the finishing work, you need to give the wall 6 hours to dry, and then again remove all protruding fragments. Then Venetian plaster is mixed with a small amount of finishing varnish. To do this, you need a drill with a mixer nozzle. After applying the composition to the wall, you must again wait 6 hours. At the end, ironing is carried out with a trowel until a metallic sheen appears and wax is applied.

The application of Venetian plaster is a rather complex undertaking that requires certain qualifications and experience in carrying out plastering works. Therefore, if there is no certainty own forces, it’s better not to try to save money, but immediately hire a team of specialists in this field, or at least get a master class on Venetian plaster.
Despite its antiquity, the decoration of residential and public buildings with plaster is still very popular. This is explained and practical benefits similar design of the walls, and an unusually attractive appearance. Do you want to make your home more beautiful without resorting to third-party craftsmen? Then do-it-yourself Venetian plaster is one of the most preferred options for you.

Venetian plaster itself has been around for a couple of thousand years and predates its current name. Even in ancient Rome, builders noticed that quarry waste in the form of dust and small fragments can be used to prepare a finishing mixture, which, with a certain application technique, is in no way inferior to normal marble in appearance.
Subsequently, the recipe for such plaster became very popular in Venice during the Renaissance, and from there it bears its current name, which in the original sounds like stucco veneziano. Now let's figure out what kind of finishing material it is and what it consists of.

The main component of Venetian plaster is very fine stone chips. Moreover, it can be not only marble, but also onyx, malachite, granite, quartz and other minerals. Between themselves, this stone crumb is connected with the help of slaked lime. However, lime has recently been replaced with a synthetic component - acrylic. Such Venetian plaster in its appearance is in no way inferior to the “classic” composition, but at the same time it is much more convenient to work with it. Complement the mixture with various dyes, also called colors. They give the Venetian plaster a certain shade, necessary for the owner of the finished premises.
Important! If desired, and if there is time, Venetian plaster can not only be applied, but also prepared independently. To do this, you will need stone chips, which can be obtained from a workshop that works with marble and granite. slaked lime can be found in a building supermarket, and colors can be found in stores selling paints and plasters. But remember that factory formulations already have a seasoned recipe and certain properties.

Separately, it is worth considering the advantages and disadvantages of Venetian plaster as a material for interior decoration. Of the advantages, the following can be distinguished.


As for the disadvantages of Venetian plaster, these include the high cost of the material, the complexity of the finish and the high requirements for the base coat - it must be perfectly even and well puttied, without bumps and defects. Without the last factor, you may run into a problem when all the imperfections of the wall will be visible after finishing.
A wall finished with plaster, depending on the type of material, may have a different texture, color, look modest and discreet or, on the contrary, very expensive. is one of the types decorative finishes surfaces. It is used for various purposes, including for finishing facades.
Before proceeding with the description of the techniques for applying Venetian plaster with our own hands, let's get acquainted with the list of tools needed for this work.
Table. Do-it-yourself Venetian plaster - a list of tools.
| Instrument name | What is used for |
|---|---|
| Applying textured plaster layers and drawing veins on the material |
| Essential tool for applying Venetian plaster and wax |
| Transferring the plaster mixture from the container to a wider spatula, mixing and tinting the material |
| Grinding and cleaning of layers of plaster, removal of excessively protruding elements |
| Storage and mixing of white and colored plaster |
| Manual polishing of hard-to-reach or small areas treated with Venetian plaster |
| Machine polishing large area treated with Venetian plaster |
| Mixing large volumes of Venetian plaster |
construction mixer
From the description of Venetian plaster, its features, advantages and disadvantages, let's move on to the consideration of the main application techniques. But before that, learn how to prepare walls for finishing work and how to get a composition of a certain color on your own.
Important! As mentioned above, finishing walls and other surfaces with Venetian plaster is a complex process that requires some experience and skills. Therefore, before starting construction work, take a small amount of composition and practice on white and smooth MDF panels. At the same time, it is advisable to try several different plastering techniques and experiment with several colors.


All work related to plastering begins with the preparation of the walls. If there is any old finish on the walls (paint, wallpaper or anything else) - remove it completely and as carefully as possible. The walls are also cleaned of involuntary traces of repair in the form of stains and building dust.

After removing the previous finish, proceed to fix large wall defects. Cover cracks and crevices cement mixture, remove the protrusions with a grinder, rub the rough places with sandpaper. As a result, you should get a relatively flat surface without any special flaws, suitable for further finishing work.


Next, apply a primer, starting and finishing putty to the surface in sequence. After sanding with the last sandpaper, you should get a perfect flat wall devoid of any flaws. Remember that all surface imperfections after finishing Venetian plaster will be very noticeable.

Finish preparing the wall for Venetian plaster by applying two (or in some cases three) coats of primer. At the same time, its color should be either neutral white or close in shade to the future finish.
Before starting to apply the finish, the owner of the premises or the master who does the work for him must choose the color of the future Venetian plaster and “cook” it using a base white mixture and several different dyes. This process is called tinting, and from the step-by-step instructions given in this subsection, you can familiarize yourself with how it happens.
Step 1. Choose the right shade of Venetian plaster. In this case, use a tinting fan. It contains not only the primary colors, but also their shades, the total number of which can reach several tens or even hundreds.

Tinting fan
Step 2 Prepare tools for tinting - a clean sheet of thick paper, on which you can see if the prepared Venetian plaster matches the selected shade, a small container for mixing the composition, a narrow spatula and a set of dyes.

Step 3 Prepare a small amount of neutral white Venetian plaster. Choose the right dyes. In this case, the master will achieve a dark red hue with an offset to brown. For this, basic red, red-brown, brown and black dyes are used. The latter is necessary to reduce the brightness of Venetian plaster and make it more similar to natural marble.

Step 4 Select a container of base dye (in this case, red), shake it up, and add a generous amount to the white plaster.

Step 5 Stir the plaster and dye with a narrow spatula until the composition acquires a uniform color.

Step 6 With a narrow spatula, apply a small strip of plaster mixed with the base color onto a white sheet of paper. Compare it with the desired shade on the color fan and determine which dyes and how much to add. In total, several such checks will be made during the tinting process, with the help of which you can gradually achieve the color that was originally intended.

Step 7 Add a second color to the plaster, which will shift its shade to the pre-selected one. In this case, we are talking about red-brown color. As before, stir the plaster until smooth, apply a small strip of the mixture to the paper and match the color with the selected shade on the fan.

Important! When giving the plaster a color, keep in mind that after drying it will be lighter than in this moment, one, and sometimes two tones.
Step 8 Add literally a few drops of black color to the plaster for a more consistent look. natural stone and some reduction in brightness, which for this finish will be redundant.

Step 9 Apply a stripe of plaster to the paper and match with your chosen shade. Adjust the mixture with dyes until it reaches the desired appearance. After that, the tinting can be considered complete - then you will prepare Venetian plaster according to the same principle, but on a large scale, for application to the wall.

Powder paints
Let's start by looking at the basic technique for applying Venetian plaster. It is called classic and requires a mixture of only one shade. In this case, Venetian plaster of milk chocolate color will be applied.
Step 1. With the help of tinting, prepare a certain amount of plaster of a certain shade and select the place where it will be applied. Keep in mind that the "Venetian" dries quickly, so work with small areas of about 1 m 2. Different places should overlap a little.

The example uses a training canvas
Important! If Venetian plaster is applied by two different people, then periodically they should change places - each has its own way of working, but at the same time it is necessary to achieve approximately the same appearance of the walls and their individual parts.
Step 2 Apply the first layer of Venetian plaster using smooth rounded movements with a spatula. It eliminates invisible wall defects, levels it and is a link for subsequent layers of decoration. Remember that you need to apply a small amount of plaster and a thin layer. At this stage, the presence of small bald spots is acceptable.

Step 3 Wait 60 minutes for the first coat of Venetian plaster to dry.

Step 4 Apply a second coat of Venetian plaster using a trowel. It should be as thin as the previous one, but at the same time form veins and other elements here, which in the future will become a “pattern” on the wall, imitating natural marble or any other stone.

Step 5 Apply a third layer of Venetian plaster, which in classical technique called "rubbing". For this work, use a Japanese spatula, while pressing it against the wall with considerable effort. With this tool, apply a small amount of plaster over the second layer, and immediately make movements to remove the excess.


Step 6 Without waiting for complete drying (but not immediately after application), sand the third layer of Venetian plaster with an abrasive sponge or very fine sandpaper. Shake off the dust formed during this operation from the treated area of the wall.

Step 7 After the final layer of plaster has dried, wax it. A small amount of it is applied to the spatulas according to the same principle as in the previous operation - first the composition is on the wall, then its excess is removed with pressure. Wax will make Venetian plaster one tone darker, give it shine and protect it from abrasion and moisture.

Step 8 20 minutes after waxing, the section of the wall finished with Venetian plaster is wiped with a dry and clean cloth. Before that, you can “grind” it again with a Japanese spatula, removing excess wax.


Now let's look at a little more complex technique applying Venetian plaster - here the work comes with mixtures of the same color, but different tones - one lighter and the other darker.
Step 1. Using tinting, prepare a certain amount of plaster of the same color, but in different containers and with different shades. As mentioned above, the first composition is lighter, the second is darker. Also determine the area of 1 m 2, from which the application of Venetian plaster will begin using this technique.

Step 2 As in the previous technique, apply the first layer of Venetian plaster with a Japanese trowel in a rounded motion with medium pressure and without much wiping. In this case, use a mixture of light colors.

Step 3 Wait for the first layer to dry before applying the second. He will be responsible for the texture of the wall decoration with Venetian plaster. Apply the main part of the second layer in a light tone, drawing small veins and other elements in height. Then, on a Japanese spatula, take a small amount of dark-colored plaster and leave small spots and streaks on the surface. Thus, form a certain pattern by copying a real stone.


Step 4 Apply a third coat of light-colored plaster. At the same time, work with a spatula with serious effort, in semicircular movements, “on the peel” of the newly applied plaster. Then polish these areas. The process is similar to what happens when describing the previous finishing technique.

Step 5 Wait for the third coat of plaster to dry and sand the wall section (or practice canvas in this case) with sandpaper or a sponge.

Step 6 Wipe off the dust left on the plastered area of the wall after using an emery sponge, and apply a layer of wax. As soon as it dries, wipe everything with a dry and clean cloth. After that, a section of the wall can be considered successfully plastered with a "Venetian" in two tones.

Important! Use the technique of applying plaster in two tones, taking into account the size of the finished area. If it is large, then the difference between the shades should be minimal - otherwise the wall will be "full" and annoy rather than evoke positive emotions. But for small areas, it is allowed to use plaster with a difference of several tones.
And finally, let's get acquainted with the third technique of applying Venetian plaster - with imitation of real marble. Please note that this is quite difficult option finishing, requiring a certain experience in this field.
Step 1. Prepare the base color plaster (in this case, the red that was discussed in the tinting section), as well as black and white mixtures, with which marble imitation will be performed. Apply the first layer of "Venetian" using the composition of the main shade. At the same time, lay the plaster on the surface diagonally from right to left, leaving characteristic stripes.


Step 2 Wait for the first coat to dry and apply a generous amount of base color plaster to the spatula, add some white mixture to it and mix lightly. Then complete with black. An example of applying plasters of three shades on a spatula can be seen in the photo below.

Step 3 Apply a mixture of three plasters different color second layer. At the same time, move the spatula diagonally from right to left, drawing a strip with veins.

Step 4 Using the instructions from the previous step, continue applying multi-colored mixtures of plasters until the second layer is fully formed. Let it dry.

Step 5 Sand the Venetian marbled stucco with fine grit sandpaper. Wipe off any dust generated during operation.

Step 6 Apply a coat of wax with a Japanese spatula to protect the plaster and give it a sheen.

Step 7 After the wax dries, wipe the surface with a clean rag or a special attachment for the angle grinder.


Marble plaster
Now you know about the basic methods of working with Venetian plaster. Try this type of finish as soon as possible - the difficulties associated with working with it will turn into an amazing result.
The history of the origin of Venetian plaster (from Italian Stucco veneziano "- liquid marble) has its roots in ancient Rome. Marble was the most popular in Rome, leaving particles of shimmering dust after processing by the master. It was marble crumbs that the ancient Roman masters began to use to create frescoes and artistic patterns. In the future, marble was replaced by materials such as granite, quartz and limestone.
Having revived in Venice, the marble drawing came to life in the hands of many masters and artists, in particular Michelangelo and Raphael, and later became an adornment of majestic European churches, rich houses, as well as ancient palaces of Italian and French kings.
Today among the diversity decorative coatings Venetian plaster also occupies a special place. It allows you to realistically convey the texture, amazing shades and bewitching radiance of marble.
The consistency of Venetian plaster is closer to paint than to plaster. Nevertheless, it has a fairly large fraction of fillers - about 0.5 mm. Due to this, it is possible to create sufficiently thick layers that hide the defects of the base. It also increases the resistance to impacts, chips, scratches.

Step 1. Use painter's tape to cover the edge of the wall you don't plan to plaster. It is better to take a less sticky tape, because when the tape is peeled off, part of the wall may stretch behind it.

Step 2 Surface preparation. Venetian plaster is applied to a dry, perfectly flat, previously puttied surface. Subsequently, a classic primer is usually applied to the surface of the finishing putty, which performs the following functions:
The drying time of the soil varies from 4 to 6 hours.

Step 3 Venetian plaster, pre-tinted in the desired color by hand or with special equipment, is applied in at least two layers to create a marble effect. We will do in three layers: for the lower and upper layers take a paint of a darker shade, for an intermediate one - white. You can do the opposite by placing a darker shade between lighter layers.
Do not immediately knead a large portion of the plaster solution. This will eliminate the risk of premature drying and, as a result, hardening.
To apply the first covering layer, we use a spatula, picking up a little Venetian plaster on it. Then we transfer the paint to the edge of the trowel, and from the upper left corner, pressing the trowel to the selected area at an angle of 30 °, apply plaster mortar on the surface of the wall with multidirectional strokes. In this case, each subsequent stroke is located perpendicular to the previous one. It is best to work from a dry surface to a wet one - the area where the plaster has already been applied - otherwise the trowel streaks may remain. Therefore, try to make strokes starting from the edges of the wall or from its dry part.

Carefully monitor not only that the layer of Venetian plaster does not exceed 1-1.5 mm, but that it is as even as possible. As soon as the Venetian plaster begins to dry out (lighten in places), polish the surface with the angle of the spatula. The result of polishing the surface of the wall should be the fine veins characteristic of marble.
If gaps form during application, it's okay. That's how it's intended. Your goal is to create some streaks that will show up as you increase the number of layers.
A prerequisite is the use of a clean tool, since the slightest grain of sand will leave streaks. Therefore, after completing the application of the plaster, rinse the tool used well with water. Also, from time to time, wipe the spatula and trowel with a damp cloth. This will help to avoid the appearance of dried particles that leave marks on the decorative surface.
Although the indicated drying time for Venetian plaster is 6-12 hours, we recommended that the first layer be left to dry for 24 hours.
After the plaster has completely dried, remove flaws (roughness and small irregularities) with a spatula.
Step 4 The second layer and the third layer are applied according to the same principle. For the second layer will be used light paint. We collect it on a spatula, transfer it to a trowel; and from the upper right corner, gradually moving to the lower left corner, we begin to apply white paint with the thinnest chaotic strokes.
I would like to note that it is best to continuously distribute the paint from one corner to another.

We polish the still wet surface with the angle of the spatula, randomly crossing the direction of the strokes until a pattern and gloss appear. Working on an area of 0.5 m 2, we continue the application, subsequently also breaking the surface into sections of 0.5 m 2.
Step 5 When you have finished applying the third layer, let the material dry. Finishing with Venetian plaster usually ends at the stage of glossing, or ironing. This stage involves giving the surface a gloss with a trowel. It is very important to wait for the material to dry completely, because if it does not dry out, a chip may form during the glossing process. We would advise you to wait until the final drying of the plaster, leaving it untouched for 40-46 hours.
When all layers are dry, you can proceed directly to the glossing process. To do this, we take the trowel with our right hand, and with the left we press the blade well (almost close) to the surface to create additional pressure. Be sure to keep the trowel under acute angle, and in semicircular movements on ourselves we press all the layers to each other. In this case, pay special attention to the cleanliness of the surface. If debris remains on it, a scratch will immediately remain on the surface of your plaster, which will later be quite problematic to remove.
Step 6 In order to give the coating additional wear resistance, moisture resistance and color contrast in texture, after glossing, a waxing operation can be performed. To do this, a special wax for Venetian plaster is applied to the surface of the wall, and then rubbed with smooth circular motions using a polishing machine.

To give additional decorative effect you can tint the wax with a special decorative powder, the approximate consumption of which is 20 grams per half-liter jar of wax. To do this, dilute the powder with a small amount of water; Add the powder to the wax and mix thoroughly. If you want to get a more saturated gilded or pearlescent effect, you can increase the amount of powder, but not more than 50 grams per half-liter package.
"Sand Wind" creates the effect of sand dunes, where golden sand grains pulverized in the sun bask in the sun. strong wind. This effect allows you to visually expand the space and raise the ceiling. Additional lighting enhances the effect.
To perform this technique, you will need decorative plaster, which includes fine-grained sand.
We present two options for performing the "sand wind": a directional pattern (diagonal, vertical or horizontal) and chaotic strokes.

For a directional pattern, brush strokes are made in the appropriate direction with certain indents, and then they are connected. When shading, a large concentration of the coloring mixture is formed in one place, and a smaller one in another. When dried, the pattern is more contrasting. Where there is more sand, it is darker, where there is less sand, respectively, lighter.
To create the best effect, before applying strokes, it is recommended to tint the substrate. If you use a pearl shade, then tinting is not necessary, since small errors are hidden due to the overflow effect.
The second effect is chaotic strokes. To do this, you will need two shades of Venetian plaster and, accordingly, two brushes, so as not to waste time washing off one of the paints. With chaotic movements, first one shade is applied, then another; they are connected with a brush, which was previously used to apply a lighter shade. If you apply it the other way around, a darker shade will “eat” a light tone. It should be noted that you need to shade the colors without waiting for the Venetian plaster to dry: apply a few strokes - connect them.
If more sand forms in some place, you can beat it with the edge of the brush and blend it again.
After complete drying, fix the treated surface with colorless wax.


INSTRUCTIONS AND PROPHECIES OF THE Blessed MOTHER ALIPIA GOLOSEEVSKY, Kyiv...

Eufillin dropper in ampoules is used to treat pathologies that ...

Among all ointments for the treatment and prevention of joint diseases, the most ...