Quite often, the population is interested in how to find out if an apartment has been privatized or ...


When connecting the hob, you may encounter problems that make you think not only the average user, but also an experienced electrician:


Wiring cable for connection
First of all, understand for yourself that the hob must be connected by a separate electrical wiring line directly from the switchboard. It is not allowed to power it from an existing common junction box in the kitchen or already installed sockets.
The cable must be three-core and copper, and it is up to you to decide which brand VVGnG-Ls or NYM. Which cable is better and how they differ can be read in detail in the article "4 differences between NYM and VVGnG-Ls".

The most important thing is to choose the right section. The set of rules SP31-110-2003, compiled on the basis of GOST and PUE, states that for plates it is necessary to choose a section of at least 6mm2. 
But apparently this is about pre-installation wiring in the apartment, when it is not yet known what power the hob will be installed. Therefore, initially, a section of 6mm2 should be laid, sufficient to connect most of the existing models.
If your power is less than 7 kW, and you are sure that in the future you will not buy a new, more energy-intensive stove, then you can navigate by the following table: 
But what if the cable has already been laid (VVGng-Ls 3 * 2.5mm2), but it turned out to be of a smaller cross section than necessary for the maximum possible power of the hob (7.2 kW). At the same time, there is neither the possibility nor the desire to re-strobe the walls.
In this case, you can protect yourself in two ways, although you will have to accept the fact that you will not be able to use the full power of the panel:
 That is, if you still do not know what kind of hob you will have, feel free to lay 6mm2. Just keep in mind that low-power panels have small terminal blocks that are not rated for 6mm2. And it is correct, it is not always convenient to directly connect such a wire, you can also break the clamp.
Connecting an induction hob in a shield
A prerequisite for the installation of the hob and oven- this is the connection of these devices through an RCD + machine, or a differential machine with a leakage current of 30mA. 
Simple circuit breakers will not be able to provide protection in case of damage to the insulation and leakage to the housing.


Socket and plug for hob
 If you do not intend to run the cable directly into the panel, then you will have to install a separate outlet under it.
For example, when wet cleaning the panel must be de-energized. If you do not have an outlet, you will have to run to the shield twice and turn off the machine. And so he pulled out the plug, wiped the surface and connected it back.Fork use over convenient option regarding the maintenance and operation of the hob.
The socket must be installed on comfortable height. The recommended distance from the floor is up to 90cm. 
In this case, it is not allowed that the socket is on the same level with the hob. It is best to place it to the right or left of the device. 
If you also want to install an oven nearby, then the socket must be located below the level of the oven. Usually this distance is at the level of the legs of the kitchen. 
It is also impossible to do it too close to the floor, keep in mind the likelihood of flooding and water leaks! 
What socket to take? With a low-power panel up to 3.5 kW (usually two-burner), everything can be connected via a euro socket and a corresponding plug.
However, it will constantly work at its rated power of 16A and most likely get very hot.
In addition, if you initially took a 3 * 6mm2 cable, then getting it to the plug contacts will be a big problem. Therefore, it is preferable to use special plug and a socket for stoves, designed for currents up to 40A. 
If you have an induction panel with a power of more than 3.5 kW, then connecting through a regular plug and socket is all the more prohibited!
The location of the phase and neutral wires in the outlet does not play a significant role. The main thing is to correctly connect the ground wire (from above to the ground contact). 
But when connecting the plug, it is desirable to observe the "polarity". It is not for nothing that manufacturers mark the terminals on which the phase and zero should go. But even if you confuse the panel, it should still work properly. 
You will need a wire to connect the plug. It doesn't always come with it. In the absence of a regular one, it is necessary to purchase a three-wire PVA wire. The cross section of the wire must correspond to the power of the device (see table above).
Disassemble the plug body, pass the wire through it. Remove the insulation from the outer shell to such a length that its edge, after assembling the plug, is pressed down with a special clamp.
Stripping the veins and to ensure better contact crimp with a NShV tip. 
Tighten the screw connectors of the plug:


A big inconvenience of such models is that they very much "bulge" out of the wall - by 5-7 cm. 
Consider this point when assembling the kitchen in advance.
Panel connection without plug
If a socket protruding a few centimeters does not suit you and you want to carefully hide everything in a socket or junction box, then this can be done in two ways:
First, let's define the wires. On many models, a connected cable already comes out of the panel, but it has 4 cores. And you have only three in the socket. How to be? 
The fact is that such hobs are simultaneously designed for both single-phase 220V connection and two-phase 380V. In this case, one half of the burners will work from one phase 220V, and the other from the second. 
Some believe that the second phase is only used for control power. This is not true. Power is distributed evenly over both phases. To connect the whole thing to the usual 220 volts, just remove one core to the side and isolate it.
There remains zero (usually a blue wire), ground (yellow-green) and phase (brown, black or other colors).
You can combine two phase wires into one through the lug. For example, in many Bosch panels, where the cable is not removable, this is how it was originally done. 
There is also an option with a 5-wire cable. Such panels are usually high power from 7 kW and above. They are originally designed for 380V. To connect them to a 220V network, you need to connect two wires in pairs. 
For example, put black and brown wires into phase, and blue and gray wires into zero. The earth is yellow-green remains solitary.
But if you strictly follow the rules, then such a connection is not entirely correct. Since the protective conductor PE must be of the same cross section as the phase conductors. And it will be twice as thin.

Sleeve connection
Now you need to connect the wiring in the socket to the cable going to the panel. Select the GML sleeves corresponding to the cross section of the cores. 
If the cross-sections of the cores are different, for example, 6mm2 comes out of the wall, and 4mm2 goes to the panel, then on one side (smaller) the sleeve is sealed with an additional wire. 
After that, the ends are pressed in with a press tongs and insulated with electrical tape or a heat pipe. 
Now all this can be neatly hidden in the socket.
Connection via junction box
The sleeve is inconvenient because, firstly, the connection is not collapsible, and secondly, a special tool is needed for crimping. Not everyone has a press available, and such connections cannot be crimped with pliers.
In this case, help mounting box KlK-5S. In addition to a screwdriver, nothing is needed here, and the outgoing cable can be disconnected at any time. 
True, her contacts can be quite delicate, so do not overdo it with the tightening force. 
Besides, dimensions it, unlike powerful sockets, is small and the whole thing can be conveniently mounted behind the kitchen cabinets.
Connection is performed traditionally:

Wiring diagrams for induction hob
After all the work done, you can proceed to the direct connection of the cable to the hob terminals. On the back of the panel there should be a sticker, drawing or graphic designation of the factory wiring diagram.
For a single-phase network, choose a circuit that is most often indicated as 1N. 
According to this scheme, terminals numbered 1,2,3 and terminals 4,5 must be connected to each other by jumpers. 
Such jumpers made of copper or brass should be included with the hob. Usually they are located in a separate "pocket", in the same place as the terminals. 
If you do not install these shunts, then you will only heat part of the hob.
Often, the same problem can occur during operation, when one of the jumpers burns out due to poor contact and heating.
Before connecting, the insulation is removed from the PVA wire and the cores are crimped. Here you can use tips NShV, NKI, NShPI. Before installation, check whether there is enough free space in the terminal box for mounting certain tips. 
Sometimes you have to shorten them, or even abandon some kind.
Jumpers are installed first. According to the diagram for a single-phase hob, mount them on terminals 1-2-3. 
After that, connect the phase core to terminal No. 3 and tighten the contacts. 
To connect zero, mount a jumper between the fourth and fifth terminals. 
Insert a blue neutral wire into terminal No. 5 and tighten the contact. 
last free vein- connect the protective earth to the connector with the "ground" symbol. 
Here are a few connection diagrams for different models of Bosch, Electrolux, Zanussi, Hansa, Gorenje hobs:


If after connecting the panel starts to work in an incomprehensible way - it turns off by itself, after a few seconds it can turn on again. Do not rush to sin on the wrong installation.
It is quite possible that child protection is set in the program, water has spilled on the sensors, or the wrong buttons have been accidentally pressed. Some models have a dish recognition function. Until you put a pot on the burner, it will not heat up. 
Another common problem is that only two of the four burners work, and the rest show residual heat (the letter H is displayed). This is due to blocking during single-phase connection of three-phase models.
Thus, power is limited by software.
Therefore, first, understand the documentation well and only then climb back into the connection terminal block.
 Five common mistakes that can cause your panel to fail or cause a fire due to improper installation and connection:
1 Using an ordinary euro socket and a 16A plug for panels with a power of more than 3.5kW.
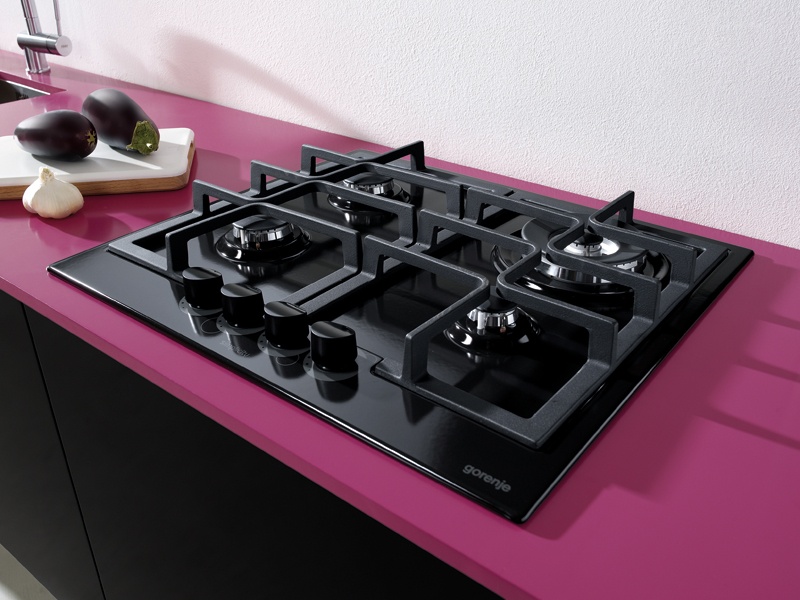
And again a photo-lesson for installation. This time I got my hands on a gas hob from Hansa. Not a bad company, by the way, had many years of experience with the stove of this company (albeit electric) - only pleasant memories.
The design of this panel is quite original - I liked it - on frosted glass fixed, as it were, separate burners ...
Instructions are also included. Here are some pictures of the installation. The first scheme, in my opinion, is rather useless. 
The second scheme has much more practical value. We will be guided by her. True, this was not fully done, due to the peculiarities of the kitchen project. But more on that along the way. 
We take a joiner's square and transfer these dimensions to the countertop. It was impossible to move the panel to the adjacent box due to the nature of the project, so I just moved it as far as possible from the wall (as a result, instead of the recommended 100 mm, I got 80 mm). 
The next step is drilling out the marking angles with an 8 drill and connecting them with straight cuts using an electric jigsaw (it is better to use a file with a reverse tooth - the cuts on the front side are simply exceptional) 
Since the panel should go onto the wall of the box, I took out the box itself and made a centimeter cutout on its side wall. By the way, after installing the plate in the tabletop, it turned out that I did it in vain on the left, it is thinner by about 4-5 mm and does not go beyond the thickness of the tabletop. But, guided by previous experience, I did just that in advance. 
The instructions do not say anything about the next step, but I always silicone the ends of the chipboard in places where the equipment is tie-in. This case was no exception. 
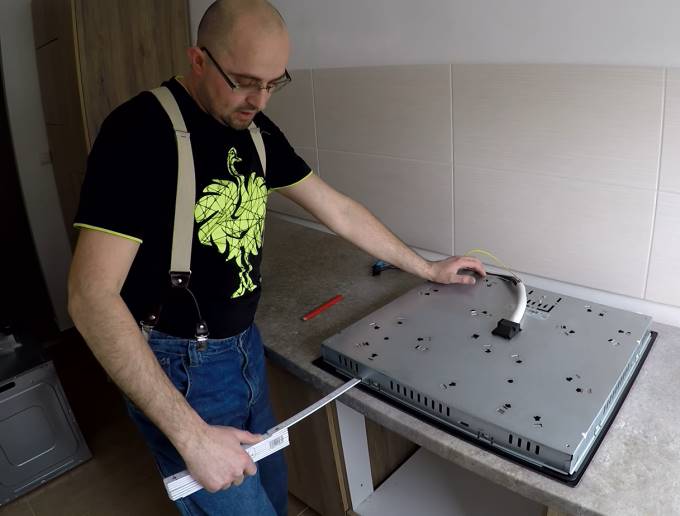
Now let's take care of ourselves hob. We turn it over (trying to make the burners crumble at the same time - they can be removed in advance))) and stick a foamy insulating tape around the perimeter (it is included in the kit)  Now we need the help of a professional, namely a gasman, to make the connection. It is forbidden to do it yourself. But the lesson needs to be completed, so I will put the stove, and then I will take everything apart)).
It remains for us to push the plate into the cut out niche, align it and screw it with special clamps. 
The instruction sees this process as follows: 
True, the width of the tabletop did not allow to do it as in the diagram, namely, to place one edge of the clamp into the cutout on the plate, and the second on the tabletop ... 
But this did not affect the degree of fixation much ... As a result, you should get something like this: 
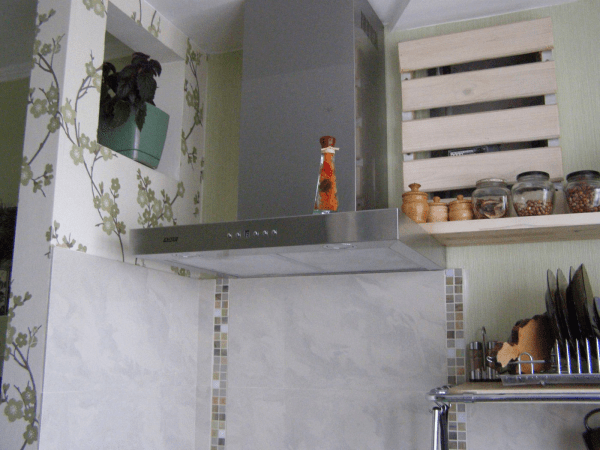
By the way, this hood for the functioning of auto-ignition requires connection to a power outlet.
Installing the hob is convenient and practical option for your kitchen. Thus, you can significantly save space, which is very important for standard small kitchens domestic Khrushchev. In addition, hobs work on the same principle as massive stoves - so why not replace them with a more convenient option. It is important to note that installing a hob in a countertop is a completely simple process and anyone who has a certain set of tools can handle it.
In order to understand the installation process and competently bring it to life, it is worth considering in detail each of the stages of repair work.
Those who have ever dealt with such work should know that it is not difficult to install a hob in a countertop. The video about this work, which is at the end of the article, is a real confirmation of this. In order to highlight all the nuances of the installation, it is worth considering the process in detail.
Sections that formed after cutting should be treated with a sealant. This is necessary so that the countertop does not swell, and also so that dirt does not get into it.

Important! You can always use aluminum tape to seal the edge. In addition to its basic protective qualities, it will be able to protect the countertop from a sharp temperature drop. Take Special attention the choice of a sealant, since the safety of the appearance of the countertop and its functionality depend on this.

The installation method will depend on which hob you purchased - electric or gas. Let's consider both options separately.
Demand electrical panels consistently high. This fact is easily explained by the fact that such devices are very reliable, high-quality and durable. Nevertheless, if such a plate is to be repaired, then it can be disconnected and taken to the workshop without any problems.
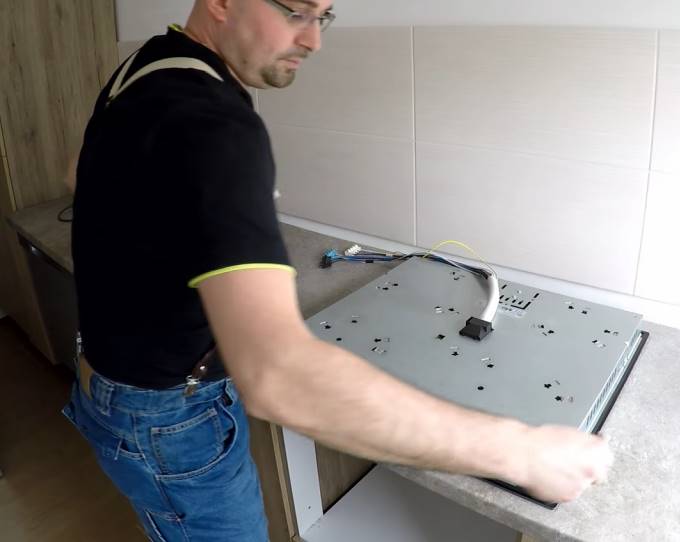
Before starting to build in the electric hob, it must be turned over and placed on the countertop. FROM inside plate, a reverse connection diagram will be drawn. Be especially careful if you have to work with the connection of the stove yourself. It is important to connect the wires correctly here.
In the event that there is a separate shield wire for connecting the electrical panel, then there is no need for a plug and socket. Simply connect the wire and install the panel into the countertop. After that, she will be completely ready for work.
Initially, you should pay attention to how the panel is attached. Install it in the countertop, then align and secure. To do this, special brackets are provided at the bottom of the model and plug the electrical wire into the outlet.
Important! Before self-connection gas, you should definitely familiarize yourself with the basic safety rules. The gas must be shut off. Make sure of this and only after, connect hob to the pipe with a flexible hose.
It is worth putting paronite gaskets into the nuts. Then, open the gas and turn on the burners in order to check the tightness of the connection and eliminate possible gas leaks. For ease of checking, use gas analyzer.
The induction hob has many positive characteristics. Among them:

As you can see, this option has a lot of advantages. Therefore, it is not at all surprising that you also wanted to install this kind of stove in your home. How to do it right? Installing the hob above the oven has a certain sequence and rules. In order to understand this issue in more detail, it is worth considering all the features of installing the panel.
Important! When installing the hob above the oven, electrical connection and the embedding of the cabinet itself must be done separately. This must be followed in accordance with the safety regulations for working with electricity.

Before connecting the electrician, check:
Remember that installing the hob in the worktop with your own hands or installing the hob above the oven requires the utmost care from you. You must definitely take into account a large number of requirements that will help you competently, quickly and efficiently install it. Guided by the above instructions, you will not need to involve specialists for this operation.
Before the connection is made, it is worth carefully checking the voltage and frequency of the current in the outlet and complying with all established standards for safe operation. self installation panels.
An integral attribute of the kitchen is gas stove, followed by ideal A husband is standing and preparing breakfast for his wife. Increasingly popular are non-classical gas or electric stoves, and cooking surfaces. Their convenience lies in their compactness and the possibility of a separate installation of the oven. But their installation on the countertop will make an inexperienced craftsman sweat. Is it possible to fix such a module on my own and what is needed for this? About it we will talk in the article.
All cooking surfaces can be divided into two large groups. The power source unites these groups, its role can be played by:

By appearance hobs that are connected to the gas main are practically no different from conventional stoves. An option for such modules may be an automatic start system, which may be self-contained or dependent on electricity. In the first case, it is represented by a piezoelectric element, which delivers a spark at the right time. Burners on gas surfaces may vary in size for greater ease of use.
Electric hobs can be of two types:

In a classic hob, the role of a burner is performed by a heating element or another heating element. Such a module is cheaper and does not differ in particular profitability. Induction hobs are everyone's dream modern hostess. The essence of the operation of the product is to heat the product due to electromagnetic field. At the same time, if you put your hand on a working burner, you will not feel anything. For the normal functioning of the product, a metal pan with a thick bottom is required. In this case, the material from which the dishes are made must necessarily be magnetized. The installation process for each of these surfaces is very similar. The difference lies only in the need to connect gas hose for the first version of the plate.

The whole installation process does not take much time and requires a tool that you may already have in your arsenal home master. The main tools include:
Additionally, you may need a level or a long metal ruler to make it easier to draw straight lines.

If we are talking about a hob that is powered by an electrical network, then preparatory stage will be in the power supply. The average power consumption of such modules is within 3.2 kW. This means that a regular but good outlet will suffice for connection. If the outlet was not installed in advance, then you can purchase an overhead version, since it will be easier to mount it and will not be needed additional tool in the form of a puncher or drill with a crown. The cable for such an outlet must go directly from the switchboard.

Such a step is being taken in order to provide such a powerful device with a separate circuit breaker who would control his work. The rated current for which the machine must be designed is 16 amperes. The best solution there will be an installation of a differential machine that is able to catch the slightest leaks. The socket is mounted slightly below the countertop. This is done not for greater ease of connection, but so that moisture and fats do not get on it when cooking. The outlet must be grounded in case of a short circuit.
Note! It is worth noting that a standard outlet can withstand a load of 3.5 kW and a current of 16 amperes.
An important step during the installation of the hob in the countertop is the markup. Usually the manufacturer technical documentation, which comes with the hob, indicates what the dimensions of the installation hole should be. One option would be to make a cardboard swatch that can be used to draw the outline of the future hole. There is another option, how you can markup, it is visible in the photo below.

It is necessary to place the hob on the countertop, but turn it upside down. She will be a model. It must be located in the place where direct installation will be carried out. The photo clearly shows that it is important to make a small gap from the edge of the countertop to the hob. Usually it is about 5 cm. It is done so that the edge of the cooking surface is not damaged from constant interaction with it.
The next step, as shown in the photo, is to apply the markup. To do this, the hob is simply outlined in a circle with a pencil. The lines must be accurate so that they do not have to be redrawn several times, because this will only confuse them later.
The photo shows that the hob has a small protrusion, thanks to which it is fixed in the hole. This protrusion has a certain size that must be taken into account. It is also important to mark it on the contour of the future hole, as shown in the photo below.

In this case, it is necessary to make a small gap. If the protrusion has a length of 15 mm, then the size of the hob must be deviated from the main line by only 10 mm. A gap of 5 mm is required to ensure that the hob can be easily installed in the prepared hole.

After marking for the hob, it is necessary to prepare holes to make it easier to cut out the necessary part. Holes are drilled with a drill or screwdriver at four corners. In this case, it is necessary to ensure that the drill does not cause damage to the facade or other elements. kitchen set. The diameter of the drill should be such that the nail file freely enters the hole.

To continue the process of mounting the hob, you will need a jigsaw. His file is inserted into the prepared hole and the cut is made. It is important to remember that it is necessary to cut along the inner, and not along the outer line. If a mistake is made, then the surface will simply fall into the hole without fixation.

In the process of work, it is necessary to remove sawdust in a timely manner so that they do not overlap the cutting line, since you can easily get off it and damage the countertop. During the cut, it is necessary to ensure that the nail file does not damage the walls of the cabinets or their surface. Before going through the last side, it is necessary to provide the tabletop with sufficient support so that the nail file does not bite, and also so that part of the tabletop does not fall on the leg.

After the hole is ready, you can try on the hob to make sure it fits the way you want it to.

The process does not end there. The tabletop is most often made of chipboard. If moisture gets on it, it swells and deforms. When cooking on the hob, this scenario is inevitable, so it is important to protect the place that has lost the laminated layer. To do this, a special sealant is applied to it, which is used when installing panels. It also acts as a fixing basis for the entire structure. The layer should be sufficient to cover all places accessible to moisture.

An adhesive-sealant is applied to the reverse side of the hob rim, which additionally fixes the product on the countertop. After that, the panel is inserted into its place and gently pressed down until contact with the surface of the countertop is felt. The sealant that has come out must be removed immediately, because after drying it will be more difficult to do. It is important to check that the abutment is the same on the entire surface. If this is not done, then under pressure from a heavy pan, the glass may burst.
Advice! If the hob is glass, then it is important to be careful when applying pressure so that it does not burst.
This fixation does not end there. Special metal plates are supplied with the surface, as seen in the photo above. They must be screwed in such a way that they provide a stop and prevent the panel from rising above the worktop. You can watch a video on installing the hob below.

Upon completion of the installation process, you can proceed to the connection of the electrical part. Most often, hobs are supplied in a single-phase version, but they can also be three-phase, which will be useful if three phases come to a house or apartment. Usually the hob has a built-in power cable. But if it is not, then you will need to buy it separately. To connect, you need a wire marked PVA 3 × 4. Each strand of this cable is rated for a rated continuous load of 8 kW.

This is necessary for a small margin, which will prevent overheating of the conductor. The wires are stripped from both sides. A plug is mounted on one, which in terms of current strength must correspond to that specified for the hob. If this is not observed, then it can simply melt. The wire is non-monolithic, so you will need to crimp the cores with tips. Near the terminal block, where the connection to the hob will be made, markings are usually applied.

The Latin letter L indicates the cable through which the phase comes, the letter N indicates zero, maybe the third letter E, which indicates the place where the ground wire is connected. Most often, instead of the third letter, a drawing is applied that indicates grounding. It is important to firmly fix each core that is crimped with a lug with a bolt. The service life will depend on the quality of the contact. If an oven will be installed under the hob, then a separate outlet must be provided for it. general power consumption of the surface and the cabinet is two times higher than that allowed for a single-phase socket.
As you can see, the installation of the surface can be done independently without significant skills. During operation, all precautions and safety precautions must be observed. While drilling and working with an electric jigsaw, goggles must be worn in front of your eyes, which will protect you from flying sawdust. During the installation of the socket and the connection of the electrical part, it is necessary to use tools that have dielectric handles that protect against breakdown electric shock. Before starting work, it is necessary to de-energize the machine, which is attached to the prepared wire in the kitchen.
Cooktops save space in the kitchen, and they work just like bulky stoves. In addition, the installation of the hob is completely easy, it happens quickly enough, and any adult can handle it with certain tools.
For those who started repairs in the kitchen, it is possible to replace the stove with a surface. You can also make a combination of a surface and a separate oven, and in this way you will not lose anything.
If you have ever done repairs in the house or were engaged in some construction work, then the process of installing the hob in the countertop should not be difficult for you. So, let's begin.
When the hole is ready, try on the hob to make sure everything is done correctly.
Process slices silicone sealant or nitro lacquer. This will protect the countertop from dirt, wetting, swelling and premature damage. You can also use a self-adhesive seal that performs the same function. It is glued on top so that the edges of the panel lie on it.
Even for edge seals, you can use aluminum tape, which, among other things, will protect the countertop from temperature changes. Having a quality seal will ensure that your countertop will last a long time and won't need to be repaired or replaced.
Modern electrical panels are very convenient, with good assembly they rarely fail, which means that they will not need repairs for a long time. If, nevertheless, repairs are required, then the panel can be easily disconnected and taken to the workshop on its own, thereby saving on calling the master.


Before embedding an electrical surface, it is necessary to lay it on the countertop, turn it over and connect it according to the diagram. The diagram is shown directly on the panel on the back for your convenience. When doing this procedure on your own, be careful. If the wires are connected incorrectly, you will not be able to control the activation of the burners and the heating temperature.
If a separate wire from the shield is provided for connecting the electric hob, then the plug and socket are not needed. Just connect the wire to the panel.
Flip the panel over and install it into the hole. It is already ready to work, it remains only to check whether it turns on and heats up correctly.
When installing a gas hob, first look at how it is attached. Install the panel, align it with the edge of the table and secure. Usually, brackets are provided with the panel for mounting from below. electrical wire must be plugged into an outlet.
To connect the gas with your own hands, you need to know the safety rules. Shut off the gas and connect the hob to the pipe with a flexible hose. Be sure to put paronite gaskets in the nuts. Turn on the gas, turn on the burners and check the hose connections for leaks. To do this, they need to be lathered. If the foam does not bubble, then there is no leak, you did everything right. You can also use a gas analyzer to check.
Quite often, the population is interested in how to find out if an apartment has been privatized or ...

In all organizations, as a rule, sooner or later there is a change ...

A lot of people are thinking about how to find out whether an apartment has been privatized or not...