


INSTRUCTIONS AND PROPHECIES OF THE Blessed MOTHER ALIPIA GOLOSEEVSKY, Kyiv...


Clay floor construction is the most durable and inexpensive. Clay, by far, is very cheap consumable, or completely free, for example, when layers of clay are found when digging pits, under a layer of soil. Subsequently, this clay can be used in construction.
Clay retains a solid structure for a very long time and, if observed certain rules manufacturing, then the clay floor will turn out to be very durable and will last for centuries.
Of course, the considered coverage has its drawbacks. For example, if the floor is poorly protected or insufficiently protected from moisture from above and below, it will not last long. More precisely, this gender will not match necessary requirements operation.
Another disadvantage is that the clay floor can become a haven for ants and mice. After drying, the clay is quite strong, but, despite mechanical characteristics, it can still be gnawed by rats and mice, or ants can settle. Of course, all this can and should be warned in advance.
To begin with, it is worth deciding in which room clay floors will be made - in a residential or utility room, for example, in a barn. If you make the floor in the house, then it should be smooth and durable and, if possible, warm. If you need to make a clay floor in a detailed room, then the evenness of the surface is not so important, which reduces manufacturing costs.
How long have clay floors been in building history? This method has come down to us from ancient times. To make the floor, you will need only clay and some improvised tools.
After preparing the surface, clay is poured onto it, which should be sufficiently moist. Then the clay is evenly distributed with a rake over the entire area of the prepared room. The level of clay that is poured should rise above the level of the future floor by about 25%. After the initial preparation, you can start ramming the clay.
It is quite easy to make this tool yourself. The grip adapts to the bar to make it comfortable to hold. Sizes are adjusted based on convenience criteria. It must be taken into account that working with a rammer with large area the beam is obtained faster, but the surface of such a floor will be less even.
You need to ram the clay until the rammer bounces off the floor. If you need to get a very even surface, then clay can be poured in the required places and rammed.
In places to be poured, the surface should be loosened so that the layers have better adhesion.
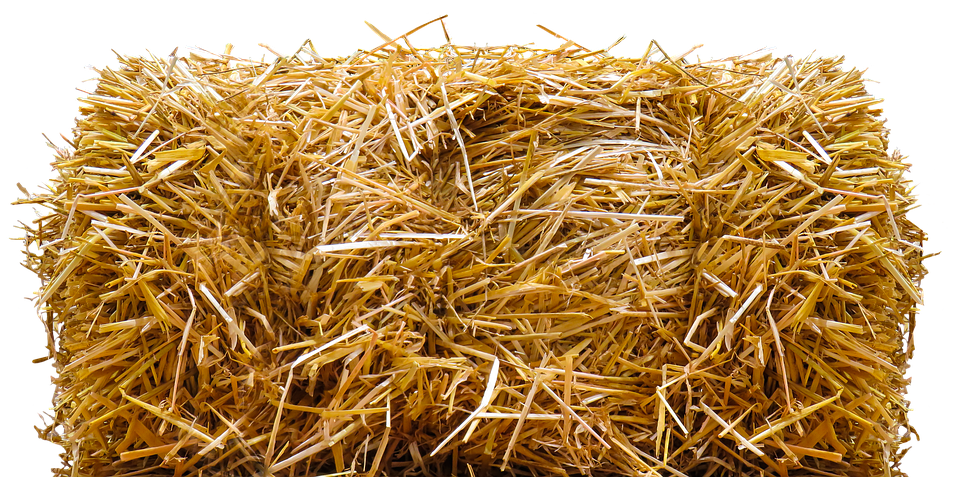
As a result, a floor obtained in this way can be a completely finished structure; later on, for example, you can put chipboard. In a detailed room, you can not cover the floor with anything at all. Previously, they did this when building houses from clay, and if they made a coating, then it was hay applied in a thick layer.
The clay floor has a lot of advantages: health, environmental friendliness, water resistance, huge mechanical strength, low cost and simple restoration, do-it-yourself production.
Today, clay flooring is gaining immense popularity in America and Europe.
There are a lot of methods for pouring a clay floor. Therefore, we will consider pouring a clay floor using the example of American eco-builders. Plus, they have a lifetime warranty on this floor.
1. The soil layer is compacted in place of the future floor.

3. A heat-insulating carrier layer for insulation is laid on top.
4. Pipes of engineering communications are being laid


7. If a warm clay floor is planned, it is installed in this layer.

8. The finishing clay floor of clay and sand is laid, smoothed out beautifully.


9. We cover 4 layers with impregnation clay / fine sand / 20% flour to increase wear resistance. You can use red clay to color the floor. Remove excess impregnation with a cloth. We dry.


10. Cover with warm, but not hot linseed oil in 4-7 layers as desired. The first layer is 100% oil, the second is 20-45% mineral solvent, the third is 50-60% solvent. Consumption 19 liters linseed oil for 30 sq. meters with 4 layers. The floor drinks the first two layers actively. Then the oil starts to dry harder and you need to open the windows. It is desirable to use organic raw oil without chemical additives.
If the proportions are violated, the clay floor may remain sticky. The oil can be removed with turpentine or, in extreme cases, with a solution demixide. Always check proportions empirically before applying as materials may differ in their properties.

Thanks to the deep penetrating impregnation with linseed oil, the clay floor turns into the well-known peasant pot, which was eaten for thousands of years before the advent of porcelain.
Same with impregnation large quantity linseed oil, there is a possibility that at first there will be bad smell. However, it can be eliminated by adding a little citrus oil to the mixture.
11. After drying, the clay floor can be covered with beeswax.
A layer of wax gives the durability of the floor surface and the aesthetics of a natural covering material.


The content of the article:
Clay floor insulation is the oldest, but effective method elimination of heat losses of stone or wooden house. It is now quite popular due to its environmentally friendly clean materials, which are used in the process of arranging such thermal insulation. You will learn how to insulate the floor with clay from our article.
Red clay is suitable for floor insulation in this way. It is distinguished by high plasticity and the presence of small pores. Has good performance and White clay. If necessary, it can also be used as a heat insulator. The color of clay depends on its constituents. minerals. Manganese and iron give the material a reddish color, organic impurities - a gray or black tint.
Clay, depending on the content of sand in its composition, is lean, bold and oily. Material the last kind most suitable for thermal insulation of the floor. It is easy to distinguish such clay - it is soapy to the touch.
Often, to achieve the maximum effect when insulating the floor, a mixture of clay with sawdust or chopped straw is used. The choice of filler for such a mixture must be treated with attention. The best option considered oak shavings or conifers wood. The reason for this is essential oils, which contain spruce, pine and larch in large quantities. These substances have a pronounced antibacterial character, which reduces the risk of fungus formation in the pores and on the surface of the insulation. In addition, before use, the clay filler is additionally treated with a fire retardant and an antiseptic. Oak shavings do not rot and do not swell from moisture.
Thanks to their unique properties clay serves not only as a heater, but also as an excellent waterproofing. Complemented with wood material, it can even be used to insulate the floor in the bath, without being destroyed by contact with hot air. Not all materials used for thermal and waterproofing have this property.
The process of thermal insulation of the floor with clay does not take much time. However, it should be borne in mind that the drying of the moistened insulation will last about a month, provided that the ambient temperature is positive.

Clay for floor insulation can be used as a liquid mixture with sawdust or ready-made panels. After the clay mixture hardens, the surface of the insulating layer becomes so strong that you can move along it without fear of cracking the material. Work on the thermal insulation of the floor consists of several stages: preparation of the base, laying insulation and a protective film layer. Let's consider them separately.

As a substrate for a wet clay mixture, you can use a waterproof polyethylene film t. 150-220 microns. It can be glued to a cement base or fixed to wooden beams overlap. The underlay sheets should be overlapped. This will help to avoid leakage of the clay mixture before it dries.
To work on the preparation and laying of the working mixture of insulation, it is necessary to prepare a trough for mixing it, a bucket, a construction mixer, water, sawdust and clay.

During the preparation of the mixture important point is to maintain the correct ratio of its components, since in the future this will avoid the appearance of cracks on the finished surface of the clay insulation. If the working mixture is planned to be laid on the base in a wet form, then for one bucket of clay you need to take 2/3 of the same bucket of sawdust.
First, you need to mix the clay with water to obtain a mushy consistency of the material. The amount of water in this case depends on the initial state of the clay. Clay can absorb moisture for quite a long time, especially when the raw material is dry and hard.
After a few days, the clay will acquire the required consistency, after which it needs to be diluted a little with water, sawdust is added and mixed well until a thick and homogeneous mixture is obtained. For mixing, use a hoe, mixer or a small concrete mixer. Ready composition can be laid on a prepared base.
Clay slab insulation is usually used in an already built house and is made in a slightly different way. For the manufacture of panels, the ratio of clay and sawdust should be 1:1. The mixture is poured into special molds that must be made in advance. They are ordinary lattice cells made of bars 150-200 mm thick. Cells must have dimensions of at least 500x500 mm. Before making panels, the grating should be laid on a sheet of plywood. This will allow you to conveniently pour the mixture into it and form neat ends of the insulation plates.
Pouring the working mixture into the grid cells can be done with a bucket to the top edge of the bars. The resulting surface should be leveled with a spatula and leave the material to dry completely.
It is not recommended to dry the panels of clay insulation under the rays of the sun, this can cause cracks on the surface of the products. You can make a canopy over the forms or simply throw grass over them, creating a sufficient degree of shading. Depending on the humidity of the air and its temperature, the clay mixture hardens in 7-15 days. If small cracks appear at the same time, they can be easily repaired with liquid clay.
To obtain an insulating layer, the finished plates must be laid on the base with minimal gaps. Joints between products should be sealed with liquid clay to avoid heat loss through voids.

When choosing it, you need to pay attention to the characteristics this material. There are membranes that partially let vapor through, while other films block it completely. The versatility of insulation, as well as its affordable price will optimal solution for purchase.
canvases vapor barrier film should be laid on the insulation with an overlap of up to 150 mm, its surface should be completely closed. The seams between the strips of insulation should be glued to seal with adhesive tape.
After carrying out all of the above activities, flooring can be attached to the floor logs. In their absence, perform a screed on an insulating layer of clay. In the first case, a ventilation gap must be left between the floor boards and the insulation. It will ensure the absence of dampness in the space under the floor and the safety wooden elements his designs.
How to insulate the floor with clay - look at the video:

Recently, there has been a growing trend to build "environmentally friendly" country houses using a large number natural materials and maximum conservation of all resources used by man. For such housing, a special decoration of walls and ceilings is needed, and in the latter case, people paid attention to the adobe floor - it is cheap, strong, durable. But most importantly - environmentally friendly. However, most builders and owners of country houses have little idea of working with clay floors, although they would like to know if possible. Do you belong to this category of people? Then study this article - here you will receive basic knowledge about what a clay floor is and how to create it.

The classic version of such a coating is several layers of clay or adobe (its mixture with straw): base, intermediate and finish. From above, the material is treated with linseed oil and wax to fill the pores and obtain a smooth surface suitable for regular washing.

Advice! In residential areas, adobe floors will look good in the living room or hallway. They are also often equipped in outbuildings because of their cheapness and durability - in sheds, chicken coops, barns, garages, and so on.
Consider the advantages and disadvantages of such floor covering. Let's start with the advantages that of this type a lot of finishing.


Important! Above, among the list of advantages of an adobe floor, it has already been mentioned several times that all the advantages of such a coating manifest themselves if it was created in full compliance with the technology. Keep this in mind when working with clay or adobe.

Now consider the disadvantage of such coverage, which everyone who is going to equip it should be aware of. It (the disadvantage) lies in the very high cost of effort and time when creating an adobe floor - first you need to tamp, then knead the material itself, lay it in several layers and at the same time achieve a perfectly flat surface with a minimum of cracks. Therefore, proceed with the arrangement only when there is enough time for business.

clay in bags
The first example we will have is the simplest coating, in fact, which is only a few layers of clay applied to pre-prepared soil. From the tools for doing the work, take a hand tamper, a shovel, a spatula and containers for mixing the main building material.

Step 1. Mark the area on which the adobe floor will be equipped. Remove layer fertile soil and ordinary earth- it is necessary to create a pit with a depth of approximately 40 to 60 cm.
Step 2 Spread a layer of sand over the surface of the future floor, pour water and compact manual tamper. Please note that this is a very long and labor-intensive step. Compact the sand to such an extent that after walking on it, no deep marks are left on the surface. Pre-watering is needed for better contact clay with a backing.


Important! Between this and the next stage, it is recommended to fill a layer of crushed stone or loose sand on top of the sand. thermal insulation material- such as perlite.
Step 3 Knead a mixture of clay, sand and water. The proportions depend on the quality of the ingredients used and the required density of the solution. Also, finely chopped straw can be added to the mixture, thus obtaining adobe.
Step 4 Apply the first, largest layer of clay. To do this, take a bucket or other similar container, fill it with the finished mixture, pour it onto a pre-compacted sand area and spread it with your hands (with gloves), using a shovel or spatula. At the same time, it is not necessary to achieve a perfectly flat surface - the finishing layer of clay is intended for this.


Step 5 After that, prepare an additional solution, and thicker. Apply this material over the previous layer of clay and carefully level with a spatula, achieving an even and smooth surface.


Important! Before applying the finishing layer of clay, it is allowed to compact the previous one according to the same principle as the sand several stages earlier. In this case, you will get a more dense and durable floor, but this will require a lot of effort and time.
Step 6 Let the clay dry for a while. Then inspect the resulting surface. Clean the cracks found with a brush and fill with a clay-based mixture.

After following the steps outlined in the instructions above, you can begin to process the adobe floor with linseed oil and wax. Detailed description this event can be found in one of the following subsections of the article.
A very common variant of the adobe floor is the ceiling, equipped with adobe - a mixture of clay, sand and finely chopped straw. Let's consider the whole process in the form of step-by-step instructions, but first we will give a list of materials and tools that will be needed for the job.

Table. Do-it-yourself adobe floor - materials and tools.
| Name | Description |
|---|---|
| The main component of adobe for laying the floor. It should be thick enough and of good quality. |
| Filler mix for adobe floor. Used in proportions 3:1 with clay. It also helps to reduce shrinkage of the material during drying. |
| It is necessary to impart fluidity to a mixture based on clay. A small amount is used and added little by little so that the solution does not turn out to be too liquid. |
| Increases the strength of the mixture based on clay, acting as "reinforcing fibers", is 0.1-0.15% of its total volume. Shrinks when used. |
| A plastic, metal or wooden barrel where straw can be chopped safely and quickly. |
| With this tool, you can grind straw to a state suitable for mixing adobe. |
| A container of a square or round shape, in which clay, sand, water and straw are mixed due to the rotation of the shaft. It is replaced by a concrete mixer or, in some cases, a conventional large container, a shovel and a drill with a mixer. |
| Necessary for the transfer of the components of the mixture and the finished adobe. |
| Necessary for compacting the sand substrate under the adobe floor. |
| It is used to smooth the applied layer of adobe clay. |
| Used in the same way as the previous tool. |
| Laths made of wood or metal are used to give the adobe layer evenness and smoothness. |
soil compaction rammer
Now let's move on to step-by-step instructions for creating an adobe floor.
Step 1. Prepare the mixture in the mixer. You can get acquainted with the proportions in the table above. First mix clay and sand, add water, and then - straw, chopped with a trimmer in a barrel. Pour in the straw little by little so that it is evenly distributed in building material. Then pour the adobe from the mixer into containers, check if it is suitable for density. If the mixture is too liquid, let it dry a little.


Step 2 Arrange a pit in which you will install an adobe floor. Further actions are similar to those described in the previous instructions - creating a sand cushion, tamping, backfilling with gravel or perlite.
Step 3 Install beacons. As a rule, they are mounted on small "cakes" of dense clay. Align the beacons in height with building level. The interval between them should be less than the length of the rule with which you will level the clay. The optimal value is 0.6-0.8 m.
Step 4 Lay the first layer of adobe between the beacons. Fill in the space in the area, then level the mixture with a trowel. Then finally bring the surface to an even state with successive movements of the rule.


Step 5 Leave the adobe for 24-36 hours, let it harden a bit and set. After that, carefully remove the beacons and fill the voids after them with a fresh clay-based mortar. Then again leave the surface for a while so that the adobe is completely dry.

Step 6 By the same principle, lay the second - intermediate - layer. But at the same time, place the beacons perpendicular to the direction of those that were in the previous layer of clay. If desired, this stage can be skipped and go directly to the finishing layer of adobe.
Step 7 Start laying the last layer. Its thickness is 10-20 mm. Level the adobe with a trowel and a rule, while regularly monitoring the process with the help of a building level. Be careful - the finish layer is prone to cracking due to its small thickness.

Step 8 Wait a while, repair the cracks formed when the adobe dried out, then let it dry completely.

Step 9 Boil linseed oil and use a sponge to apply it to the surface of the adobe floor. Let dry. Then repeat the procedure, but diluting the oil with turpentine or alcohol in a ratio of 4:1. Then do everything a third time, changing the proportions to 1:1. Apply the last time oil and solvent in a ratio of 1 to 4. If the steps are performed correctly, puddles should form on the surface of the adobe floor at the end of the treatment - this means that the pores of the material have completely absorbed the oil.

Step 10 Wait until the floor is completely dry, melt the wax in oil in a ratio of 1:2 and apply this mixture to the surface. As a result, on the floor of adobe will appear protective layer. Don't forget to update it periodically.
If everything was done correctly, then in the end you will get a beautiful, reliable, durable and environmentally friendly adobe floor.
When building natural houses from straw and clay, clay floors are very often made because they are inexpensive and accumulate solar energy well.

Clay floor natural. The main components will be clay, sand, straw, linseed (hemp) oil, wax.
Clay floor is eco-friendly. Its ingredients do not pollute environment, they can be reused.
The bigger, the better. The thicker the layer, the better it will absorb solar energy and warm better.
Underfloor heating. Clay as a material is ideal for creating a warm floor. It heats up quickly and gives off heat.
A well-laid adobe floor does not leave any stains or scratches, it is quite easy to keep clean (compared to a wooden floor), and it does not lose its properties over the years.
The clay floor does not require additional waterproofing, a layer of gravel below is enough so that moisture does not rise to the adobe.


Main layer fill order
The order of work is as follows:


In this layer you can run plastic pipes for floor heating. 
The final layer of clay / sand is smoothed to a completely flat surface. For the final layer, we use finely sifted sand. 3 parts sand to 1 part clay. 
Note: Each layer must be completely dry before starting the next layer.Then we cover the floor with 5-7 layers of linseed oil + mineral solvent.


INSTRUCTIONS AND PROPHECIES OF THE Blessed MOTHER ALIPIA GOLOSEEVSKY, Kyiv...

Eufillin dropper in ampoules is used to treat pathologies that ...

Among all ointments for the treatment and prevention of joint diseases, the most ...