If you adhere to proper nutrition, then avocados are probably in ...


Not all car owners have a garage, but most of them dream of one. Not all happy owners of the garage have it insulated, but most of them, who have ever felt the charm of insulation, dream about it. And behind the seeming complexity of the warming process is a sequence of simple actions that any normal man can reproduce. In this article, car owners are invited to find out how from the inside, since they are the main source of general heat loss.

Motorists can ask a quite reasonable question: “Why, in general, insulate the gate, and the garage itself? After all, this is a room for the periodic appearance of a person in it, and the car is under a roof and is protected from natural influences. In words, everything seems to be so, but it is necessary to sort it out in order. What are the arguments for insulating garage doors?

How heat "leaks" from the garage door can be clearly seen on the thermogram
Another fundamental question is to insulate the gate from the outside or from the inside? Building science recommends insulating capital walls from the outside, and covering the insulation layer with plaster. Gates are a completely different design. Firstly, they need to be movable to open and close, and secondly, they perform a protective and anti-vandal function, which is best done by a metal sheet. Therefore, it is advisable to insulate them from the inside.
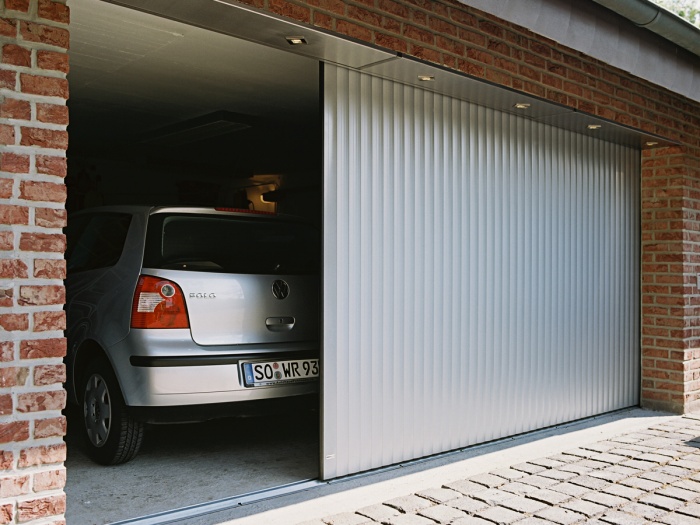
Most garage doors have a hinged design, which, of course, is simply necessary to insulate. The basis of such gates is a frame made of shaped pipes and steel sheet as exterior finish. The very high thermal conductivity of steel is known, so we can assume that such non-insulated gates do not represent any barrier to heat leakage. AT swing gate ah, the presence of a gate is fundamental, which greatly reduces heat loss with frequent movement of people. Therefore, if the garage is still at the construction stage, then it is necessary to order with a gate.

Lift-and-swivel are very fashionable now and overwhelmingly factory-made. Their canvas or sections are sandwich panels made of sheet steel outside and foamed polyurethane inside. This design already has the necessary thermal insulation properties and does not require additional measures for insulation. These types of gates, at the request of the customer, can also be equipped with a gate, which must be done.

Meet up-and-over gate handicraft, but in this case, their insulation will not fundamentally differ from swing gates, since the same frame and steel sheet.
Roller doors cannot be insulated due to the peculiarities of their design. Yes, and they can be called garage doors with a very large interference, since they are inferior to all the others in terms of thermal insulation and anti-vandal properties.
Insulation is a material that has a minimum thermal conductivity. In building science, thermal conductivity is evaluated by a special indicator - the coefficient of thermal conductivity. And the smaller it is, the more likely this material is to become a heater.

In the presented table, its upper part is heaters, and the lower (from No. 16 onwards) building materials that need to be insulated. The insulation layer greatly slows down the transfer of thermal energy and the thicker this layer is, the better, but at the same time the principle of reasonable sufficiency is observed. For garage doors, a layer of insulation of 5 cm will be enough.
In today's rich selection of various building materials exists great amount heaters under different names. It is very difficult to navigate them, especially for an inexperienced person, but in fact there are only a few main classes, some of which are suitable for garage door insulation, and some are not.
Mineral wool is a wonderful heat-insulating material that has proven itself very well in construction. Under this name, there are actually three subspecies of insulation:


Basalt wool is the most demanded among all porous heaters.
All types of mineral wool are highly hygroscopic, so their use for insulating garage doors is limited, since moisture will condense in the insulation layer, reducing the thermal insulation properties of this material. Glass wool is dangerous to work with, slag wool has residual acidity, therefore only stone basalt wool is applicable, provided that vapor barrier films are used.
Foam plastics are called a fairly wide class of synthetic materials, the common thing for which is their foamed gas-filled structure, and the basis is some kind of polymer. It is by the type of this polymer that foams can be classified.


Judging by the types of garage doors described earlier, insulation is required, first of all, for swing doors, as well as lifting and turning ones made independently. Before starting the insulation, you should make an audit of the ventilation system in the garage. What is it for?

Before starting work on thermal insulation of the gate, it is necessary to prepare the inner surface of the gate, on which there may be pockets of corrosion, old peeling paint, various contaminants, etc. To do this, you must:


With any method of thermal insulation, with any materials, in the design of the door leaf you will need a crate, which, firstly, will help to fix the insulation, and, secondly, the gate lining will be attached to it in the future. For the manufacture of crates will need wooden blocks section 4*4 cm or 5*5 cm, depending on the design of the gate. The crate must be attached to the load-bearing frame of the door leaf: profiled steel pipe or corner. To make a wooden crate, you need:


If a decision has already been made to insulate the gate with mineral wool, then it is better to choose basalt wool from well-known manufacturers. But before laying the insulation, you need to take care of waterproofing, since mineral wool is a very hygroscopic material. For these purposes, the following can be used:
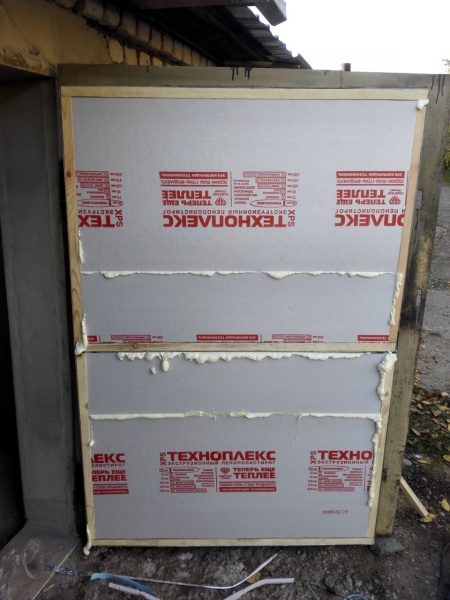
After waterproofing the surface of the gate, you can cut the insulation into pieces of such a size that they fit very tightly between the bars of the crate. Mineral wool can caking over time, so the denser the better. After laying all the insulation on top, a vapor barrier film is stretched and attached to the bars of the crate with a construction stapler. After this operation, we can say that the gate is ready for the final cladding.

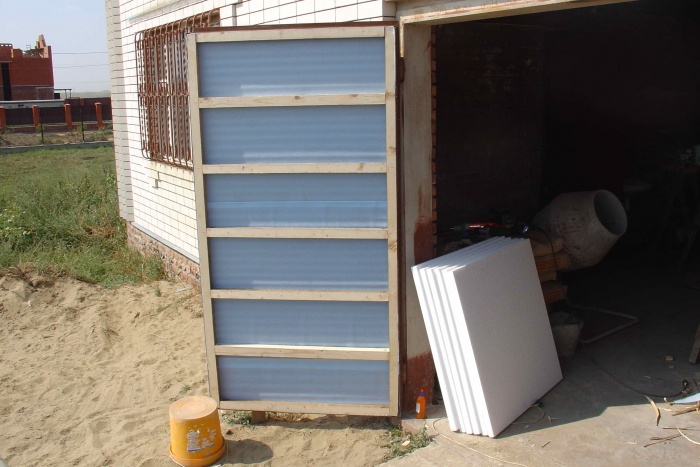
If ordinary PSB foam is used to insulate the gate, then the use of waterproofing is also desirable. This material is capable, although not in the same way as mineral wool, to absorb moisture, which reduces its thermal insulation properties. It is desirable to use XPS, which does not have hygroscopicity. Extruded polystyrene foam, although more expensive, does not require waterproofing. For the surface of the gate you need:
When insulating the gate in this way, it is no longer possible to do without the involvement of a qualified work force and special equipment. Polyurethane foam is applied by a special installation by spraying in several layers. A wooden crate is still needed, since it is convenient to attach the finish lining of the gate to it.
It has clear advantages:
Before applying the coating, close the gate hinges, locks, bolts and ventilation holes with a film, pasting it around the edges with masking tape. Coating is carried out only in protective clothing, goggles and a respirator. After applying the calculated layer of insulation and its complete drying, the excess on the crate can be cut with a construction knife. After that, the gate is ready for cladding.
The main thing is already done! Garage doors are already equipped with thermal insulation, but no one has yet canceled aesthetics and practicality, so it is best to veneer with some material. What can serve as a lining?


The cladding is fastened to the lathing bars with screws with a press washer.
One of the main ways to lose precious heat from the garage space is a loose fit of the gate leaves. Very rarely they fit so tightly together that they exclude any movement of air. Therefore, it is always necessary to use seals, which come in different profiles and sizes.

For a snug fit of the gate leaves and the gate, a rubber seal with a round section with a diameter of 20 mm has proven itself best. Due to the rubber tail, this seal is easily attached to any door. To do this, a perforated steel strip is taken and, in a predetermined place, the tail of the seal is pressed with it and screwed with self-tapping screws in increments of 15-20 cm to the gate leaf. It is desirable to smear the tail of the tape with glue No. 88 before installation.

Another area where heat can escape from the garage is at the bottom of the gate. Naturally, one cannot do without a gap in this place. Rubber seals are not suitable for this purpose, but there are special brush profiles specifically designed to seal the bottom of the gate. The installation of this profile is quite simple - it must be screwed to the bottom of the gate with self-tapping screws in increments of 15-20 cm. Wherein, when fully closed, the brushes should bend about a third of their length.

A significant plus in saving heat in the garage in winter is the garage curtain, which is hung directly behind the gate. The curtain material must meet certain requirements:
All these requirements are perfectly met by an ordinary tarpaulin, however, with a small caveat - it must have a water-repellent impregnation. They also make curtains from heavy PVC fabric, but tarpaulin sun is equally out of competition.

The best material for garage curtains is tarpaulin. It is worth buying along with eyelets
Along with the tarpaulin, eyelets should also be purchased, which are inserted into the fabric at a distance of 20 cm. Opposite the gate in the fabric of the curtains, you need to make a cut for free movement without moving the entire panel.
7227 1 0
Most car owners who are lucky enough to acquire a coveted home for their four-wheeled friend quickly begin to realize that without decent insulation it's just a canopy protecting the car from the rain. Plus, a garage is not only a home for a car, for our man it is a workshop, a banquet hall and an interest club in one bottle. Warming the garage door is the first and perhaps the most important thing that should be done to gain comfort. Today we will talk about how to insulate the gate in the garage with your own hands in affordable ways.
Referring to the regulations, this case this is SNiP 21.02-99, so that the car body does not rust, and the engine can start without warming up, a constant temperature of 5ºС is sufficient. Therefore, the insulation of garage doors does not require excessive effort and fantastic materials.
It is no secret that it is better to take into account any nuances at the stage of building a room. But most owners, when building or choosing a garage, are primarily interested in the reliability of constipation, leaving insulation for later. This is not entirely true.
For protection, there are alarms and other similar systems. And, in the end, everyone knows that if they want to steal, they will steal. But having familiarized with modern designs gates, you can solve the problem of insulation even before it occurs. Moreover, a radical increase in the budget, as a rule, is not necessary.
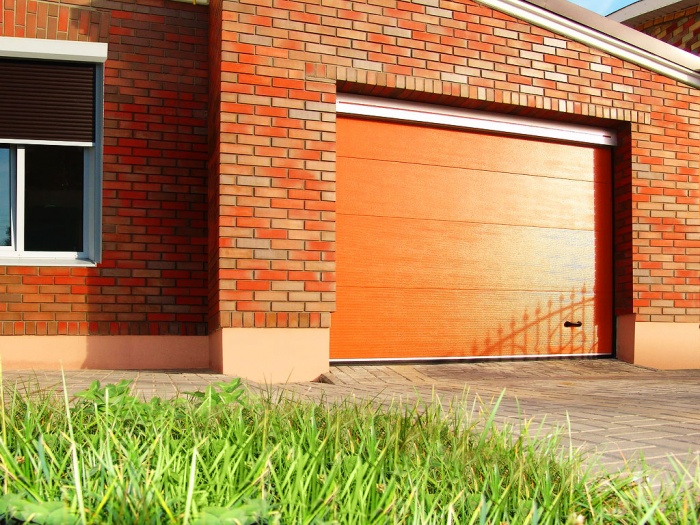
In our country, such a design appeared in the nineties and immediately gained popularity. The entrance opening here is closed by one solid leaf, which, with the help of a mechanical drive, rises up and gently slides into a horizontal plane parallel to the ceiling, that is, it changes its position by 90º.

This model is produced both industrially and by many home craftsmen. Factory insulated lifting gates are a one-piece sandwich panel made of sheet steel and filled with polyurethane foam. The thickness of such a sash usually fluctuates around 45 mm, which is quite enough even for the harsh conditions of the north.

Handicraft enterprises and home craftsmen, in order to reduce costs, often do not bother installing a sandwich panel. As a rule, the owners are forced to insulate such sashes with their own hands. The technology itself here is the same as with the insulation of swing options, I will talk about it later.
Cold and damp inside the garage have a negative impact on both the condition of the car and the garage itself.
According to the regulations, the temperature in a heated garage should never fall below +5 - under such conditions, the car will always be ready for work, it will not be damp and cold in the garage, mold will not appear, it will be comfortable to be in it. After all, the garage is not only the “home” of the car, but also a place for storage, a workshop.
For creating comfortable conditions the garage needs to be insulated. Separately, the insulation of the gate should be highlighted here, because it is through the gate, most often made of metal, that the most heat escapes, and it is more difficult to perform it than the thermal insulation of the roof or walls. How to insulate Garage Doors from the inside with your own hands?
To insulate garage doors with their own hands, they most often use
Insulation with liquid polyurethane foam is a modern and effective, but expensive way. Spraying polyurethane foam requires special equipment. The advantages of this method are the formation of a uniform coating without seams and a long service life (up to 70 years).

You can insulate garage doors with mineral wool. For this material, it is necessary to lay waterproofing and vapor barrier, since cotton wool absorbs water, which worsens its heat-insulating properties. It is advisable to use basalt wool from well-known companies.
Best value for money for self-insulation garage doors fit XPS and Styrofoam. These insulating materials have the following advantages:
The video shows how to insulate a garage door with polystyrene foam with your own hands.
You will also need materials for finishing. It can be
Finishing not only improves the appearance of warm garage doors, but also protects the insulation from external influences, for example, from mechanical damage and aggressive chemicals (gasoline, solvents).

The most practical is considered to be facing with OSB boards. They have several benefits:
Usually, plates 1 cm thick, 125 * 250 cm wide and long are used. For facing the gate, 1-2 sheets are required.
Wooden lining is beautiful, condensation does not accumulate on it, but it must be treated with antiseptic and flame retardants. Plastic lining looks good, but soft and easily damaged. The profiled sheet is durable, but condensation accumulates on it.
Such gates are an "accordion" that folds and rises to the ceiling. Industrially manufactured models already have their own polyurethane foam insulation, and all joints between sections are additionally insulated. Usually this is enough, but you can additionally glue foam sheets on each section.
Such garage doors, when opened, rise up and turn at a right angle. You can buy them ready-made or make your own. These garage doors are already insulated. The insulation is a panel of polyurethane foam with a thickness of 4.5 cm, which is enough even for the northern regions.

They are made of lamellas, like blinds, and are wound on a roller when they are lifted. A small layer of insulation can be made between the lamellas and on them, a thick layer cannot be made due to the design features, therefore in Russia it is not advisable to use such gates for heated garages.
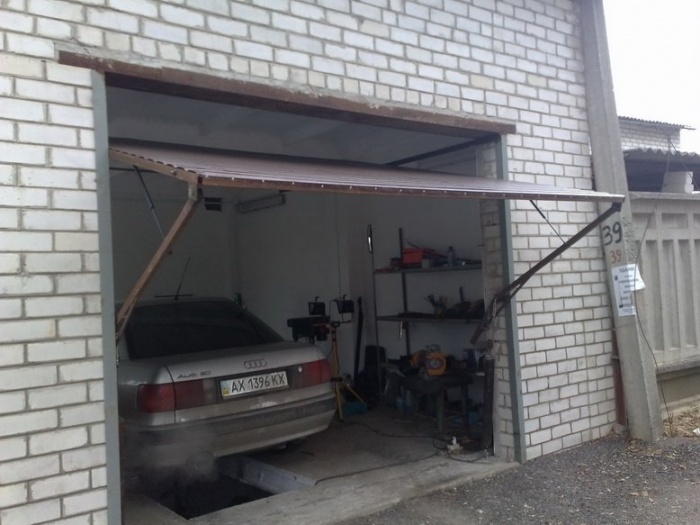
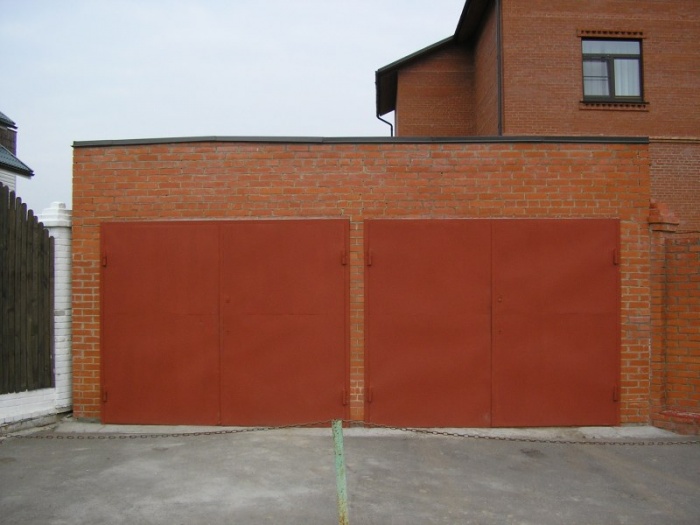
The simplest and most popular design, made of sheet steel or profiled sheet, is quite durable. To minimize heat loss, even when installing the gate, a wicket should be provided in them. Do-it-yourself insulation of garage doors is easiest on this design.
They represent a whole metal structure that moves along the rails. Such gates are rarely found in garages, however, if you have just such a system, they are insulated in the same way as swing gates.

To insulate the garage door with your own hands, you will need the following tools:
Of the materials needed
To properly insulate garage doors, they need to be prepared. All wooden surfaces must be treated with an antiseptic and antifungal agent with a brush. You may need one or two coats, each of which should dry.
Attention! It is necessary to apply an antiseptic with gloves - these compounds are harmful to the skin.
The gates themselves are cleaned of rust and peeling paint with a metal brush or a special nozzle for a drill. After that, they are cleaned with sandpaper and degreased with a solvent. When it dries, apply an anti-corrosion primer. The composition must be designed for use over a wide temperature range. Apply it in two layers: one along the gate, the other across.
The next step is the crate. It is made from 4 * 4 cm bars and attached to the gate frame and to other elements on their surface, for example, to stiffeners. Before sawing the bars, you need to measure the garage door and make a drawing. The step of the crate must be at least 40 cm.
To fasten the crate in the frame, holes are drilled in increments of about 20 cm. If the frame is made from a corner, 3.5 * 30 mm screws are usually used for fastening to the frame and 4.5 * 70 mm for fastening the bars to the end. If the frame is made of profile pipe, then, accordingly, take longer screws. Fasteners should go into the bar no less than half of its thickness, and at the end of the bar - no less than 3 cm. Clamps are used to firmly press the bars to the frame. Then, using a screwdriver, screw them with self-tapping screws.
When cutting insulation, remember that the fewer joints, the better. Insulation is placed between the bars of the crate. 9

Styrofoam or expanded polystyrene sheets are lubricated with mounting foam or a suitable adhesive - special for foam plastic or "liquid nails". It is better to take a professional polyurethane foam, which increases in volume less and is conveniently applied with a gun. Glue must be applied around the perimeter and at the corners of the foam sheets and evenly distributed over the entire surface.

If mounting foam is used to insulate the garage door, the surface needs to be slightly moistened. The foam is applied to the sheet and left for a few minutes to increase in volume. Then the foam is glued to the gate. After 15 minutes, you need to press the sheets tightly again. After all the sheets are mounted, all remaining gaps and cracks are also filled with foam.
Mineral wool is fixed to the crate with dowels. Lay on top vapor barrier film, fixing it to the crate with a furniture stapler.

Important! If ventilation holes have been made in the gate, they must not be closed, this is dangerous! It is necessary to leave holes in the insulation layer.
After laying the insulation, OSB boards or other selected material are screwed to the crate. The sheets are cut so that the number of joints is minimal, and those that are available fall on the bars of the crate. Sawing OSB with a hacksaw or electric jigsaw.
Warm garage doors can be obtained using mounting foam, which allows you to create a single surface without joints. For 7 sq.m. The gate will require approximately 5 cylinders of foam. The technology is extremely simple: foam is applied to the prepared surface, then it hardens, after which the excess is cut off. From above it can be plastered, painted, covered with OSB or chipboard.

In order to properly insulate garage doors, you need to make sure that they close tightly and without gaps. Usually they use a round seal with a thickness of 20 mm with a rubber "tail", for which they are attached to the gate with a perforated tape and self-tapping screws.
A seal is also installed at the bottom of the gate, but rubber ones are not suitable for this. For the lower part of the gate, brush profiles are used, which are also fastened with self-tapping screws.
Reading time ≈ 12 minutes
Most of the happy owners of a private space for their car are wondering how to insulate the garage door from the inside with their own hands, and there are reasons for this. Now it is very rare to find wooden sashes - a steel sheet is much more reliable and durable, but it's no secret to anyone that when you enter, on metal with inside you can see frost, and sometimes even frost. This is understandable, because the metal has a very high thermal conductivity - 50 W / (m K), and different wood from 0.18 to 0.25 W / (m K), that is, two times less.
Before undertaking the insulation of the garage door, you need to choose the right insulating material, since in this case not all of them can be used. Of course, these are internal works, but in most cases garages are classified as premises with high humidity. Perhaps this will surprise someone, but the humidity there is the same as outside, with the exception of precipitation.
Mineral wool is produced in mats and rolls, with and without foil coating.
The term "mineral wool" refers to three different, albeit similar in structure, insulators. But they are made from different raw materials, therefore, they have different characteristics, so we will consider them in more detail.

This is what glass looks like
For the manufacture of such insulation, a melt of broken glass is usually used, or the materials from which it is obtained, but the technology here is somewhat changing. Substance molten up to 1400°C ( liquid glass) is placed in a centrifuge and under pressure inflated with steam, turning into the thinnest threads. Then they are treated with a phenol-aldehyde polymer and then the alignment process takes place on the conveyor. In fact, it is highly resistant to humid air and has a thermal conductivity of 0.03 to 0.052 W/m K.
Having learned about such characteristics, the car owner may decide to use it for his garage, but it would be wrong not to mention other aspects of such a material. Any glass, not to mention fluffed glass, belongs to fragile instances and glass wool fibers, despite the addition of a polymer, are extremely brittle and the laying of the material is accompanied by glass dust. Getting on skin tissues, it causes irritation and itching, affects the eyes and respiratory organs (not fatal, but terribly unpleasant). Consequently, installation work it can only be carried out in overalls with long sleeves, a hat, gloves, a respirator and goggles.

Slag tends to have the dirty color of blast-furnace slag
It is obtained from blast-furnace slag melts, where, as you understand, metal is smelted and the fibers that make up the mat or roll are also saturated with residual iron particles. If we talk about thermal conductivity, then this indicator is approximately the same as that of glass wool and ranges from 0.046 to 0.048 W / m K, and if it comes only from these parameters, then such insulation can be used, but ... Its hygroscopicity has a coefficient of 1.9, that is, 1.9%/hour of the total mass. This is a lot, in addition, small particles of iron corrode from which the insulation sags and loses its protective qualities. Currently, it is used very rarely, and even then, only in dry rooms.

Basalt wool in mats and rolls with foil
Stone wool is very often called basalt wool, as it is produced from melts of hardened volcanic rocks, that is, basalt. It is worth paying attention to this material right away. First, for self-styling of protective equipment only gloves are needed, and even then some neglect them (everyone's skin is different). Secondly, it practically does not react to moisture (does not lose its qualities). Thirdly, the thermal conductivity of basalt wool, depending on the density and manufacturer, ranges from 0.031 to 0.041 W / m K. In fact, this is the most the best option from three types this product.
Testing mineral wool from different manufacturers

Material such as polystyrene is known to most people.
This is expanded polystyrene, known in the same way as, and most often, as foam. Its marking may differ in the abbreviation, it is PSB or PSB-S, where the letter "C" indicates that the PSB is treated with a flame retardant and is a self-extinguishing or non-combustible material. It differs in bulk density (kg / m 3), these are PSB-S-15, PSB-S-25 and PSB-S-35, where the thermal conductivity is 0.045 W / m K, 0.041 W / m K and 0.038 W / m K, respectively. In the domestic sphere, they are limited to 15th and 25th panels, of which the first are somewhat cheaper, but when cutting from the bottom, there is a lot of debris in the form of crumbling electrified granules that stick to hands, a brush or a broom. If we talk about garage doors, then the 25th foam plastic is an excellent material for insulation, especially since it can simply be glued with mounting foam.

Extruded polystyrene foam, also known as EPPS, PENOPLEX and TECHNONICOL
Visually, in structure, it is very similar to foam, but is produced by extrusion, that is, the plastic is passed through an extruder with the addition of a blowing agent and molded into panels desired thickness, where, as a rule, there is a one-sided chamfer along the perimeter. I want to answer right away to people who either do not understand or deliberately denigrate this insulation, arguing that it absorbs moisture faster than polystyrene foam and mineral wool, and so, its vapor permeability is only 0.011-0.0128 mg / (m * h * Pa), and when completely immersed in water, 0.2-0.4% of the total specific gravity.
The density of the same TECHNONICOL (although other brands practically do not differ) ranges from 25 to 45 kg/m for fear of technical damage. On average, the thermal conductivity of XPS is 0.029-0.034 W / m K, and this is the best indicator of all materials used in construction. The only drawback is the higher cost than other heaters, but this is fully offset by its advantages. So there is no better option for garage doors and doors!
We turn to the instructions, do-it-yourself garage doors from the inside, and in order not to dwell on the description of each detail separately, which is more necessary for teenagers than for car owners, we will dwell on the main points of insulation. This will include:
With a heater, everything is clear - choose it yourself, but in addition to this, you will need other materials:
In fact, tools can be selected even for a non-electrified garage, but if there is ̴220 V, then some can be replaced:
In this case, everything is simple - you need to get rid of everything that can interfere with adhesion during the installation of insulation, and the most difficult thing is to remove the swelling paint on the metal. This is best done with a metal brush (if using sandpaper, then waste a lot of extra time). Remove only the paint that does not hold well - or is swollen or cracked. After that, clean the canvas from oil stains - gasoline or diesel fuel, which no doubt can be found in any garage, is quite suitable for this.
Now about the slats, and here you can go in two ways - to strengthen the bars unpainted or paint and the second option is better than the first in any case. It doesn’t matter what the paint will be, as long as it is on wood - even an antiseptic or glyphthalium paint will do (GF is usually used as a primer). But it is better to do this a day or two before the start of work, so that the paint dries out - this measure is needed to protect the wood.

Installing wood framing from the inside
Any garage door has stiffeners and most often these are corners 40 × 40 or 50 × 50 mm, but tubular profiles of rectangular or square section can also be used. But in this case, on the part of technology, this does not change anything, except that the second option will slightly complicate the task in technical terms. In order to fix the bars on a metal sheet, holes must be drilled in these ribs, the diameter of which depends on the diameter of the self-tapping screws. The distance between the holes is 40-50 cm, but they are required along the edges of the profile. Mounting holes are not needed on the diagonal ribs, as there will be no rails.
Try to adjust and screw the bars so that there are no gaps at the joints (they are usually at the corners), but if this happens, then do not be too upset - you can always blow them out with mounting foam. In the case when the stiffeners are made of a very wide profile, for example, 40 × 60 mm, welded flat, then it will be more difficult to cope with the task, and if this confuses you, go the other way.
Mounting holes can be drilled through the sheet and the rails can be screwed on from the outside, but for this you will definitely need self-tapping screws for wood with a stainless coating - they are either white or yellow.
Note. This applies to those who intend to work not with an electric drill, but with a screwdriver. You will have to drill about 80-100 holes, and if the batteries are weak, then in cold weather, even without frost, even 2 pieces will not be enough for you. If the work will be done with cordless drills such as Bosch or Makinfa, then one battery is enough for such a load.
Now the most important thing is to accurately cut the insulation, especially when there is a diagonal stiffener on the sash, but for this you have a paint knife and a tape measure. It doesn’t matter which side to start the installation from, right or left, bottom or top - the most important thing is to start from a larger panel or even from a whole one, for example, from 1000 × 1000 mm foam or 1200 × 600 mm EPS, but here already, “ how the card will fall. It is best to cut foam, polystyrene or mineral wool under a ruler - an even object of this length is usually found in every garage if it is used not only for storing potatoes, but also for cars and various repairs for home.

Glue well replaces mounting foam
Try on the desired fragment at the installation site and make sure that you cut it to size - if it turned out to be larger, then you can cut it, and if it is smaller, you can blow out a gap of up to 15 or even 20 mm with mounting foam. If the gap is even larger, then it is better to close it with strips of the same material. Lay the fragment on the floor and apply several strips of foam on it at a distance of no more than 10 cm, although even smaller and around the perimeter is better. Then put it in the right place and hold for 20-30 seconds (usually this is enough).
When you make sure that it does not fall off, start measuring the next fragment, and after cutting it, again apply foam and glue it to the right place and so on until the very end, until you completely close the sash. The stiffening ribs will remain open, and these are effective cold bridges, therefore, blow out these gaps, as well as all remaining gaps, with mounting foam.
Note. In the event that the insulation will be made with mineral wool, you will need a special reinforcing adhesive. But when the mineral wool is foiled, then you can go the other way - stick it on the foil with mounting foam.

Sheathing the gate in the garage from the inside of the OSB
The simplest part of the work remains - sheathing the inside on top of the insulation with some kind of sheet material. Most likely, it will be grade 3 oriented strand board or laminated or moisture resistant plywood. To cut such large panels, you will need at least two stools, although if there is a pit in the garage, then this is the best option in any case. Mark the sheet, lay it so that the part to be cut is above the pit and saw. Then screw it with wood screws to the crate, making sure that all joints adjoin as tightly as possible. Everything.
Note. If desired, instead of sheet material can be used wooden lining and if you are interested in the aesthetic side of the issue, then this is the best option.
Video with insulation of old garage doors
Well, what do you think, is it difficult or easy to insulate the garage door from the inside with your own hands? Most likely the latter, but this will require at least a whole day, not counting the purchase of materials. Nevertheless, special skill is not needed here, and even when a person has not been engaged in similar work, he can do it!
If you adhere to proper nutrition, then avocados are probably in ...


Pizza can be cooked not only with meat products - sausage, sausages and ...