INSTRUCTIONS AND PROPHECIES OF THE Blessed MOTHER ALIPIA GOLOSEEVSKY, Kyiv...


Redevelopment of an apartment or house is a repair and construction event that is not uncommon today. Many people want to change the arrangement of rooms by adding or removing partitions. Sometimes in the process of ongoing work it is necessary to deal with the laying of existing doorways. This can be done with bricks, blocks or drywall. Latest material gained great popularity today due to the simplification of ongoing operations. Therefore, the question of how to seal a doorway with drywall is currently very relevant.
Preparation for repair
It is necessary to prepare in advance all the necessary tools and materials before you start work and start sealing the doorway with drywall.
Of the tools you will need:
From materials:
First, the door leaf is removed from the hinges. If you no longer need the door itself, then its box can be cut into several pieces with a saw. After that, each piece with the help of a crowbar is torn off from the ends of the opening.
Usually, in the process of dismantling, the surfaces of the openings at the attachment points of the boxes deteriorate and do not meet the requirements in terms of technical condition. Therefore, it is recommended to putty the surface.

Frame assembly
Since it is not at all easy to align the doorway, it is necessary first of all Special attention pay attention to the build quality of the metal frame. How it all happens:

The frame is ready, you can proceed to the installation of drywall sheets.
Let's figure out how to sew up a doorway with drywall quickly and easily. In principle, there is nothing complicated at this stage. Here it is important to accurately apply the dimensions of the opening to the sheet and cut out the required area along the contour. To do this, you only need a sharp construction knife.
Cut the cardboard layer along the drawn lines in turn, then simply bend the sheet at the place of the incision. Thus, go through the entire circuit.
There should be two such blanks. Install one of them first. Fastening is carried out around the entire perimeter and along the installed crossbars. Then go to another room and lay soundproofing material between the frames. For example, it can be ordinary mineral wool or foam panels. The gap between the sound insulator and the frame can be filled mounting foam.

Now you can install the second blank and fix it with self-tapping screws. Pay attention to how the fastening is done correctly.
If on this side there are small gaps between the GKL sheet and the end of the opening, they can be foamed.
Finishing process
In fact, you have already closed the opening in the wall, it remains only to align the walls of the room with the installed drywall sheet. For this, putty is used. But before that, it is necessary to treat the GCR sheet itself with a primer and close up the installation sites of the self-tapping screws with a thin layer of putty.
After drying, a layer of putty mortar is applied to the entire area of the sheet with entry to the walls of the room. If necessary, the leveling material is applied in two layers. Before the second, the surface to be treated is primed again.

The best option for decoration - wallpaper. The thing is that the vibration of the house, whether you like it or not, literally in two or three years will definitely do its negative work. Cracks at the junction with the walls will appear. And it does not matter that high quality putty was used, and the leveling process was carried out by a highly qualified master. Cracks cannot be avoided. And with the help of wallpaper, they will hide until the next repair.
As already mentioned above, it is possible to close up a doorway in a wall with block materials. The brick is missing here. He's heavy. And here are the blocks cellular concrete will be just right. In addition, today you can choose this material for the size of the opening, since manufacturers offer a fairly wide range in terms of dimensions. Plus high heat and sound insulation properties of the blocks.
As you can see, it is not difficult to seal the opening under the door with drywall even with your own hands. Maybe one of our readers had experience in this type of work, we would like to hear your comments on this topic.
Often, when redeveloping a house or apartment, it becomes necessary to transfer interior doorways. In such cases, it is necessary to close up the old openings. There are several ways to close them, but the most common is embedding with drywall. Therefore, the problem of how to sew up a doorway with drywall is very relevant today.
Like any change in layout, this process requires official permission to carry out such work. In case of violation of the design of load-bearing walls, this is strictly prohibited. And with simple interior partitions it is quite possible. After receiving the relevant documents, you can immediately start working.
Before starting work, you need to make sure that all the required tools and materials are prepared in advance. Before installing the frame, the door frame is first dismantled, so you need to take into account the tools that can be useful during disassembly.
So, to get started, you will need:
Necessary materials that are better to take with a margin:
First you need to remove the platbands, if any. After that, the door leaf is removed from the hinges and proceed to disassemble the box itself. First, it is sawn with a hacksaw, and then in parts it is torn off from the end of the passage with the help of a crowbar. The entire surface of the passage is cleaned of dust and loose plaster, if necessary, putty all the irregularities.

How to close up a doorway with drywall so that as a result it does not differ from the background of the wall? To do this, it is better to carefully measure and mark everything. GKL sheets will be attached to a frame made of a profile, therefore, it is necessary to take into account their thickness and note their total distance from the edges of the wall on both sides.

The next task is to assemble the frame base, made from a guide profile. The complete structure will look like two frames that cover the same wall, but in different rooms. To complete it, the first step is to cut two pairs of blanks from NP with a length equal to the height of the opening. Then the profile is attached to the wall with dowels and self-tapping screws, using a level and a plumb line.
The distance between the holes should not exceed 0.4 m and at the same time it is important not to forget to leave room for drywall by moving the profile from the edge of the wall by the thickness of the sheet. The recommended thickness of the sheet for mounting the partition is 12 mm.
Next, it is necessary to cut 12-14 pieces from the rack profile with a size equal to the width of the passage. They play the role of crossbars connecting elements from the guide profile. On both sides of the structure, the cuttings of the joint venture are attached close to the upper end, and also in relation to the floor. The distance between each element should not exceed 50 cm. For greater rigidity of the partition, you can strengthen it by fastening the partitions with vertical elements to the middle of the doorway to form a lattice.
There is nothing complicated in the installation of GKL. The main thing is to measure the size correctly and cut it neatly. This is done using construction knife: First, cuts are made along the marked contour, after which the sheet is bent along the cut line. And so along the entire line of the incision. There should be two such sheets. First, you need to close up the opening on one side and fix it along the entire edge with an indent of 1.5-2 cm, as well as along the transverse elements. This is done with the help of self-tapping screws screwed in with a screwdriver. The distance between the fastening should be no more than 15 cm, and the caps of the self-tapping screws should not stick out, but, on the contrary, should be slightly recessed deep into the GKL.

When the first sheet of GKL is installed and fixed, you need to go to the adjacent room to close the second side. But before that, you need to fill the void with an insulating material, and it is advisable to blow out the gap between it and the frame with mounting foam. After that, the next blank is applied and screwed with self-tapping screws. If there are small gaps between the ends of the wall and the plasterboard, they must be covered with putty.
In principle, the opening in the wall is already completely closed, it remains to bring it into proper form. To do this, you need to align the drywall in the wall so that they are on the same level. For this purpose, putty is used, which rubs all joints, cracks and recesses at the attachment points.
First, a layer of primer is applied to the GKL sheet. When the primer is dry, you can begin to putty.
The finished solution is applied in a thin layer over the entire surface of the partition, reaching the walls. If necessary, you can apply several layers, pre-treated with a primer. Now you can start finishing the finished wall. It is not recommended to paint it, because after a while cracks will appear at the joints with the wall. The best option considered to be tiling. Wallpaper is also suitable for this purpose, but this is only until the next repair.

As it turned out, sealing the doorway with drywall is not a tricky business. The main thing is to prepare everything in advance and make all the measurements correctly. As he says wise proverb- Seven times measure cut once! And the presence necessary tool makes the whole process much easier. This design is easy to implement and does not take much time. In addition, it is distinguished by its economy.
But there are also significant downsides. It is not durable, and any load over time can destroy drywall. In addition, he is afraid of dampness and moisture. So the construction of such partitions near the bathrooms is undesirable. It is not recommended to cling heavy objects to such a wall, which can lead to its deformation. However, the wall can be blocked by some large-sized furniture. Another disadvantage is poor sound insulation.
During repairs, it often becomes necessary to move the front door of one of the premises to a new location. How to close up a doorway with drywall so that after redevelopment it does not stand out against the background of the wall, you need to know for sure home master starting this work.
It must be remembered that any change in the layout is possible only with the permission of the relevant inspecting authorities in the presence of an agreed project. At the same time, the weakening of the bearing walls of the building is strictly not allowed. With lungs internal partitions everything is much easier. If you have resolved organizational issues, you can begin work.
The first step is to clean the doorway from the platbands, remove the door from the hinges and remove all dirt and plaster.
It is quite possible for one person to reliably and beautifully sew up a doorway with drywall for several hours. But it is more convenient to work together. What will be required for this?
Before starting work, you should prepare everything you need:
First of all, the doorway is freed from everything that may interfere with installation. The platbands are torn off and removed from the hinges of the door leaf. wooden beam door frame sawn with a hacksaw and dismantled with a crowbar. The entire perimeter of the opening is cleaned with a spatula and a brush from old peeling plaster and dust.
At this stage, you need to make sure the strength brickwork or concrete framing the opening. If large defects are found in them, restoration is performed.
Gypsum board does not have high rigidity. Therefore, it is possible to close the doorway with drywall only on a frame specially made for this. It is collected from metal profile and attached to a solid foundation.

Since the drywall sheet does not have the necessary rigidity, it must be installed on a pre-prepared metal frame.
The mounting plane is set by guide profiles. They are attached with anchors or dowels directly to building structures, so they are located along the perimeter of the frame being created. The quality of the entire installation depends on the accuracy of their installation.
The rack-mounted carrier profile forms an internal lattice. He takes the brunt of the burden. The place of its installation is selected in such a way that the joints of drywall sheets, if any, fall on its central axis.
When closing a through hole in the wall on both sides, the installation of two structures is required, which do not need to be connected to each other.
For this you need:
Before closing the opening in the wall with drywall, it is measured, in accordance with which the GKL sheets are cut. The material is cut with a sharp knife and broken at the incision site.
Drywall is attached to the profile using self-tapping screws. They are twisted in increments of 10 - 15 cm, retreating from the edge of the sheet by 15 - 20 mm. The head of the fastener should be recessed into the material to facilitate further surface finishing.
First you need to sew up the opening in the wall with drywall on one side. After that everything inner space the opening is filled with sound and heat-insulating material. Experts recommend using mineral wool mats for this. The gaps between it, the frame and the wall can be sealed with mounting foam. She also overlaps the voids between the end of the drywall and outer wall. Excess foam after it dries is cut off with a knife.
All joints and irregularities on the front side of the drywall are aligned with the approach to the walls using putty. Prior to its application, the surfaces are treated with a deep penetration primer, which promotes good adhesion of the leveling mortar. Putty is usually put in two layers with intermediate priming. In this case, all caps of self-tapping screws must be completely closed.

It is not recommended to use dyes as a finishing touch to the room in which the opening was sewn up. Over time, cracks may appear in this place. You can hide this defect by using wallpaper or wall tiles.
If it is required not to completely close the doorway, but only to reduce its width, a three-dimensional frame is made and fixed from the profile, corresponding in size to the wall section being built up. In plan, it will look like the letter "P". To do this, parallel lines are drawn on the floor inside the opening, which are a continuation of the walls. Perpendicular to them, the border of the end face of the future wall is drawn.
Stepping back from it and the first two lines 12 mm inward, we find the U-shaped border of the installation of the metal frame on the floor. A guide profile is attached to the floor along it. Strictly vertically above it, the same design is created on the ceiling. Two more guide profiles are installed vertically from floor to ceiling along the edges old wall opening.
The corners of the letters "P" of the floor and ceiling are connected uprights from the carrier profile. To increase the rigidity of the structure, they are connected to guide profiles nailed to the wall with several horizontal lintels in increments of no more than 50 cm. After that, part of the doorway can be sewn up with plasterboard with filling the cavity with soundproofing material.
Sometimes it is required to seal the opening above the door with drywall. In this case, two frames are installed there, consisting of a guide profile, anchored to the walls and ceiling. The lower edge of each frame forms a horizontal bearing profile, connected by its edges to the vertical guide profiles. Both frames are also sheathed with plasterboard, and the interior space is filled with stone wool.
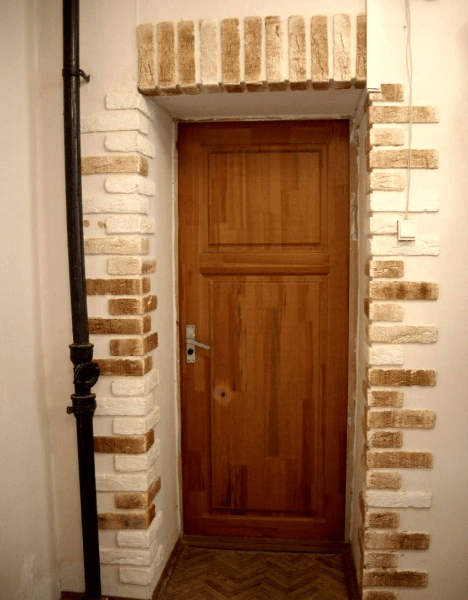
After installing a new front door, it remains to update them with brand new slopes. They can be included in interior design different ways, drywall, laminate, MDF, PVC sandwich panels are suitable for decoration, as well as non-standard materials(for example, imitation natural stone). In order not to spend money on the services of a specialist, you can do the installation of slopes yourself, following the instructions.
Slopes are plastered most often together with the entire apartment when the finishing is not completed.
Required tools:
Materials:
Do-it-yourself plastering sequence:


Finishing completed.
If we are talking about a private house, it is advisable to treat the cleaned opening with an antifungal primer before work and add a little to the solution itself.
Drywall is a popular material for finishing the slopes of the front door with your own hands. It is inexpensive, reliable and easy to install.
Necessary materials:
Required tools:
The procedure for doing the installation of slopes with your own hands using drywall:

The next day after installation, the slopes can be further processed: putty, paint.
Laminate - flooring, often used for slopes of the front door, it does not need to be further processed, it resists mechanical stress. Do-it-yourself decoration has a lot of nuances.
There are two ways to install laminate slopes:

The first method is preferable for apartments, the second is universal.
Most common finish: Affordable, good looking, easy to install.
Necessary materials:
Tools:
Installation of MDF door slopes - do-it-yourself installation algorithm:

After finishing work, you need to install platbands. If there is still wallpapering to be done, they are installed after the repair is completed.
Advantages: finishes look presentable, easy installation.
PVC sandwich panel is two thin sheets of plastic with a layer of insulation (sheet thickness 1 cm).
Materials, tools for installing slopes of PVC sandwich panels on the front door:

Installation of slopes from sandwich panels, or how to do it yourself:
Optional space between sandwich PVC panel, the wall opening is filled with mounting foam. This is done after installing the sandwich panels.
More about installing slopes with your own hands after installing the front door, watch the video
In addition to the above standard ways using popular materials, you can use more original options that will emphasize the interior, decorate the front door and surprise your friends:
Materials can be combined if their properties are similar (sandwich panel details + stone, laminate + tiles and others).
To close the doorway, you need to get rid of door leaf. If it is already removed or missing, then there will be less work. Not in all cases, the door itself is removed. Sometimes the doorway is partially closed to reduce it, for example, if a new box of a smaller size is installed than was previously installed. Completely close the opening during the redevelopment of the apartment. You can close it with the material from which the walls themselves are made or with drywall.
There are several reasons for sealing a hole in a wall. Based on the reason, choose suitable materials for work. To lay the opening completely, you need reliable and high-quality material. It should not only close the existing entrance, but also have sound and heat insulation qualities.

Reasons why you should close the doorway:
Space redevelopment is a common reason to move the entrance to a room to another location. preference in this case it is worth giving brick or drywall. With a brick, you can lay the entrance quickly and inexpensively. Drywall sheets are easy to work with as they are lightweight and can be cut. It is possible to sew up the opening after removing the door leaf and dismantling the box itself.
When replacing doors, a problem arises: the new door is smaller than the old one. Therefore, there is a need to partially close the passage so that you can install new door straight and in the right place.
The passage to the room can be large. It can be reduced independently using bricks or small foam blocks. The decor of the opening in the studios is common. It is not necessary to close it completely: you can partially close it or hang it with decorative elements.
Based on the reason why it is worth removing or reducing the opening, they are selected the right materials, tools and work steps are defined.
Many apartment owners have experienced inconvenient home layouts. The doorway may not be convenient or less functional if one room is isolated and the second is a walk-through. To close the doorway use a deaf seal.

It can be done with:
The first two materials are inexpensive and do an excellent job of this task. You can close the doorway yourself. To do this, you need to level the opening with the wall, and make the entrance to the room in another convenient place.
Sometimes, you can enter the back room by walking diagonally across the entire living room. In the same way, you need to go through to get into the bathroom, toilet, kitchen or hallway. This layout is not convenient if the family has children and they live in the back room. You can move the doorway to another part and separate the nursery from the living room or parents' room. You will have to get rid of the old opening.
Foam blocks are good material for this purpose. Their cost is slightly higher than that of the first two materials. They are suitable for sealing the opening in panel houses.
Brick is used for cardinal sealing of the opening. Brick or foam block laying is a radical method. The choice of material depends on the thickness of the wall itself, in which there is an opening. The material is suitable for closing open space in bearing wall. AT cement-sand mortar add substances to strengthen the masonry.

Stages of work:
As a dressing with the wall, reinforcement is used, which serves as a reinforcement. It is necessary to impose a solution on each row, then evenly level and remove excess.
If the wall is brick, several bricks are taken out of it and masonry is made from new ones. They are a connecting element with bricks that close the opening.
You can sew up the opening with a sheet of drywall. This material is often used in construction and decoration. Drywall has a lot of advantages. It is inexpensive. The sheets are light weight. It will take a little time and effort to work with this material.

To work with drywall, you will need a minimum of materials and tools: a puncher, dowels, self-tapping screws, cross bars, profiles, putty, tape measure.
Step-by-step work on sealing the opening above the door:
There is another simple option: do not use the frame, but put the finish on liquid nails. This option is less reliable than the first one.
You can close the opening in the wall yourself. To do this, you need to decide on the purpose and materials. Removing the door and continuing the wall instead is much easier than making the opening itself. The work will take time and effort. It is necessary to prepare the room, materials, tools and clothes for work in advance. The work itself is dusty, but the result will please.
INSTRUCTIONS AND PROPHECIES OF THE Blessed MOTHER ALIPIA GOLOSEEVSKY, Kyiv...

Eufillin dropper in ampoules is used to treat pathologies that ...

Among all ointments for the treatment and prevention of joint diseases, the most ...