There are many ways to send a file to someone over the Internet, and whoever it is ...


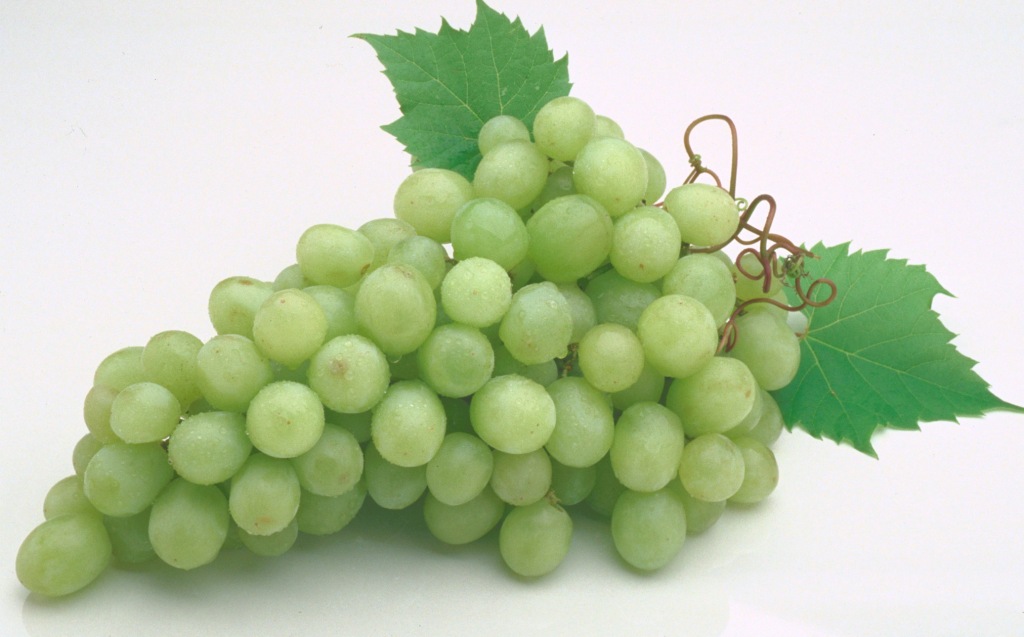
" Grape
Grapes are a very heat-loving plant and we are used to growing them on huge plantations, mainly in southern countries. But over the past few decades, through the efforts of breeders, many hybrid varieties have been bred that can bear fruit in central Russia, and even closer to the north in closed greenhouses. At an average ripening temperature of +18 ° C, it is possible to get a juicy crop in just 100-110 days, fragrant berry. We will talk about the cultivation and cultivation of such grapes further.
Grapes are exactly the crop that does not propagate by seeds, since in this case it does not retain its original genetic characteristics. It is not always possible to buy a ready-made seedling of a favorite variety. That is why the most accessible and widespread vine propagation method - cuttings.
Its availability lies in the fact that at home it is very easy to save, plant and root grape cuttings, prepare them for planting in open ground or a greenhouse. It is best to do this at home, since the rooting process should begin no later than late February - early March.
The most important thing is to choose a grape variety capable of good rooting.
Now very many hybrid varieties have this ability, since cuttings are one of the main areas of work of breeders. Most often, on a garden plot, gardeners like to plant table varieties with excellent palatability, sugar content, large berries (preferably seedless), with early or mid-season ripening. Almost all these requirements are met by varieties:, Pleven, and many others.
Before planting grapes in the ground, it is necessary to germinate the cuttings and wait for the first leaves to appear. Growing grapes in a greenhouse or in the open field directly depends on natural climatic conditions region. It is clear that in the southern regions in the open field, grapes will have time to ripen not only early varieties, but also later. But in the Middle lane, the Moscow region and further north in open soils, only the crop of the earliest varieties will ripen.
In those regions where summers are short, winters are cold, it is best to grow vines in greenhouses in order to enjoy the taste of berries for a longer time with different terms maturation. But in indoors will have to more carefully monitor the health of the bushes, microclimate, soil conditions, as cases of fungal and other lesions spread much faster. In a closed space, it is easier to prevent the appearance of typical diseases than to eradicate them.
The whole process of obtaining rooted seedlings takes several months, but in terms of labor intensity it is not very difficult. Even novice gardeners who decide to go into viticulture are able to achieve the best results - this culture is so unpretentious, although it requires some attention. The main thing is to properly care for and carry out certain activities on time.

The very first stage is the preparation of planting material. During the pruning of grapes in the fall, when all the branches that bear fruit this year are removed, the cuttings are harvested. It is the fruit branches that serve the most best material for future seedlings. What is necessary take into account:
The branch should be without visible damage, with a light bark, on the cut - green, with droplets of liquid (juice) protruding on it, the lower cut is made straight, and the upper cut oblique. The length of the handle is at least 40-45 cm, the cut diameter is 10-12 mm + 3-4 living buds with a gap of 10 cm between them. Make cuts with a very sharp pruner or knife so that their tissues do not wrinkle, at least 2 at a distance from the buds -3 cm
Cut cuttings need to be prepared for storage:
Store the cuttings at t 0 + 5 ° C (a refrigerator, a glazed balcony, a basement will do).
 Cuttings can be stored both in the refrigerator and in the basement.
In late February - early March, they begin to root the planting material. First you need to check how the material was preserved. To do this, the sections are updated, each at a distance of 0.5-2 cm from the upper and lower kidneys, respectively, in an oblique and direct way - they should be green and moist. Then the cuttings are lowered into the water for 1-2 days (depending on the degree of dryness of the branches), to stimulate growth, add honey, aloe juice or humate (1 tablespoon / 10 l of water).
At the lower heel, where the roots will grow, you need to make several grooves with a needle 2-3 mm deep and 2 cm long - this will help to get a more developed, lush root system. The upper cut can be treated with paraffin.

In ordinary glass liter jar put a layer of cotton wool about 2 cm at the bottom, pour the same amount of water (preferably melted water), lower the cuttings. The heel - the lower edge - should be in the water at a depth of 4-5 cm. To avoid rotting of the liquid, you can put 2-3 tablets activated carbon, add water periodically. You can put a plastic bag on top of the jar to create a greenhouse effect, put it on the windowsill.
Grapes, like any plant, need plenty of light and heat for intensive growth. Branches will appear first, and then roots. In order for the root system to develop, the sprouts should be broken off; for a bush, one, the very last shoot, will be enough.
The soil for seedlings must be prepared in the fall, mixing equal amounts of soddy soil, peat, sand, rotted manure or compost; a ready-made mixture from the store is also suitable. As a container, you can use plastic bottles, larger disposable cups, etc., make drainage holes. A little drainage is poured onto the bottom of the container, then the prepared soil, the stalk is carefully lowered onto it, filled with soil, slightly (!) Moistened.
The heel of the seedling should be at a depth of 1/3 of the container, and young shoots above the ground. Approximately until the end of May - the beginning of June, young seedlings will have time to take root well, develop full-fledged leaves and branches, and prepare for planting in the ground.

In the southern regions, where already in March the soil warms up to a temperature of 10-12 degrees at a depth of 10 cm, cuttings after processing and soaking can be planted directly into the ground - shkolka. Planting is carried out in prepared, well-fertilized soil to a depth of 40 cm. The cuttings are placed in pits (or furrow), covered with earth to half, well tamped, watered abundantly, pits fall asleep to the top. 2 buds should remain on the surface of the earth. Focusing on the climate of the region, you can mulch the surface or temporarily cover it with a film.
Another fairly common way to germinate cuttings is in sawdust.
Sawdust should be only deciduous trees, without admixture of harmful plywood or chipboard sawdust. They must be steamed before use - pour boiling water, then cool and in a deep dish (bucket), first pour a small layer to the bottom. Then, in an inclined state, spread the sawdust in layers, placing the cuttings vertically between them. After planting, it is necessary to cover the dishes with a film, put in a warm place and moisten the environment from time to time until sprouts and roots appear.

The technology for planting in open ground is simple. Ready rooted seedlings are first prepared for planting in open ground. To do this, within 5-7 days, seedlings in pots are taken out into the street, avoiding direct sun rays. After hardening, cuttings are lowered into pre-prepared holes together with an earthen clod, the holes are filled with earth mixed with humus, and watered with warm water. The main thing is not to bury the plant and water it moderately. In order not to damage the roots during planting, it is better to carefully cut plastic cups or other containers, then remove the seedling with an earthy clod.

Be sure to immediately fix the support next to the grape seedling planted in the ground!
Germinating a grape cutting, rooting it and growing a seedling of your favorite variety of crispy sweet berries is not difficult. This can be done both in a polycarbonate greenhouse or greenhouse, and in open ground. Proper Care to your pet - and he will thank you with active growth and a rich harvest, literally, in two or three years.
Growing grapes from chubuk is quite simple. Therefore, this method has become the most popular among farmers and gardeners. To get a new plant, you need to properly prepare the cuttings, save them in the winter and root in the spring. In the south, grapes are planted even in autumn. In the northern zones, the branches may not withstand frost, so it is advised to plant them in the ground on the site from the beginning of May.

Before you grow grapes from chibouks, they must be properly harvested. Most experts advise doing this in the fall, during pruning or immediately after the foliage has fallen. The correct preparation of chibouks consists of the following steps:
Ready chibouks of grapes can be planted immediately in the ground, pre-rooted or stored until the beginning of spring. In the southern regions, breeding is practiced in the first two ways. In the northern ones, for example, in Siberia, the spring landing option is more acceptable.
In order to grow grapes with chibouks in the spring, they must not only be harvested correctly, but also preserved throughout the winter. The stage of preparing the vine for storage is very important. Once the cutting is completed, the cuttings are soaked in water at room temperature for a day. They are saturated with moisture and do not dry out during storage. The tops can be waxed so that moisture is not lost.
After moistening, the vine must be disinfected so that in winter the branches do not become moldy and die from diseases. For processing, solutions of copper sulfate or potassium permanganate are used. Soak the chibouks in them for 15-30 minutes.
After all procedures planting material need to dry well. Sprigs are laid out on a newspaper, filter paper, paper napkins. Storage of chibouks is recommended to be carried out at low temperatures, from 0 to 5 degrees. Suitable for this fridge or basement. Can be stored in the refrigerator a large number of twigs. They are tied into a bundle, rewound with plastic wrap and stacked on the bottom shelf.
If there is a lot of planting vine, it is best to place it in a dry basement. Take wooden box, pour a layer of sand on the bottom. Then lay the grapes next to each other. Sprinkle the branches on top with another layer of sand, 3-5 cm thick. You can make several such layers in a box, this does not affect the safety of the cuttings.
During the winter, at least once every 3-4 weeks, the vines should be checked. If they become dry, you need to re-soak the cuttings in water for a day. When the branches have bloomed or become stained, be sure to disinfect them. Sick chibouks are then stored separately from healthy ones.
Growing grapes from chubuk at home provides for their rooting in February or in the first days of spring. First, it is recommended to do kilchevanie. The lower half of the branches are placed in heat, and the upper half in the cold. Then the roots will develop faster than the leaves from the eyes. All the power of the chubuk will go to rooting, and not to the development of green mass.
You can start growing grapes from chubuk by several methods:
Each of the methods has its own advantages and disadvantages. We will talk about them below. The main thing for germination is to choose good healthy material, then it will be successful.
Propagation of grapes by chibouks with rooting in water is a very simple and popular technique. You need to do it like this:
To make the water evaporate more slowly, put cotton wool or gauze on the bottom. It is advisable to throw a couple of crystals of potassium permanganate, charcoal into it. This will protect the young roots from rotting. Transplantation into the ground is carried out when the length of the roots is about 2 cm. Rooting lasts 4-6 weeks, sometimes longer.
When the number of seedlings is large and there is little space at home, they can be rooted on a locker. The process looks like this:
When growing grapes from chibouks in peat tablets, there are even fewer problems. To do this, the tablet is soaked in water until it swells. Stick the tip of the chubuk into it, wrap everything with plastic wrap. Spread the branches on the locker and transplant into the ground on the site after 4-6 weeks. Times may vary depending on the variety. Planting is carried out directly in peat tablets, it is not necessary to pull out the cuttings. A successful rooting process can be judged by how well the leaves and twigs develop.
As a substrate for propagation, you can use a special hydrophilic filler, sphagnum moss or ordinary sawdust. Recently, there have been many positive reviews about the coconut flake substrate. A layer of filler is poured into a small container, 5-6 cm thick. Sawdust can be pre-filled with boiling water to disinfect. Also, the substrate can be watered with a weak solution of potassium permanganate.
The seedling is immersed in pots with filler to a depth of 3 cm, watered regularly and covered with foil after about 5 days. Soil germination looks the same. A mixture is prepared from equal parts of turf or garden soil, peat and sand. Immerse the cutting to the first kidney, and cover it with a film on top. Young shoots are removed, leaving only one of them. Intensive crown growth can interfere with root formation.
How long should the vine be kept indoors? How and when to plant grape chibouks in the soil on the street? To do this, the night temperature should rise above 15 degrees, and the ground should warm up to 10 degrees. In the north and temperate zone these temperatures are reached by mid-May.
Before transferring the germinated grape chubuk to the garden, it can be planted in a pot of earth. At the bottom of the tank, a layer of drainage is poured from pebbles, expanded clay or river sand. Then fill it with universal soil for flowers or a mixture sod land, humus, peat and sand. Rooted chubuki are planted there (the length of the roots should be at least 2 cm).
If you grow grapes with chibouks in the first days of March or at the end of February, it often becomes necessary to transplant them into pots. After all, the roots have already appeared, but it is still cold outside. In the ground, cuttings can grow for several weeks. It is advisable to take them out periodically to the veranda or balcony to harden. At a suitable temperature, the vine is planted in the garden. For this, a place protected from the wind is chosen, from the south or south-west side of the building, fence, hill.
GRAPES FROM CHUBUKOV! HOW EASY AND SIMPLE TO TURN A GRAPE VINE INTO A GRAPE SEEDL!
Chubuk is planted in a hole at an angle of 40-45 degrees. Cover with earth so that 1-2 buds remain on the surface. Near a young trunk, it is desirable to lay out a small mound. The seedling is poured with 3-4 buckets of water, the ground around is mulched with straw or peat. If frosts are expected, you can cover the stalk with plastic, glass bottle, plastic bag.
To grow grapes from a chubuk, it must not only be planted correctly. Care of seedlings in the first weeks and months is very important. It provides:
In the first two weeks after the planting, the grapes do not need to be watered, the water that you poured when transferring the chubuk to open ground is enough. When the earth dries out by 3-4 cm, you can pour 2-3 buckets of water under the bush. Further watering depends on the weather. If the yard is dry, you need to water the vine 3-4 times a week. When it rains, watering is reduced to a minimum.
Organic and mineral fertilizers are used to feed seedlings. From organic matter, you can use manure (diluted 1:100, chicken manure (diluted 1:50, compost or humus). Mineral top dressing can be done independently by mixing:
Can be bought ready mixes in the store, if you give them yourself at home, they do not allow. You need to feed a young seedling a month after planting, the second feeding is carried out in September.
To protect young seedlings from diseases, they are treated with copper sulphate or Bordeaux mixture. When plaque appears on leaves or young branches, they are removed. Pests are destroyed by dichlorvos, slaked lime, other insecticides.
Proper care and watering can protect against many diseases, especially fungal ones. If you follow all the instructions on how to grow grapes from chubuk correctly at home, after 1-2 goals you can get the first fruits from the vine. In more detail, all stages are conveniently viewed in the photo and video.
To get a self-rooted seedling of the variety you like, you can carry out cuttings of grapes at home. To do this, you need to know how to properly prepare the cuttings, what time is best for this, and how to care for the resulting planting material in the future.
In the photo cuttings
As a rule, cuttings are harvested in the autumn months, during. The main thing is to be in time before frost, even if not all the foliage has flown from the bushes yet.
For cuttings, you need to choose the best grape bushes that have shown themselves well in terms of yield and quality of berries. The cuttings are cut from the middle part of the fruiting vine, the thickness of which is from 7 to 12 mm, and the length of the internodes is about 10 cm. The color of a healthy vine should be straw or brown, without any dark spots or other suspicious signs.
Video about the propagation of grapes by green cuttings
Instructions for harvesting cuttings:
Make sure that rot does not form on the cuttings in the basement due to high humidity. Rotten branches can be washed with water or discarded if they already look completely unsuitable for planting.

Photograph of grape cuttings
At the end of February, or already in March, you can start growing grapes from cuttings. Cut each productive shoot into small cuttings with two eyes, retreating from the kidneys by one and a half centimeters. In this case, the upper cut is beveled, and the lower one is made perpendicular.
Healthy twigs should have a light green color when cut, and a clear liquid should come out when pressed. Cuttings with darkened sections are not used for rooting.
On the sides of the base, it is recommended to make grooves with a sharp carnation or a needle. Next, disinfect the small cuttings in a solution of potassium permanganate for 5 hours and place them entirely in water at room temperature for two days. It is also useful to hold the branches in a rooting stimulator after soaking.

Photo of grape cuttings soaking
To form the root system, prepared grape cuttings are placed in the usual glass jar filled with 3 cm of clean water. Place different grape varieties in different containers and place in a sunny place. After 12-14 days, you will notice how the upper bud swelled, and the growth of the young shoot began, and in a month the roots will grow. The main thing is not to forget to add fresh water as it evaporates.
Plant cuttings with regrown roots in the ground, using one and a half liter bottles with a cut neck, plastic cups, plastic bags and seedling pots as containers. For convenience, containers with seedlings can be installed in one box, so that it would be easier to transport the strengthened plants to the vineyard later.
Before planting grapes with cuttings, you need to prepare a suitable substrate by mixing garden soil, humus, rotted sawdust and sand (1.3: 1: 1: 0.5), or buy ready-made soil mixture in the store. Be sure to pour a drainage layer on the bottom of the container, add the soil mixture and, setting the cutting so that the upper eye is on the surface, fill the container to the top.
Video about how and when to root grape cuttings
As you can see, growing grapes with cuttings is not particularly difficult. It is only important not to neglect the rules for caring for seedlings:

Photo of grape cuttings
By June, the cuttings will be completely ready for planting in open ground, but if the plants seem weak in appearance, move them to grow in the greenhouse. Well, about which method of landing is better to choose, you can read in the corresponding article on our website.
The success of grape cultivation largely depends on knowledge and compliance with growing technology, as well as on correct selection zoned varieties. Grapes can be effectively propagated by both seeds and vegetative methods. For the selection of new varieties, sowing by seeds is used. V household plot grapes are bred only by vegetative methods: layering, grafting and cuttings. At the same time, the most convenient, cheap way of mass cultivation of grapes is growing from cuttings. Usually they use green summer or stiff winter ones.
Propagation of grapes is propagated in two popular ways: by seeds, vegetatively.
Harvesting grape cuttings should be carried out in the fall (September - October) from healthy bushes. The thickness of the vine for cuttings should be 7-10 mm. Sections 60-55 cm long are cut, containing from 4 to 5 buds, cleaned of leaves and tendrils. The lower cut of the handle is made under the knot, and the upper cut is 2 cm above the eye. Prepared cuttings are soaked in water for a day, then disinfected with a solution of copper sulphate. Sections should be dipped in melted paraffin or wax to prevent moisture loss.
The grape cuttings treated in this way are placed in labeled plastic bags and stored in a cool place with a temperature of 0 to +5 degrees. Some keep the cuttings right on the site in a hole about 80 cm deep, covered with sand and earth from above.
Back to index

Grape cuttings must be planted for acceleration in late January-early March.
The optimal time for planting cuttings for rooting: the end of January - the beginning of March. We take the cuttings from the storage place, evaluate their safety and quality. The cut of the vine should be green, without black spots and mold. On selected cuttings, sections are updated with a sharp knife from below 5 mm from the lower kidney, from above obliquely from the kidney and 1-2 cm above. In the lower part of the cuttings, 3-4 grooves 3 cm long are made with a knife or a needle, cutting through the bark to the bast. Furrowing promotes the growth of additional roots.
After soaking, it is desirable to treat them with a root system growth stimulator. For this, a solution of heteroauxin, sodium humate, fumar, humisol, as well as honey (1 tbsp is needed for 10 liters of water) or aloe juice (2 parts of water for 1 part of juice). The cuttings are placed with the lower part in this solution for a day.
Back to index
At this time, it is necessary to prepare a kilchevator - a device that provides pre-planting preparation of cuttings. How it works: creating elevated temperature in the lower part of the cutting in the area of root formation, and lower at the top. The goal is to speed up root formation and slow down leaf growth. There are many designs of this device with electrical heating or the use of natural thermal agents (manure, compost).

Growing grapes requires a lot of attention and technology.
The simplest kilchevator at home is obtained from plastic containers eg bottles. Cut off the top of the bottle, make drainage holes at the bottom. We fill the resulting containers by 3-4 cm with disinfected pine sawdust, place the cuttings in them vertically and fill them with sawdust and the upper eye. 5-7 cuttings can be placed in one bottle. For effective kilching, you need to place the bottles so that the temperature below is 22 - 25 degrees, and there is cool air on top, for example, on a radiator by the window.
The cuttings rooted in the kilchevator with the leaves that have appeared are planted in prepared pots with a mixture of fertile soil and sand, or immediately in a school. The term for planting seedlings in the ground, in a school or in a permanent place is June - early July.
Another effective method grow planting material - rooting seedlings in paper cups. It provides a high survival rate of cuttings. Paper cups (without a bottom) are used, 15–20 cm high, 6–7 cm in diameter. They are filled with soil mixture containing humus and sand. Cooked cuttings are placed in cups up to the top eye. Cups with cuttings in a pallet are placed on the windowsill of a sunny window. Watered with warm (25-30 °) water every other day. After 2 - 3 weeks, leaves begin to appear, after 4 - 6 weeks, roots begin to appear. To obtain full-fledged seedlings of European-Asian varieties in this way, 45-50 days are enough. For planting in place or in a school, seedlings are ready by May 5-10, in areas of the middle lane, planting is carried out after May 25.
Back to index
Shkolka is a section of a nursery in which grapes are grown from cuttings, with subsequent transplantation to a permanent place. The cuttings in the shkolka are arranged in rows every 10-15 cm. The distance between the rows is at least 30 cm. More often this method is used in industrial viticulture, when it is necessary to grow a large number of seedlings.
The area for the school should be well lit by the sun and ventilated from all sides. For better rooting and development of seedlings, the earth should be light. The soil is dug up in April to a depth of about 40 cm, organic and mineral fertilizers are applied.
If kilchenation was not performed, it is necessary to stratify the cuttings before planting in a shkolka. They are wrapped damp cloth and leave in a warm, well-lit room (20 - 25ºС). After two weeks, the bulk of the kidneys should bloom. After that, the best ones are chosen and landed in a school.

Kilchevanie allows the cuttings to ripen faster for further planting in the ground.
Planting begins after the soil warms up above 10 ° C. Cuttings suitable for planting are immersed with the lower end in a clay solution with the addition of heteroauxin (0.01 - 0.02%) to stimulate the development of the root system. With sufficient moisture, the shkolka is recommended to carry out a shallow planting for better heating of the roots in the spring.
In most viticultural areas, the cuttings are buried no more than 30 - 35 cm. In the prepared soil, furrows are made 40 cm deep and a shovel wide. The cuttings are laid along one of the walls of the furrow at a distance of 12-15 cm from each other. The groove is half-filled with soil, compacted tightly, watered abundantly, and after the water has been absorbed into the soil, the groove is finally filled up, leaving 1-2 buds on the surface. From above, an earthen roller is formed above the upper kidney by 10-12 cm. Next row do at a distance of less than 30 cm from the previous one. After planting the cuttings, the ground is loosened again, and after 1 - 2 days it is recommended to carry out additional watering.
Planting cuttings in shkolku must be completed before May 10 - 15. With a later landing, there will be less time for the shoots to ripen, and they may freeze slightly in the fall.
Rooting lignified cuttings is the main method of grape propagation, accessible even to a novice gardener. The principles of growing seedlings from cuttings vary somewhat depending on the region and have many options, but the success of obtaining high-quality seedlings, subject to simple rules, is guaranteed. You just need to get cuttings of the variety you like somewhere and be patient.
The time when in autumn it is already possible to cut grape cuttings for early spring or even winter planting for germination comes when the leaves begin to turn yellow. During this period, they can be cut off, and after a week, cuttings can already be cut. However, you should not rush, because it is much more convenient to do this in late autumn, during the main pruning of bushes before shelter for the winter. By that time, there will be no leaves, the unripened fragments of the vine will freeze from the first mild frosts, and everything will be “in full view”. It is not worth leaving the harvesting of cuttings for the spring: who knows what will happen to the vine in winter?
Often the top of the vine does not have time to ripen for summer period and must be removed. Actually, after the first frost, it is perfectly visible. A well-ripened vine crackles when bent. It is only advisable to have time with cutting before temperatures drop below -5 ° C. In autumn, cuttings should be cut longer than they are required for planting, with 5–6 buds, since in spring they will again need to be cut on both sides. The best shoots for cuttings are at least 5 mm in diameter, from the middle of a vine that has grown to at least one and a half meters in length. Thin cuttings will also take root, but the process will go more slowly, the seedlings will not grow so strong.
After leaf fall, choosing the desired section of the vine is simple, everything is clearly visible
If this first and simple operation is not performed correctly, further work may be useless. The most common errors are:
To preserve the cuttings until winter, you need a cellar or a shelf in your home refrigerator. They will have to lie there until about mid-February, the optimum temperature is about +1 o C.
Before sending to the cellar, the cuttings must be prepared. This will require:
If possible, not “naked” cuttings are put in the bag. It is useful to overlay them with pine or spruce sawdust, but first the sawdust must be scalded with boiling water. Coniferous resin favorably affects the safety of cuttings, protecting them from accidental mold. During the winter, sawdust should be changed once or twice. At the same time, carefully examine the cuttings for their suitability, throwing out the clearly blackened ones.

Before sending for storage, labels must be made indicating the variety and origin of the cuttings.
The maximum possible temperature during storage of cuttings is 6–7 ° C. Air humidity should be slightly less than 100%. Periodically, a revision of the planting material is required: if even traces of mold are found, the cuttings must be wiped and washed with a pink solution of potassium permanganate. If drying is found, soak for several hours (if necessary, up to a day) in water and send it to the cold again.
Work with cuttings stored in autumn in most regions of our country begins at the end of winter. First they need to be prepared for later life, it will not be easy anyway. To start cuttings you need:
Perhaps not everyone survived the winter well, so you need to check their survivability. If you slightly scrape off the bark of a living cutting, a green tissue should appear under it. Brown, yellow or black color indicates that such a cutting will have to be thrown away.
Now, from the long stocked cuttings, we need to cut those that we will plant. Short cuttings for planting should have three healthy buds (you can have two, if they are well developed, then that's enough). Grape cuttings with three developed buds are traditionally called chibouks. Cuttings with a large number of buds will give a lot of roots, which is not very convenient when growing at home.
The upper cut should be straight and located 2-3 cm above the kidney, the lower one (1-2 cm below the kidney) should be made obliquely.
In any case, the prepared cuttings should swim in the water for 2–3 days (preferably from melted snow), while you must be sure that this time is enough. The signal is the release of moisture droplets on the cut of the cutting taken out of the water. Sometimes this takes more time.
Then there are options. There are two of them:
But in any case, at the bottom of the soaked cuttings, it is necessary to make 3-4 longitudinal shallow grooves with a knife or a needle. This facilitates the growth of a stronger root system. Some amateurs use various root formation stimulants, but this must be done strictly according to the instructions, and good cuttings take root without their use. A natural stimulant can serve as a honey solution: a tablespoon per liter of water. Of course, success may also depend on the grape variety: there are varieties that are difficult to root.

You can apply shallow scratches with any handy tool, this will greatly facilitate the formation of roots by the cuttings
So, let's say you decide that you will plant cuttings in the ground only after they give roots. How to germinate cuttings, awaken them and force them to form roots? Here, too, there are several options, but one of them is quite elementary. To germinate cuttings, you need:

A slightly more complicated option is to use scalded coniferous sawdust instead of water. They are also poured with a layer of 4-5 cm, moistened with water, put cuttings on them and pour the same amount of sawdust. Sawdust is sometimes replaced with ordinary cotton wool. The option in which the cuttings wrapped in a wet rag are tightly tied in a plastic bag, leaving only the upper kidney out, apparently, should not be recommended: in the bag, both souring of water and breaking off of hatching roots is possible.
So, in a container with soil, you can plant both cuttings that have already given roots, and simply soaked cuttings. There is a slight difference in planting technique and soil selection.
If we plant cuttings with roots, then they already have very small green leaves. If three weeks have passed, there are leaves, but there are no roots yet, this does not mean that everything is lost: for some grape varieties this situation is normal, and you have to wait more, refreshing the water or replacing the sawdust. Cuttings that have taken root can be planted in pots or large glasses.

The optimal length of the roots is from 2 to 4 cm, but when planting, you should try not to break them off.
For growing grape seedlings from cuttings, it is convenient to use large paper cups or one and a half liter plastic bottles, cutting off their tapering top and making several holes in the bottom to drain excess water with a hot nail. At the bottom of any vessel, it is imperative to lay 3-4 cm of drainage from small pebbles or coarse sand. The soil is a mixture of equal amounts of fertile soil and river sand.

circumcised plastic bottles as if specially created for growing grape seedlings
One cutting is planted in each container. You can do two, if there are a lot of them, but there is not enough space, but then the worst will have to be removed: you can grow two seedlings in one bottle, but they will be cramped, and then it will be impossible to plant them in open ground without disturbing the root system.
If the cutting had three buds, it should be planted so that one is in the ground, the second is close to the surface, and the top one is in the air. Two-eyed cuttings are buried almost entirely in the ground: the upper kidney should barely be visible from under it.
If the leaves on the handle have already unfolded, then the pot can not be covered, and if they just appeared from the kidney, for the first time you need to put a plastic bag on it, creating the greenhouse effect. The temperature during the growth of the cuttings does not play a special role: it should be room temperature, and good light is needed, so the containers should be placed closer to the window. In containers, the soil should be constantly slightly moist, but in no case waterlogged. The frequency of watering depends on the quality of the soil and the conditions in the apartment. Usually it is necessary to water in small portions every few days, sometimes once a week is enough. Water for irrigation should be slightly warmer than room temperature.
Most grape varieties take root well without prior preparation, but when planting cuttings without roots, moisture and temperature should be monitored more closely. With proper observance of the conditions, the rooting of such cuttings is almost one hundred percent.
The requirements for capacity and the presence of a drainage layer are the same as in the case of germinated cuttings, but soil mix more friable is being prepared: in addition to sand and soil, humus must also be taken, mixing them in equal quantities. Many amateurs generally do without earth and sand, filling the containers with boiled coniferous sawdust.
It is recommended to plant a grape cutting without roots so that almost all of it is in the substrate, and only one kidney is visible above it. However, experience shows that leaving two kidneys out leads to good results. At least in the examples of five different varieties, the author of these lines has never had to experience failure.
After planting, the substrate is well watered with a pink solution of potassium permanganate and the cutting is covered with a plastic bag. The best temperature for the formation and growth of roots is from 25 to 30 ° C, but they will germinate at a lower temperature, only in a warm substrate, root formation will begin much sooner. Do not overheat: if the recommended temperature is exceeded, roots may not form.
Until the roots have formed, it is necessary to water the soil often: about every other day, but without fanaticism. Excess water should drain through the holes into the pan. Many generally water “from below”: they put the pot in a bowl of water for a while, and then take it out of it. After 2-3 weeks, you can slightly pull the handle: if there is resistance, then the roots have begun to form. From this point on, less water is needed: it is better to let the soil seem a bit dry than obviously wet. Around this time, the leaves begin to bloom. As soon as they unfold, the package covering the stalk must be removed, and the "garden" should be transferred to a bright light.

It is necessary to water the cuttings carefully, excess water is more harmful than its lack.
Grape cuttings root easily if done correctly. Errors when planting cuttings without roots are more fatal than in the case of germinated cuttings. Here's what they can be:
Caring for planted cuttings at home consists in observing temperature regime, irrigation, organization of additional lighting. As already noted, the soil in the cups should not dry out, but stagnation of water is categorically excluded. However, in addition to soil moisture, great importance It also has air humidity, and in a city apartment during the heating season, as a rule, it is dry.
The simplest way out of the situation is that after removing the plastic bag from the handle, two open cans of water are placed next to the structure: one is flush with the pot, the second is higher, at the level of the upper kidney.
So that the removal of the package is not a shock for the plant, it can be taught to be without such a hat gradually, for several days removing the package for a short and then longer time.
It is best to place the "garden" near the window and the battery, but in March there may not be enough light for good development future seedling. At the initial stage of cultivation, strong illumination is not required. But after the leaves unfold and the shoot begins to grow, most likely, you will have to add to sunlight and a fluorescent lamp or a diode lamp. best temperature for plant development from 25 to 28 ° C, but even at slightly lower values, growth will be normal.

A cold light fluorescent lamp can be placed directly above the garden
A month after planting the cuttings, they can be fed with a solution of complex mineral fertilizer according to the instructions, for example, azofoska or special fertilizers for grapes, such as Novofert. In May, it is gradually necessary to accustom future seedlings to fresh air, taking out the pots on the balcony. From mid-May, in the absence of obvious cold weather, they should be on the balcony almost around the clock, and at the beginning of summer it is time to land in open ground.
The quality of seedlings grown from cuttings directly depends on the bushes from which the cuttings were cut. If the bushes were affected by mildew, oidium or gray rot, the cuttings will not take root and grow well. It is from this point of view that the processing of cuttings is extremely important both before winter storage and before planting in pots. chemicals(potassium permanganate, Fundazol, Rovral, etc.). This treatment allows you to destroy the spores of infections on the surface and a significant part of the diseases that develop inside the wood.
During the germination of cuttings in water, infection may enter the water from the outside, which is prevented by changing the water in the jar and adding wood ash or activated carbon to it. Infection is also possible through sawdust used as a substrate. If the infection enters, the tissues of the cuttings die off or the young shoots rot. V severe cases possible death of up to 100% of the cuttings. Therefore, periodic preventive spraying once a week with Fundazol or Rovral is not at all superfluous.
Already in the process of growing planting material at home, you can notice problems on young leaves. Symptoms of the disease are the same as on adult grape bushes. For example, unexpectedly and rather sharply, the leaves may turn yellow. Most likely, this is the most dangerous mildew fungal disease that affects not only leaves, but also young shoots. If the disease has not gone deep, when the first signs appear, the "garden" must be sprayed Bordeaux mixture or the drug Ridomil Gold.

mildew starts small yellow spots, but soon covers the whole sheet
In another situation, the leaves may turn black, which also happens unexpectedly, the process progresses quickly. Sometimes this can happen simply from excess moisture or, conversely, from drying out of the soil. In this case, optimizing growing conditions can still save the day. This also happens because of too dense soil. You can try to urgently transplant: if the matter has not gone far and the roots have not died, a transplant can help. If the leaves turn black from diseases (and these may be the consequences of several infections at once), it will no longer be possible to save the cuttings.
It is not always convenient to plant a garden in an apartment, often there is simply not enough space for this. In the conditions of the middle zone, and even more so in the south of our country, the cultivation of grape seedlings from cuttings can often be transferred to a greenhouse. And in the southern regions, they even practice planting cuttings directly into open ground.
The period of physiological dormancy for grapes ends in January, and its cuttings can already be put on germination. However, for growing in a greenhouse, as well as in an apartment, all work begins no earlier than the end of February. All preparatory operations are identical to those performed at home (washing and disinfection of cuttings, cutting them into three-eyed pieces, etc.).
For growing in a greenhouse, cuttings are almost always germinated until roots form, placing their ends in a jar of water. Even more often, they are planted for the appearance of roots in wet sand immediately in the greenhouse, if only the temperature in it has reached values of at least 10–12 ° C. This is the lowest possible temperature for root formation, but for guaranteed success, heating is needed in the root zone. Therefore, a greenhouse, in which there is no possibility of connecting heating devices at all, in the middle lane or in the north is not suitable for early spring cultivation of grape seedlings from cuttings.
During mass cultivation on racks, sand is poured with a layer of up to 15 cm and cuttings are densely planted in it. In amateur viticulture, we are talking about several copies, so any acceptable container can be used for sand. If the weather in the region is such that the greenhouse needs to be heated, you should not do this especially for grapes, it will be easier to grow seedlings in an apartment.

It hardly makes sense to use a greenhouse for growing several seedlings, but as a temporary, “transshipment” point, it will also fit in amateur viticulture
After planting the cuttings, the sand should be watered with warm water so that it is constantly slightly moistened. Optimum temperature in the greenhouse about 18 o C, and sand in the root zone - about 23 o C, air humidity about 75%. Under such conditions, roots are well established, and bud break is temporarily delayed.
After 2-3 weeks, leaves and rudiments of roots should appear at the same time. After another week, the cuttings are carefully transplanted into any containers of sufficient volume (large cups, cut plastic bottles, etc.). It is desirable that by this time the roots of the branch are at least up to 2 cm. Best Cast soil for planting containers - soddy land, compost and sand (approximately 40: 40: 20%). In the future, you need a high temperature, not lower than 25 ° C, and good lighting.
It takes about 2 months from planting in a container to transplanting seedlings to a permanent place. In May, it is necessary to accustom future seedlings to fresh air, opening the windows and doors of the greenhouse for a while. At this time, if the shoots have grown from several buds, only one, the most powerful, is left. If it grows too long, then upon reaching a height of half a meter, pinch the top of it: before planting in open ground, the main shoot should not be long, but strong, let it continue to grow in thickness.
In the southernmost regions of our country, cuttings can be planted directly in open ground. Moreover, this is often done even in the fall, immediately after cutting the cuttings, and at the same time they get good results. At autumn planting the cuttings take root well and with the onset of warm weather in the spring they grow. The stalk is completely buried in the ground in autumn, leaving only one bud on the surface. But for the winter they also spud it, and cover the bed with a film and sprinkle it with a layer of earth. In the spring, the structure is opened, a hole is cut in the film for escape. The stalk is unraveled only when the grapes clearly begin to grow and a steady heat sets in.
Spring planting of cuttings in open ground is possible when the soil at a depth of 10 cm warms up to 10–12 ° C, in the south this time falls on March. Processing of cuttings before planting is standard, keeping cuttings in a jar of water or wet sawdust is mandatory, at least until the roots begin to grow.

Cuttings are planted in open ground in spring only after they have given roots.
Cuttings are planted in well-fertilized soil to a depth of 40 cm: since this is open ground, you do not need to limit yourself to the size of the cuttings, they can have more than 3 buds so that the roots immediately grow powerful. Cuttings are planted with a slight slope, leaving two buds on the surface. If it is still cool, you can temporarily cover them with non-woven materials.
In the case of grapes, the process of growing planting material varies greatly depending on the climatic conditions of the region. If in the southernmost regions they rarely associate with growing seedlings at home, then in the north it cannot be otherwise.
In Russia, more than half of the grapes are grown in Krasnodar Territory. The main viticultural regions are Temryuksky, Anapa, Krymsky, the cities of Novorossiysk and Gelendzhik. Climate Krasnodar Territory best suited for viticulture. little different weather and in other regions, territories and republics of the Kuban region. It is warm enough everywhere, only the amount of precipitation in some areas can vary greatly. The soils are fertile, there is a lot of light, and this makes it possible to obtain rich harvests of grape berries.
The basic rules for planting in the Kuban do not differ from the usual norms, but seedlings are almost never grown here in a city apartment.
Most often, cuttings are planted directly into the open ground, and the “long vine” option is often practiced: in the fall, a piece of vine about one and a half meters long is immediately buried in a large planting hole, curled into a spiral and leaving 1–2 buds on the surface. For successful root formation in this variant, an irrigation pipe is carried into the zone of future roots, but a large layer of drainage must be arranged.
The soils in many areas of the Kuban are so good that many amateurs do not even dig planting holes, but plant cuttings in the fall "under the ramrod". So here they call the technique of making mini-pits with heavy metal scrap. They break through wells 10–12 cm wide, 10–15 cm deep deeper than the length of the cutting. Fertilized soil is poured into the bottom of the well (only half a bucket!), a long cutting is inserted, the soil is compacted, watered well, the well is filled so that there are no voids, and they are waiting for the result, which is close to 100% success.
Belarus was not previously considered an area suitable for viticulture, but these times are long gone: now grapes are on household plots- a common thing, although it requires the application of strength and skills. The climate in the country is quite mild, although not very hot, many varieties of grapes successfully ripen. But the cultivation of seedlings from cuttings is almost always carried out at home, in extreme cases - in a greenhouse, usually heated.
Planting cuttings for cultivation starts here at usual terms indicated above - at the very end of winter. Use the most various ways germination, but they do it without fail: almost no one plants cuttings without roots. There is a lot of peat in Belarus, so they try to add it to any soil, and the soil for growing grape seedlings is no exception: the most popular mixture is peat with sand and a small amount of sod land. All other operations are completely similar to those described in the main part of this article.
The climate of the Moscow region is very similar to the climate of Belarus, but more unpredictable, although this applies to winter period when severe frosts alternate with unexpected thaws. Therefore, viticulture here is a little more risky, but this mainly concerns the shelter of adult bushes for the winter and the correct choice of grape varieties: it is somewhat limited.
As for growing seedlings from cuttings, it is carried out in the same way as described above, with a slight shift in timing: cuttings are taken out of storage in early spring. Their germination for the formation of root rudiments is mandatory, cuttings with roots are planted in a container with soil composed of a mixture of peat and coarse sand. They keep cuttings in containers a little longer than in Belarus, and plant them in a permanent place closer to mid-June.
Well, who would have thought half a century ago that grapes could be grown in the Urals? Now you can, however, not any varieties, but only the most frost-resistant. You can also grow planting material from cuttings, and doing this is no more difficult than in the middle zone of the European part of Russia. True, with the timing here is a slightly different story.
Planting cuttings at home is carried out in the same way as in the Moscow region, but they are not planted in June in open ground, but are grown all summer: first in greenhouses or greenhouses, and from July in the open air. If the growth proceeds powerfully, in the summer the plant is carefully transferred into deeper containers (old buckets).
By the fall, they dig planting pits and, before the onset of frost (and often already in September), grown seedlings are deeply planted in them, if they already have at least two well-ripened buds. When planting, only one kidney is left on the surface, and it is spudded and well covered for the winter.
There are many ways to send a file to someone over the Internet, and whoever it is ...

Topic: Setting up and installing the LastPass Password Manager plugin. This extension...

A rebus is a special kind of riddles in which the hidden words are encrypted with ...