So I bring to your attention a simple, but very long recipe for cooking ...


The most popular way of laying a laminate is longitudinal. It is the most simple and economical. This method is often indicated on the instructions that come with the packaging of the coating. Most of those who decide to make repairs on their own try not to deviate from the basic rules of laying. Of course, this is a good option, especially if there are no problems with the layout of the room, and the installation error is several degrees. But what if indoors uneven walls, speeches? AT difficult situation Laying the laminate diagonally is better.
With the classic method of laying laminate boards are located parallel to the walls - along or across the room. Diagonally laminate is laid at an angle of 30 or 45 degrees. The last option is considered the most optimal.
The pros and cons of laying laminate diagonally are ambiguous. It cannot be said that the advantages outweigh the disadvantages and vice versa. The undeniable advantages of this method of installation: unusual design and the ability to zone the space.
Diagonal styling- the shortest path to creativity and interesting design rooms. The skills gained during the repair will come in handy to visually smooth out the unevenness of the walls, hide the defects in the layout of the room.
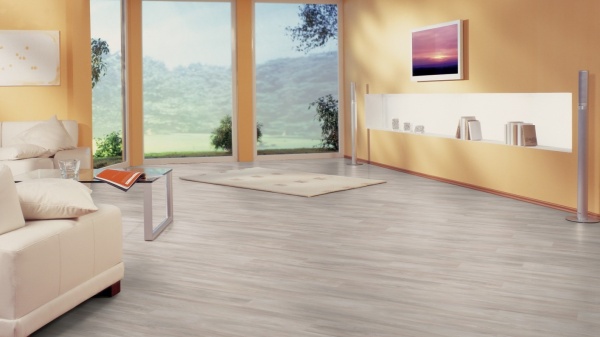
Laminate laid diagonally good way visually expand the room. They are often used by interior designers. This floor looks most impressive in rooms that are not overloaded with furniture and accessories. In this case, the diagonal pattern of the laminate further visually expands the space. It seems that the room really became more spacious.
Here is a photo of the laminate diagonally in various versions:

One of the most important arguments in favor of diagonal installation is that such a floor pattern looks stylish and opens up space for the designer. You can visually enlarge the room and make it lighter, divide the space into separate zones using different ways styling.
Laying laminate at a 45 degree angle is technically more difficult than classical method installation and requires more materials to implement the plan. For this reason, considering required amount laminate, add 15-20% to the resulting value. Professionals who have great experience in laying laminate flooring, can reduce unnecessary spending to a minimum - up to 5%. If you decide to make repairs yourself and have little experience in such work, it is better to play it safe and take more material.
So, how to lay the laminate diagonally? Before starting work, take paper, a simple pencil and a ruler. Draw the layout of the room to scale and sketch out the layout of the boards on the plan. Consider the location of the windows: the boards should be laid so that sunlight fell on them in parallel. Thanks to this, the seams between the lamellas are almost invisible. You will get a detailed diagram as in this photo:

Then proceed directly to work. In order for the laminate to be laid correctly, it is important to level the subfloor well. This is a mandatory rule when installing any floor covering, regardless of the method.
From a technical point of view, the preparation of the subfloor for diagonal laying does not differ from the traditional longitudinal installation of laminate boards. There are several stages:


You can lay the boards from corner to corner or from window to doorway. In the latter case, try to position the longitudinal joints in the direction of the rays of the sun. You can start installing the floor from the center of the room so that the boards are evenly spaced. Stretch the cord diagonally from one corner of the room to the other. This will serve as a guide.


The first row should be laid out strictly parallel to the guide. Lay the boards from the center to the left. With the diagonal laying method, the end locks are connected first, after which a whole long row interlocks with the next, already fully assembled row. It is best to work with assistants. If you work alone, use the load. This will facilitate the process of connecting longitudinal locks. As soon as you fasten the two rows and put a load on them so that they do not disperse, you can safely continue to work.
The slats are laid according to the method brickwork or in checkerboard pattern with an offset of at least 30-40 cm. The coating will be stronger and stronger without deforming during operation.
When you reach the walls, do not lay the laminate back to back. Be sure to leave small gaps of 1.5-2 cm. The fact is that with natural fluctuations in temperature and air humidity, the laminate will expand and contract. If not done, the floor will swell and cracks may appear. To ensure that the floor is laid evenly, and the distance to the walls is the same everywhere, use small pegs while working. When the laminate is completely laid, get rid of them. These gaps will not spoil the appearance of the floor. They are covered with a plinth, which is attached to the wall.
When making repairs with their own hands, some are faced with the problem of trimming the extreme lamellas. You need to cut the boards strictly diagonally, taking into account the direction of the wall. The cut must be parallel. How to do it correctly and evenly? Measure with a ruler the distance from the topmost corner of the row to the peg between the wall and the boards, in the same way measure the distance from the bottom outer corner to the peg. Transfer the obtained values to the whole lamella. Mark the obtained points and connect them with a line. Clearly cut the panel along it as shown in this photo:


You can cut the laminate with a hacksaw or electric jigsaw strictly from the back.
Whatever technology you decide to lay a laminate, always choose a quality material. Don't skimp on coverage at the expense of quality. Laminate of an average or premium checkout will last much longer than a cheap one. When installing the floor in the kitchen, it is better to choose a moisture-resistant coating. After you have bought and brought laminate flooring into your home, let it rest for at least 48 hours. Observe temperature regime indoors: not lower than +17, so that the laminate after being in the warehouse gradually “gets used” to new conditions.
Do not install laminate flooring in damp areas. This material does not tolerate sudden changes in humidity and a large number moisture in the air. From this, the lamellas swell and swell. If you have recently plastered walls and other surfaces, it is better to wait with the repair of the floor. It is necessary that the level of humidity in the room returned to normal.
Water must not be allowed to enter the laminate floor, especially if the cheapest material is chosen. The quality of such a coating is the least resistant to any influences. Moisture-resistant panels are not afraid of an accidentally spilled glass of water, but even they will not withstand too much of it.

The laminate is laid only on the substrate and only on a flat base. If these conditions are not met, then it is to be expected that the unevenness of the base will lead to deformation of the coating. The substrate does not allow the laminate to change its structure and is a good heat and sound insulator.
Also, the laminate goes well with any floor heating system. Do not forget about the so-called thermal seams - those same gaps along the walls. It should be taken into account that in office space such gaps are much wider than in the living room. The size of the gap is considered simply - 1.5 mm for each meter of the width of the room.
Please note that all tips apply only to rooms with a humidity level of no higher than 65%.
Heavy overall furniture does not allow the floor to “breathe”, preventing the panels from expanding and contracting naturally. In this case, experts recommend increasing the gaps between the coating and the walls by another 1 cm around the entire perimeter.

Inspired by a photo and decided that you want to do the same? Correctly laying laminate flooring at a 45° diagonal is a little more difficult than laying it across or across the room. You will need more accuracy in work and more accurate calculations. This installation option is less economical in terms of money. But in the end, you will get a beautiful and original floor that will stylishly fit into any interior and visually enlarge the space. And this is especially valuable in small rooms.


Laying laminate diagonally not only diversifies the design of the room, but also visually expands the space. Such installation is a little more difficult to produce compared to simple ordinary installation, but taking into account the recommendations of specialists, everything can be done with high quality and with your own hands. Some problems in work are compensated by the peculiar and attractive appearance of the flooring.
Laminate flooring has gained wide popularity as a floor covering, which is facilitated by its many advantages. Almost all instructions for its installation are guided by standard installation, when the panels lie strictly parallel to the walls. This method is fully justified when the room has a strictly rectangular shape, and the walls converge clearly at a right angle.
What to do in the case when the shape is far from ideal, and the walls are not parallel, and even there are rounded corners and other atypical shapes? Standard, ordinary laying of laminate will only emphasize all the flaws, making them more noticeable. Diagonal laying of panels will help to solve the problem. With this system, the panels are laid at an angle of 30-45 degrees to the wall surface. The best option- 45 degrees, but depending on the curvature of the wall, the angle may vary within the specified limits.
In addition to smoothing out construction defects, this arrangement of the laminate visually expands the space, and the effect is most pronounced in an uncluttered room. Designers successfully use this effect. In addition, the diagonal arrangement looks more original, and makes it possible to design the interior in unusual style. Wherein different colors panels manifest themselves differently in visual perception.

A compensation gap of at least 10 mm must be left around the entire perimeter of the room at the place where the laminate adheres to the wall, which is then closed with a plinth. This condition eliminates the effects of shrinkage and temperature changes.
The preparatory stage begins with cleaning the floor from debris and dust, as well as carefully leveling the surface. Roughness is checked using a long straight rail. If you apply it to the surface and lean towards the floor, then the irregularities will reveal gaps that can be measured with a ruler. When they exceed the allowable limits (3 mm), leveling is carried out with a cement mortar.
The next important preparatory step is the laying of the substrate. It is made from rolled tile material. The most commonly used options are polypropylene, cork, coniferous mats or sheets of extruded polystyrene. It should be noted that the use of a foam polymer underlay eliminates the need for thorough preparation of the floor surface, since able to smooth out the imperfections.

The next important preparatory step is the laying of the substrate.
To carry out work, prepare in advance essential tool- jigsaw, knife, scissors, mallet, hammer, tape measure, square, building level, brush for applying glue.
Wooden wedges will help ensure the same gap. In addition, you will need wooden block for tamping laminate tiles.
To ensure the correct diagonal laying of the laminate, the following rules must be observed:
When carrying out work, it is worth considering specific nuances. It is easier to ensure diagonal laying if the panels are at least 30 cm long. If there is a radiator in the room, then the row should be started under it, because the final lining under it is very inconvenient to do. Using adhesive composition it must be allowed to dry completely before checking the strength of the installation.
For ease of installation and constant control of the line, it is recommended to stretch beacon cords, which will be a visible guide to maintain the desired angle over the entire floor area.
Diagonal laying of laminate is sometimes simply necessary in the presence of large defects in the construction of walls. It can be done in such a way that the coating not only hides errors, but also creates unusual interior. You can carry out the work with your own hands, and with their proper organization, it will be possible to avoid unnecessary waste of material.
Diagonal laminate flooring looks good in any room, no matter the style. If your room is narrow or has a non-standard layout, diagonal flooring can solve this problem. Right choice The colors of the laminate and its correct laying in relation to the incident light from the window can transform any, even the most nondescript room.
Laminate is a material with many advantages. Among the advantages are beauty, versatility, resistance to temperature changes, moisture resistance. On the laminate, you can easily walk on heels, move furniture on wheels and ride children's cars.
Laminate retains its functional qualities for a very long time, the main thing at the same time is compliance with certain rules.
Before you buy a laminate for laying diagonally, it is worth taking measurements of the room
The process of laying laminate flooring largely depends on the type of floor on which the work will be done. It doesn't matter what kind of substrate to lay the laminate on, the surface must be flat and dust-free.
Laminate can be laid on a cement screed. To do this, it is important that the screed is even and dry. Therefore, if you decide to lay the laminate on cement, you need to wait at least 7 days before starting work. AT winter time if there is no room central heating, it should take 3 weeks until the cement floor is ready for further use.
When laying laminate on a cement screed, it is recommended to cover the floor plastic wrap to avoid the release of moisture. Also, between the floor and the laminate flooring, you can use a polystyrene substrate, in case you need to insulate the floor.
If the laminate is installed on wooden floor, it will not work to level it with cement. In this case, you can use OSB boards for a virtually flawless floor. For insulation, also use a substrate or isolon.
Allow the laminate to sit indoors for a while before starting the laying process. He needs to get used to the temperature of the room.
Like any job, laminate flooring requires certain skills. The diagonal method is slightly different from the standard installation. The flooring of the boards is not mounted directly, along the wall, but starting from the far corner of the room.
Craftsmen who have already encountered laying laminate on an oblique more than once can do this work without auxiliary means. They can cut laminate by eye, join boards without any problems and easily determine the angle of inclination.
It is worth remembering that with a diagonal laying of a laminate there will be more residues than with a horizontal or vertical
But if for the first time you decide to cover the floor with boards with your own hands, it is better to install beacons on which it will be easier to lay the laminate.
By appearance a finished floor with diagonal laminate flooring will look like brickwork.
Key points when laying laminate diagonally:
This method of laminate flooring has significant disadvantages. The consumption of material is greater than with conventional installation. To save money, you can start laying from the middle of the room and move to the corners. Also, the calculation of the material is more difficult to make than with direct laying.
Laying laminate diagonally requires an accurate calculation of the material. Specialists or consultants in hardware stores will help you calculate how many boards will go on the floor in the room. There are times when the calculation is very approximate and then the material may not be enough or there will be more boards than necessary.
If you decide to lay the laminate diagonally on your own, then you first need to watch the training video
You can calculate the laminate consumption yourself by calculating, according to the described scheme, the approximate piece consumption of boards to cover the entire floor. Add 3-4 boards to the amount received in case something gets damaged.
If it is not possible to compose detailed diagram premises, but there is a common quadrature, you can calculate the flow rate as follows. When laying diagonally, add 10-12% to the total area of the room and divide the resulting number by the area of \u200b\u200bone board. Divide the number of planks by the number of laminates in the package.
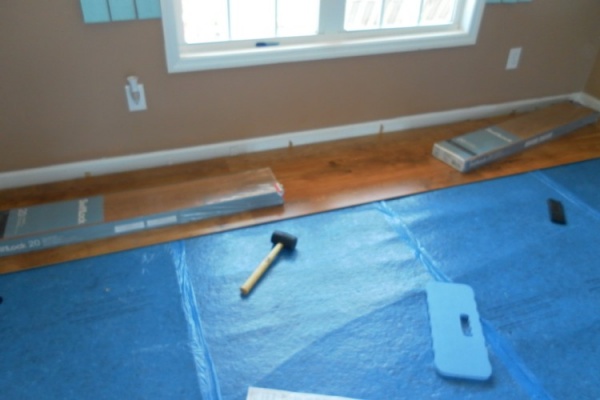
Before you start laying laminate boards, you need to lay the substrate. Roll out the material over the entire surface of the floor, glue the joints with adhesive tape or masking tape. So that when laying the boards, the substrate does not move, you can make a small overlap on the walls, the excess can be easily cut off with an ordinary clerical knife.
Perhaps in order to lay the laminate correctly, you will need a diagram that will show you sequentially how it is more convenient and economical to lay the boards.
To improve the performance of a laminate laid diagonally, it is worth putting a substrate under it.
The diagonal layout of the laminate starts from the far corner of the room, which is located near the window. You can lay a laminate both from right to left, and vice versa - there is no fundamental difference. When installing boards, you need to take into account the angle of inclination, it varies from 30 to 45 degrees.
Progress:
Between themselves, the laminate is connected by special locks. To dock the boards together, you need to bring the board into the lock at an angle of 30 degrees and gently lower it to the floor. If you hear a “click” sound, then you did everything right.
When laying the laminate obliquely, you need to adhere to the indentation from the wall of 20-30 mm. This is done so that the coating does not deform when loaded on it. These indents will later be hidden by the plinth.
A high-quality result can be obtained only by observing all the rules of laying. Despite the fact that diagonal laying is a more complex and painstaking process than standard laying, the finished result will exceed all expectations. Thanks to this method of installing laminate, you can transform the room, make it original and beautiful.
Installation of one of the most popular types of flooring - laminate, has become available to many consumers thanks to the improvement of the interlocking system. If the first laminate had to be smeared with glue before installation, the coating with Lock-locks required skillful handling of a mallet to join the panels, then the Click, 5g, Megalock locks made the work process quite simple.
However, even with modern interlocks, laminate installation requires accuracy, care, patience and accurate calculation, without which you will allow a large waste of material. Typically, the laminate is laid perpendicular to the light source (window) so that the light rays go along the long side of the panels. This way of laying makes the seams between the panels hardly noticeable.
Across the room (parallel to the light source - windows), the laminate is laid in small rooms in order to visually expand the room. The coating is also laid across narrow corridors and small hallways.

In addition to direct laying methods, herringbone and diagonal laying of laminate is also used. Today we will talk about the diagonal method.
Laying in this way is more complicated than a regular straight line, it requires more time, effort, accurate calculation and more material consumption. The panels at the junction with the walls of the room will need to be cut at an angle in the end parts. However, a properly executed diagonal laying has undeniable advantages:


Laminate for laying diagonally will have to be purchased with a margin. Advice on the size of the stock varies, up to 20%. Such “advice” seems to be frank reinsurance, and, except for laminate manufacturers, no one will say “thank you” for it. It can be assumed that a beginner will not be able to complete the installation with a minimum amount of waste, which the masters proudly demonstrate in videos posted on the Internet. They get from 5 to 7%, and some even less. But a beginner will be able to keep within a 10 percent supply of material.
Calculating the required amount is easy. Multiply the area of the room by 1.1. The packaging indicates the total area of the panels contained in it. We divide the resulting room area with a 10 percent margin by the area of the panels in one package and round up to a whole number. Here is the number of packs you need to purchase.
Important! Buy as much as you need at once. Firstly, panels of the same model from different batches may differ in shade, which will be immediately noticeable on the floor. Secondly, stores are constantly updating their collections, and when you come to buy more, there may simply not be such coverage.


Preparing the surface of the base for diagonal laying of the laminate is no different from similar work for other methods. The base must be level, solid and stable, dry. Height differences are allowed within 2 mm when measured with a 2-meter rail (it is convenient to use a level as a rail). Laying can be done on a sand-cement screed, wooden floor, plywood, OSB-boards, linoleum.

The wooden floor is checked before installing the laminate, if necessary, replace the boards, get rid of squeaks and bumps.
The screed is checked with a level, if necessary, the influxes are ground, deep cracks are expanded and poured cement-sand mortar. If the height differences reach 10-20 mm, the screed is leveled with a self-leveling mixture (self-leveling floor). To remove air bubbles, the floor is rolled with a spiked roller.

Before installation, the screed is treated with a deep penetration primer. Be sure to install a plastic film as a waterproofing before installing the laminate.
Linoleum must be firmly attached to the floor and not have serious defects. Sheets of plywood under the laminate should be laid apart in such a way that 4 seams do not converge at one point. Plywood is laid with a distance between sheets of about 10 mm.
A roll or sheet substrate is laid under the laminate: cork, rubber cork, bitumen-cork, foil, ventilated Tuplex substrate, polyurethane foam or the already mentioned polyethylene. The choice of the substrate depends on your capabilities and the tasks that the substrate must solve.
Important! The strips of the substrate are rolled end-to-end and fixed with adhesive tape so that it does not stray during installation.
Packages with material are brought into the room where the installation will take place, and allowed to adapt to temperature and humidity for about 2 days. The packages do not need to be opened.
There are two ways to lay the laminate diagonally: from the central axis of the room in series in both directions to the corners or from the far corner of the room through the center of the room to the opposite corner.
For work you will need:

For diagonal laying, it is customary to proceed from an angle of 45 ° - such an angle will allow the use of almost all sawn-off pieces of laminate during installation. There will be much less waste. However, there are times when the configuration of a room will dictate a different angle. Keep in mind that an angle less than 30° will look bad. Permissible angle sizes are from 30 to 45°.
Advice. Laying laminate diagonally must be done with an assistant, it will be very difficult to cope alone.
With any installation method, work begins with the installation of plastic wedges around the perimeter of the room, which will remind you of the required distance between the flooring and the walls.
First, the first row of whole panels is assembled along the central diagonal axis of the room. The length of the last two pieces of laminate, which will adjoin opposite walls in this row, is measured from the end of the last whole panel to the plastic wedge. Save the remaining pieces - they will fit on the other side of the row, and you will not need to saw the whole panel.

When the central row is laid, installation continues from it, first towards one corner, then another. With an assistant, work can be carried out simultaneously in two directions.

For laying laminate flooring outside corners, you will need to mark three or more points on the panel. It is more convenient to make a template and cut the panel to size according to it. A piece of laminated cardboard packaging is perfect for the template. Or you can lay the flooring tangentially to this outside corner.

Important! Laminate panels with lock connection Click are inserted into the laid panels at an angle of 45°, lowered and snapped into place. Before starting work, carefully check the possibility of laying the purchased model according to the “from the center” scheme. If the model you have chosen can only be laid in one direction, work will have to start from the corner.

After the installation is completed, the plastic wedges are removed and the plinth is attached to the wall. Remember that laminate flooring is a "floating floor" and should not be rigidly fixed. One more piece of advice. Lay out the remaining pieces after cutting and try to use them in your work. Then even a 10% margin will seem redundant to you.

Laying from the corner is recommended to start with one whole panel. Both end sides of it are cut to the selected angle. The first whole panel (we consider it whole, it has only cut ends) will set the direction for the entire floor.

To lay the laminate around the pipes, the panel is cut at an angle at the place where the pipes pass, cuts are made in it with a drill to fit the pipes. It is even easier to make cutouts at the junction of two panels.

The laying of the next row starts alternately from the whole or from half of the panel, if flooring stacked in a checkerboard pattern. When laying with an offset of a third of the board, the row begins with a whole board, the next - with a board 2/3 of the length, then there is a row with a panel of 1/3 of the length. Then again the row starts with a whole panel. Both methods will not only make the coating neat and beautiful, but also increase its strength.

Important! Whole panels of one row are fastened at the ends. The length of the last two pieces of laminate, which will adjoin opposite walls in this row, is measured from the end of the last whole panel to the plastic wedge. Save the remaining pieces - they will fit on the other side of the row, and you will not need to saw the whole panel.
You should be very careful and follow the direction of the tenon and groove in the row and in the panel that you are going to cut. As the famous character of the comedy film beloved by all said: “There is no need to hurry!”. True, there it was about the return of a full-fledged member to society, but here it was about the “fate” of one panel.
When the extreme pieces for the next row are cut off, the entire already assembled row is removed from the connection with the neighboring one, completely assembled and only then finally fixed in the lock. Just for styling long row help of an assistant is required.

For cutting panels intended for laying in internal corners rooms, you will need to mark the three points of the triangle. It is more convenient to make a template and saw off the panel on it. A piece of laminated cardboard packaging is perfect for the template.
Laying laminate diagonally requires patience, care, accuracy and precise execution of the work plan outlined in the drawing. This installation method will require more time, but, as they say, "the game is worth the candle." The result of the work will please you for a very long time.


So I bring to your attention a simple, but very long recipe for cooking ...

Trout in cream - general principles of preparationBefore cooking trout ...

Alexander Gushchin I can't vouch for the taste, but it will be hot :) Contents The usual...