INSTRUCTIONS AND PROPHECIES OF THE Blessed MOTHER ALIPIA GOLOSEEVSKY, Kyiv...


The type of sink and its location largely determine the convenience of cooking and the comfort of the entire kitchen. This is not only a functional item, but also part of the design of the room. Therefore, to choose kitchen sink must be approached with full responsibility.
We will help you decide on optimal model and we will tell you where it is best to place it. We will also describe how to install a sink in the kitchen without the help of specialists. The installation technology is quite simple, the main thing is to adhere to the rules and requirements outlined in the article.
One of the key aspects in installation is the type of sink, which implies a certain design and fastening device:
According to the type of location relative to the countertop, kitchen sinks are divided into desktop, undercounter and mounted.
The first is mounted below the level of the work surface. The latter are mounted on hinged brackets, rarely used due to low aesthetics.
Image gallery


It is also worth paying attention to the material from which a particular model is made. The cost of the product and its appearance depend on this.
Most often chosen for the kitchen practical options from of stainless steel, including chrome or nickel plated models.
Image gallery


Selecting the best sink for kitchen interior, you can proceed with the installation. First you need to stock up on all the necessary tools.
During the installation process you will need:
Additionally, you will need several drills for 10-12 and a cardboard box.
So we have a clean wooden table top in which you need to cut a niche for the dimensions of the sink. We start with the markup, determining the center of the sink on the countertop. It is necessary to determine the lines of symmetry in order to set the sink symmetrically with the rest of the furniture in the kitchen.
After that, we draw the outline of the product on the countertop itself. The contour should have a perimeter that is comparable to the widest part of the sink, recessed under the countertop.
To create a contour, you can use a cardboard blank, which will serve as a pattern for applying the contour to the countertop. This is the most the best option, which will give high accuracy.

Use a cardboard blank to draw the most accurate outline on the base of the countertop. Draw with an ordinary pencil with a high softness of the rod
The cutout must be at least 5 cm from the front edge of the countertop and 2.5 cm from the back. These recommended values may vary in practice, but it is best to adhere to them so that the kitchen set does not lose its integrity and strength.
This arrangement of the sink is convenient and practical, since water splashes do not fly to the floor, and the back does not get tired while washing dishes.
Next, you need to drill 4 through holes, using a drill to fit the size of the jigsaw blade. Holes should be close to the cut line, but not beyond the perimeter. Now, along a line strictly marked with a pencil, cut out a niche from the front side of the countertop.
In the process of sawing, several self-tapping screws must be screwed into the resulting gap with different parties as it cut. This will prevent the inside of the countertop from falling off, which could damage the finish and form long nicks.
To enter the jigsaw, we use drilled holes. After complete sawing, the cut array will be held on self-tapping screws. It is necessary to remove the screws one by one, holding the plate from below. The cut must be freed from sawdust by cleaning it sandpaper fine granularity.

During the operation of the jigsaw, insert a few screws that will not allow the sawn plate to fall. Do not use the jigsaw at maximum speed, otherwise the edges of the tabletop may melt.
Now you can make a trial dive of the sink into the niche. Please note that the sides of the product should be close enough to the walls of the cut. A slight play is allowed, since the sink must freely enter the cutout.
Places that interfere with full immersion must be filed with a jigsaw. You should also think in advance about how the connection to the mixer, the siphon and the faucet itself will be placed.
First you need to install complete fasteners that serve to fix the product. A layer of sealant is applied to the edges of the tabletop (on the cut), which will protect wooden surface from moisture penetration and will not allow the tree to swell.
To do this, you can use a rubber spatula or smear the adhesive mass with your finger. Chips on the plastic (countertop cover) around the saw cut are also smeared.
Sinks often come with a polyethylene foam sealant, which is glued on the back of the sink sides.
If, after fixing, the seal protrudes slightly beyond the sides, then it must be carefully cut with the sharp end of the mounting knife. If this is not done, then the protruding seal will not allow the fasteners to press the sink well enough to the base.
After that, you need to degrease the surface of the countertop and sealing polyethylene. We use a rag soaked in acetone or gasoline. A layer of sealant is applied to the sealant in an unbreakable strip, but do not get too carried away with the thickness of the strip.
Plumbing manufacturers often include double-sided tape in the kit, which serves as an additional gasket between the two surfaces, increasing the tightness. It is glued along the edges of the countertop, and a layer of sealant is applied on top of it.
In practice, often do without a sealant. As a substitute, a sealant is used, which fills the entire space intended for polyethylene foam.
Mounting on mounting brackets. In some cases, special fasteners are sold along with the sink. First, self-tapping screws are baited into the inner walls of the cabinet, on which brackets are hung. Then the screws are screwed in ¾. After that, the sink is installed in the opening with mixing on the mounting bracket.
In the process of maneuvering, it is necessary to ensure that the sink is completely pressed against the pedestal, and the self-tapping screw is fixed in the place where the corner is deepened. Then the screws are screwed in until they stop.

Installation of a free-standing sink is somewhat easier, because. implies in its design the presence of special holes and brackets for fixing
mount on wooden bars X. This method is used when the previous two are not suitable, for example, due to a countertop defect or the lack of appropriate connectors on the sink. In this case, you will need 4 wooden bars and furniture corners. Using these materials, you can make an installation site.
The height of the bars is selected so that the sink is at the same level as the rest of the kitchen furniture. The bars are cut to the size of the cabinet and fastened from the outside with furniture corners. Homemade construction installed on the cabinet and corners with self-tapping screws with inside screwed to the walls of the underframe.
In two latest ways you need to take care of tightness. To do this, apply a layer of sealant to the contact points of the pedestal / wooden platform with the sink.
Additional information on the installation of an overhead sink is presented in.
This video visualizes the process of installing the sink and will help you see some of the subtleties of the wizard.
Mounting the mortise model:
The installation of a sink is a responsible task, on which the functionality of the workspace and reliability depend. Wrong installation can lead to the rapid destruction of the countertop if water begins to penetrate under the sink.
The main thing in installation is high-quality sealing of the joint between the sink and the ends of kitchen furniture.
If you have experience installing a sink, please share the information with our readers. Leave comments on the article and ask questions. The feedback form is located below.
The sink in the kitchen has a strategically important role, so you need to choose and install it with your own hands correctly.
Before deciding how to install a sink in a countertop, you need to decide on the choice of product. The best option- connecting a deep sink and not too high a mixer - in this case there will be a minimum of splashes when washing dishes. The sink should be deep so that it is convenient to wash large pots in it or stack plates after a family dinner.
The material also matters - the easiest way is to connect a traditional stainless steel sink yourself. good decision will be enameled steel.
Do-it-yourself kitchen sink installation requires the following tools and materials:
Advice! Before you fix the kitchen sink, you should carefully process all seats sealant. This will provide high-quality waterproofing and chipboard protection from damage due to high humidity.
Do-it-yourself installation of a sink in the kitchen can be done according to various technologies. The installation method is selected depending on the type of sink design:


A democratic overhead (built-in) sink is made of stainless steel. It is mounted on a separate module and covers its entire upper part. It's very easy installation- for fastening, special L-shaped elements with an oblique slot are used. About 4-5 such fasteners are provided for one sink.
Advice! The connection of the mixer is carried out before the stage of installation of the sink (the sink is already mounted with installed equipment) - otherwise it will be inconvenient to do all this at subsequent stages.
How to fix a surface sink with your own hands:
Of course, it is easier to install a do-it-yourself overhead sink, but the mortise model provides a greater level of tightness and looks very neat on a cabinet with a common worktop. The question of how to embed the sink into the countertop is solved quite simply - you just need to make a hole under the sink correctly.
Installing the sink in the countertop is carried out according to the following algorithm:
A sink sink can be mounted flush with the countertop - however, this is a laborious process that requires experience, since it involves removing the layer of countertop under the rim. The depth of removal is equal to the height of the side with a layer of sealant.
If you decide to install and connect the sink so that it is below the level of the table, you will have to resort to the services of specialists. After all, this installation method is chosen for expensive structures - not from steel, but from natural, artificial stone. For fastening in this case, special tools are also required - for example, a jigsaw and diamond-coated saws. Indeed, in such sinks there may not be a hole for draining water - complete sawing of products in industrial conditions is not carried out. Sinks from natural materials fixed with a special mounting adhesive.
As for sinks with an unusual shape, they are supplied with a paper template, according to which the installation hole is cut.
Do you want to connect the sink yourself correctly? Do not forget 3 more nuances:
When the installation work is completed, you can connect the sink. To do this, the hoses through which cold and hot water connected to the public water supply system.
Advice! The connection requires the use of a rubber gasket to better seal the joint.
After the hoses are fixed, the connection is carried out in the following sequence:
It may turn out that the diameters of the pipes from the siphon or sewer are very different. In this case, it is mandatory to use an adapter - a sealing cuff. This completes the installation of the kitchen sink.
Industry furniture production provides a choice great amount various furniture for the kitchen. Sometimes a dish sink is offered separately, and is installed by the buyer himself. This does not require any special knowledge and skills.
The tool in order to properly make a hole, you need the simplest. The question of how to cut a countertop for a sink is not very difficult. However, if certain installation requirements are not followed, the installed equipment can be damaged.

The sequence and manipulations carried out are similar to cutting a hole in a chipboard.

The tool in order to properly make a hole, you need the simplest.

It is better to do this outdoors, as there will be a lot of dust in the sawing process.
Relative to the level of the work surface, the sink can be installed in the following ways.

You will need to wear protective gloves on your hands, and protect your face with a special transparent shield-mask.

Sometimes a dish sink is offered separately, and is installed by the buyer himself.
Sealant is used to prevent moisture from getting into the places where the sink and countertop come into contact. Water can severely damage chipboard. For different surfaces its own sealant is intended. When working with artificial stone only silicone is used. For wood and plastic, sealants containing alcohol are more often used.

If a decision is made to cut a hole in the countertop for a sink on your own, then you will need a special tool - a “grinder” with a diamond wheel.
The use of a sealant not only prevents unwanted water intrusion. This also serves as additional strength to the connection.

If the sink is purchased separately and its installation is required, it is advisable to entrust this work to professionals.
Required tools:

Before cutting a hole for the sink in the countertop, the required hole is marked. To do this, a template is made from cardboard or thick paper. Some manufacturers and manufacturers of sinks include a template with the product itself. If the installation option on the countertop was chosen and the sides are wide enough, you can mark up without a template. For this, the sink is used as a template. It is applied to the plane with its upper surface and outlined along the contour with a marker or pencil. For ease of installation, it is advisable to remove the countertop. Having retreated inward 0.5 - 1 cm from the drawn line, a working contour is drawn, along which a cut is made.

It will look more solid, but it will be more difficult to mount a sink into it on your own.
Having marked the cut line, the template is removed and you can start the process of cutting out the place for washing. The drill drills a place for sawing an electric jigsaw, with a diameter of about 10 mm. For a rectangular or triangular sink, holes are made in all corners. If the product has a round or oval shape, one will be enough for work.

It is not difficult to install a sink into a wood or chipboard countertop, having the required tools and the simplest skills in handling it.
The hole and cut are made from the side of the laminate, this will prevent it from chipping. With a jigsaw, carefully cut out the required hole along the drawn contour. An electric jigsaw must be pressed firmly against the surface. The saw blade should go exactly at a right angle.

The sink is covered with a sealing tape supplied with the product.
When performing this work, the inner sawn part should be supported. Or position the countertop so that when the sawing is completed, this part does not fall. With a sharp separation of the remaining and removed part, the laminated coating may crack. Or part of the chipboard will break off.

You can use a drill with a special drill - a furniture crown, just immediately take such a drill of the required diameter.
If there is no place for such an arrangement, or the countertop has not been removed, use construction tape. Sawing is done in this case with stops. A 10-15 cm cut is made, which is then glued with adhesive tape on both sides.

A drain is mounted to the bowl and, if provided for by the design, a mixer (water tap).
After the sawing is completed, the sink is preliminarily tried on. It should enter freely, but the gap should not be large. If it fits too tightly, widen the installation site with a rasp or jigsaw.
Having marked the cut line, the template is removed and you can start the process of cutting out the place for washing.
Now you should carefully “sand” the inner end, to which the sink will adjoin. This is done with fine grit sandpaper. The resulting dust is removed, and a thin layer of sealant is applied to the place of contact with a brush.

For ease of installation, it is advisable to remove the countertop.
A drain is mounted to the bowl and, if provided for by the design, a mixer (water tap). All gaskets are installed in the correct sequence. Usually, the layout of the gaskets is indicated by the manufacturer on the packaging of the faucet and drain siphon. Threaded connections stretch well wrenches or, if necessary, with a wrench.

When buying kitchen furniture with such a surface, it is desirable to have already ready product, which will require only connection to the water supply and sewerage system.
If there are no holes for water supply and sewerage in the structure on which the installation is planned, they should be cut out. They are done in the same way as for washing. drilled through and electric jigsaw cut the desired size opening. You can use a drill with a special drill - a furniture crown, just immediately take such a drill of the required diameter.

For this, the sink is used as a template.
The sink is covered with a sealing tape supplied with the product. A small gap is left from the edge, which is subsequently filled with sealant. Fixings are being installed.

Some manufacturers and manufacturers of sinks include a template with the product itself.
Re-apply the sealant to the contact points and allow it to dry slightly, 2-3 minutes. Install the product in place and stretch the fasteners. Fix the tabletop together with it in its place and connect the water hoses. Connect drain. Once again, go through the joints with sealant, the excess must be removed.

Before cutting a hole for the sink in the countertop, the required hole is marked.
It is not difficult to install a sink into a wood or chipboard countertop, having the required tools and the simplest skills in handling it. More durable will be a countertop made of artificial or natural stone. It will look more solid, but it will be more difficult to mount a sink into it on your own.

The use of a sealant not only prevents unwanted water intrusion
When buying kitchen furniture with such a surface, it is desirable to have a finished product that will only require connection to the water supply and sewerage system.

For wood and plastic, sealants containing alcohol are more often used.
If the sink is purchased separately and its installation is required, it is advisable to entrust this work to professionals. In the stone processing workshop, craftsmen will perform the required work without damaging the surface. To do this, they have the appropriate skills and have the entire set of necessary tools.

For different surfaces, a different sealant is intended.
If a decision is made to cut a hole in the countertop for a sink on your own, then you will need a special tool - a “grinder” with a diamond wheel. Great care is required when using this tool. You will need to wear protective gloves on your hands, and protect your face with a special transparent shield-mask.

Sealant is used to prevent moisture from getting into the places where the sink and countertop come into contact.
It is better to do this outdoors, as there will be a lot of dust in the sawing process. The sequence and manipulations carried out are similar to cutting a hole in a chipboard.

The place for the cutout is selected taking into account minimum distance for draining water into the sewer and connecting the water supply.
According to the principle of placement on the underframe, sinks are divided into overhead and built-in. The surface of the sink panel can be located above the plane of the countertop, be flush with it or be below the level of the desktop. In any case, the bowl for the mixer should be installed between the areas of the headset for placing dirty dishes and for cooking and serving dishes.
The cabinet, on which the overhead sink is attached, is often a separate element of the kitchen interior. Mortise and integrated washbasins are mounted in the solid surface of the worktop of the floor units of the sets.

Sink connection diagram: 1 - mixer pipe; 2 - gasket; 3 - fixing nut; four - flexible hose; 5 - pipeline supply; 6 - overflow hole; 7 - combined drain; 8 - drain device; 9 - compression ring; 10 - compression clutch; 11 - double-turn siphon; 12 - drain pipe.
Overhead types of sinks are mounted easier than others. it traditional way installation of equipment for washing dishes. In the interior of the kitchen, it is a free-standing cabinet with a sink, complemented by a panel for folding washed kitchen items.
On the pedestal, the panel is fixed with fasteners in the form of brackets or pushed onto the base into the grooves of the pedestal using special slides.
The sink kit may include an adhesive tubular seal inserted into the groove on the panel. The joint between the curbstone and the washing panel is smeared silicone sealant to protect against moisture penetration.
Rubber seals do not adhere tightly to the mating surfaces and have a short service life. More often they are replaced with a moisture-resistant sealant, it tightly fills the gaps and retains its properties for a long time when dried.

The underframe usually does not have additional internal elements, this opens up access for repairing supply pipelines, cleaning the siphon and sewer pipes. Sometimes supporting bars are attached under the overhead sink, which increase the strength of the structure.
You may be interested in: A few basic rules for installing a sink in a countertop
Before attaching the sink to the countertop, a mixer, water supply hoses and a siphon are mounted. The overhead sink is fixed with L-shaped fasteners with an oblique slot. 4-5 such elements are installed. Self-tapping screws are screwed into the places for fastening marked on the inner surface of the cabinet. They should protrude 5 mm from the walls of the underframe. It is better to screw in the screws with a screwdriver, when using a screwdriver, the countertop may be damaged.
During installation, the fastening grooves are mounted on self-tapping screws and the sink is shifted until it is firmly fixed on the surface sink. Then the screws are tightened and the protruding sealant is removed.
Back to index

To prevent splashes from water when washing dishes, choose a deep sink and install a low faucet.
The sink is installed in a pre-cut hole in a solid worktop. In this case, the sink itself can be made of various materials A: stainless alloy, earthenware, porcelain, etc.
To insert a washing tank, you will need some tools and additional materials:
The contours of the installed panel are marked with a pencil, turning it over and laying it on the countertop. The indents from the front and rear edges of the latter take at least 5 cm. Then the location of the bowl is measured relative to the edges of the panel. On them, the contour of the hole cut out under the sink looms.

The bowl can be various shapes, therefore, it is necessary to transfer its geometric parameters to the surface of the tabletop as accurately as possible. Manufacturers of mortise sinks often include a template with the kit, according to which the shape of the hole is drawn.
The cutting line should recede outwards from the sides of the bowl by about 1 cm. A hole is drilled at one of the points of the contour for inserting a jigsaw blade. For rectangular shape hole bowls are drilled at the corners of the intended contour.
You may be interested in: Installation and connection of the washing machine and dishwasher
Masking tape is glued on the outside of the contour. It will protect the surface of the countertop from damage by the foot of the jigsaw when cutting. On a removable tabletop, the material is sawn with a jigsaw from the front side, so the surface lining is less damaged. In the process of cutting the opening, self-tapping screws are screwed into the cut to a small depth so that the inner part does not fall out during operation. The sector to be removed can also be fixed from below with a backwater.
The ends of the countertop along the cut are covered with silicone sealant to protect the material from moisture penetration. The sealant is also applied under the edges of the panel along the drawn contour. A sink with a built-in mixer and a siphon is inserted into the prepared opening and attached to the countertop with clamps included in the plumbing kit. It remains to connect the mixer to the water supply and drain the sink through the siphon to the sewer.
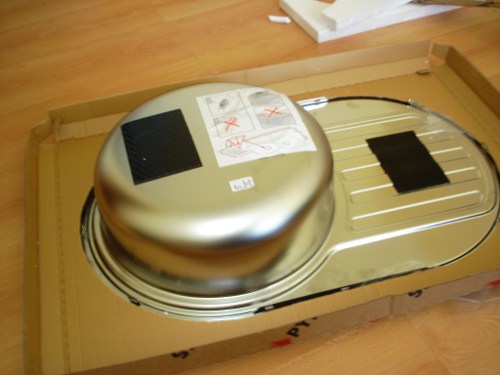
Friends, good afternoon. If you are faced with the task of embedding a kitchen sink, and you do not know how to do it, then this post is for you.
Kitchen sinks vary in shape, material, type and price. Most often for kitchen set acquire a mortise, metal sink.
If your choice fell on such a sink, then pay attention to the following points:
On the Internet, this item is written minimalistically and smeared, something like this: “Correctly mark and cut with a jigsaw.” Let's look at how to properly mark the drank under the sink.
For example, you bought a round sink and you need to cut it into a cabinet by 800 mm. If a template is attached to the sink, then everything is simple, but if it is not there, then we do the following.
The first task is to decide where it is better to place the sink. I explain - in our example, the sink is round 51 (or 49) cm in diameter, and the cabinet itself is 80 cm, therefore, it can be moved to the left or right, or cut in the center.
Pay special attention to the layout of the sink in the corner version (option 90 gr.) of the kitchen, since the convenience of approaching the sink depends on your choice.
 Having decided on the choice of location, put the sink on the countertop upside down. Now you need to decide how much you need to retreat from the wall. This item is especially important if your sink is 51 cm deep. If you mark such a sink exactly in the middle of the countertop, then it is likely that your saw will pass along the front bar of the pedestal (this depends on the design of the pedestal itself). The easiest way is to attach a kitchen plinth to the wall and step back 1-2 cm from it. This place will be the outer edge of the sink.
If the cut line still goes along the body of the cabinet, then you must either pull back the bar of the cabinet, or remove the countertop from the body, cut it out and put it back in place.
 We take a pencil and outline the outer contour of the sink.
 Now we need to decide on the line of the cut itself.
To do this, measure the distance from the outer edge of the sink to the fasteners (mounting lugs). Usually this size: 1-3 cm, but it can be different for different sinks.
We already have a drawn outline of the outer contour of the sink. Now we measure from it the just measured distance inside the future sink and draw an internal contour. This is the saw line.
 With a drill, from the inside of the contour, next to the cut line, we make a through hole. We make it so that the jigsaw blade passes.
We cut with a jigsaw along the contour of the cut. When sawing, do not rush and do not press hard with a jigsaw.
It is better to cut with a “Clean Cut” blade. If the sink is rectangular, then molar tape can be used to avoid chipping. When choosing a file, consider the height of the cut.
 After sawing, it is necessary to process the edges of the saw cut.
Align the cut with large sandpaper and try on the sink with fasteners.
If everything is fine, then we clean the saw cut from dust and coat it with silicone.
Silicone, in the future, will not absorb moisture and swell the countertop.
Stage 6. Mounting the sink
Usually the sink is attached to the countertop with the faucet already installed, since it is extremely inconvenient to do this under the sink.
The new sink is completed with a sealing tape, which is glued along the edge of the sink into a special groove. For greater reliability, you can apply silicone around the edge.

 We insert the fasteners into the ears of the sink, with hooks to the countertop, bend them inward and insert the sink into the sawn hole.
We move the structure a little so that the sink sits correctly and tightly. Fasteners hook the sink to the countertop as shown in the figure and use a screwdriver to pull the sink to the countertop. Don't overdo the washer.
It is not worth pulling the sink with a screwdriver, as it is very easy for them to turn the fastening thread.
The tightening force is felt by hand, and some fasteners are very weak in tightening.
That's all. There will be questions - write.
INSTRUCTIONS AND PROPHECIES OF THE Blessed MOTHER ALIPIA GOLOSEEVSKY, Kyiv...

Eufillin dropper in ampoules is used to treat pathologies that ...

Among all ointments for the treatment and prevention of joint diseases, the most ...