INSTRUCTIONS AND PROPHECIES OF THE Blessed MOTHER ALIPIA GOLOSEEVSKY, Kyiv...


In this article we will talk about the recovery of bad sectors hard drive and the reasons for their occurrence. Step by step instructions will help you prepare for this procedure and cope with it yourself.
Let's take a quick look at the structure of the hard drive. It consists of several separate disks, above which there are magnetic heads designed for reading and writing information. When storing data, the heads magnetize certain areas of the disk, divided into tracks and smaller components - sectors. It is in them that units of information are stored. If the sector becomes unreadable, it is called "broken".
There are several signs of this problem:
The main reasons for the appearance of broken hard drive segments are:
Also, failures in the hard drive may appear due to mechanical damage. They are often caused by dropping the hard drive or computer, resulting in damage to the magnetic surface (for example, during transportation). Non-working parts also appear due to factory defects. AT this case they may not appear immediately, but “crumble” over time, quickly increasing their number to a critical level.
Important! If you suspect mechanical damage or marriage, you should immediately contact a specialist or exchange the hard drive under warranty.
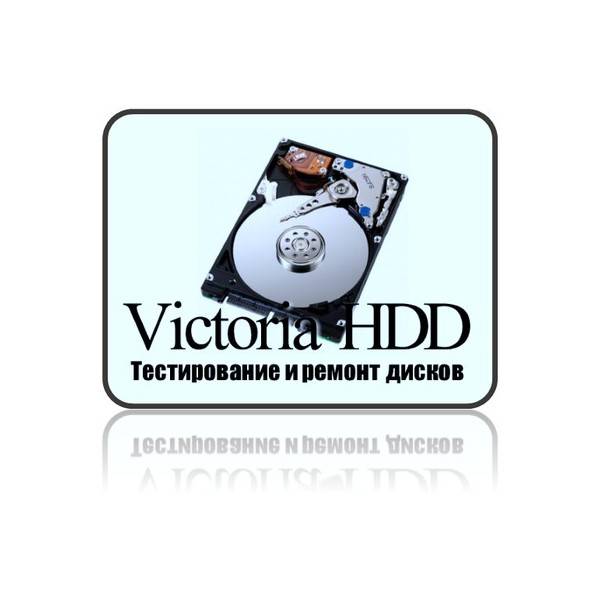
If the appearance of broken segments is associated with software failures, then they can be restored using specialized software. One of such programs for recovering bad sectors of hdd is Victoria. The utility is available in two versions - for Windows and DOS. Recovery through DOS will be the most effective, since when the OS is running, some sectors may be occupied, which means they are not available for scanning.
To get started, we need to do a little preparation. First, you will need a disk with the program image recorded on it or a bootable USB flash drive. If everyone can handle recording an image, then creating a flash drive can be difficult.
Let's take a closer look at this step:

Note! The program takes up very little space, so after installing it, the drive can be used to store other information. In order not to accidentally delete the files necessary for the utility to work, it is recommended to allocate a separate folder for them.
Let's start the scanning process:


Here we need an item "Reallocated sector count", which displays the number of fragments in the reserve zone, as well as "Current pending sectors", where parts that cannot be read are displayed. If their number is not very high, then the disk is recoverable.
Let's take a look at exactly how this process happens. Problem segments can be divided into two types. The first ones are not readable due to a mismatch between the information stored in them and its checksums.
This error occurs during power outages, when new data has already been written, but the checksums remain old. They simply cease to be recognized and are restored quite easily - by formatting them and recording the correct amounts.
The second type occurs as a result of mechanical damage. In this case, recovery is more difficult, but still possible. The resumption of operability of such parts is carried out through the use of spare areas that are on each hard drive.
Let's start recovering each of these types of errors.
Let's try to fix it first bad sectors by erasing the information stored in them:
A lengthy process of scanning and repairing broken files will start. HDD sectors. If the program finds a bad sector, it will try to erase it, thereby correcting the error. If a mechanical defect is present, an error will be reported. In any case, it is necessary to wait for the complete completion of the check and then separately fix the sectors with physical malfunctions.
For this:

Now the recovery operation will work according to a different principle, trying not to erase bad sectors, but to replace them with space from the spare area.
Important! If there are a lot of such sectors, then the reserve space may run out. This will be reported by a special message, and further recovery will become impossible.
After successfully recovering bad sectors on the hard drive, it is recommended to full check file system for errors.
This can be done using the CHKDSK utility or in the following way:


Attention! So that the system not only finds, but also fixes problems, before starting the scan, select "Automatically fix system errors."
The methods described above will help you easily deal with non-critical cases of problem sectors, find and fix them. By strictly following our instructions, any user will be able to do it on their own, even without a computer education. We hope that this information was helpful to you.
>In this article, we will talk about bad sectors on the hard drive what they are and how to treat them. But first, let's find out where they come from?
Everyone knows that the hard drive consists clusters are miniature cells. Each of the clusters is a logical storage of information where files are constantly written. The totality of all clusters provides us with the correct operation of the entire computer.
bad block or bad sector is an unreadable disk sector that contains bad memory cells.
Such HDD is no longer suitable for working with the operating system, but you can try to use it as an external drive, like a "large flash drive". If you use such a hard drive for data storage, it is advisable to cut off the place where the bad blocks are located using a hard drive program. For example, Acronis DiskDirector.
Most common cause of bad sectors- this is the natural wear of the drive, i.e. if a hard drive has been in operation for many years, it is simply due to a large number write and read cycles to a particular sector, the hard drive begins to slowly but surely fail. As a rule, this is more than 10,000 hours of operation. This increase in the access time to the sector is manifested, i.e. for a new serviceable cell it is about 10-15 ms, then indicators of more than 150 ms indicate a strong wear of the drive. If one sector fails, then others will soon begin to fail, which means that you should think about replacing the hard drive, or at least copy the information you need.
Why bad sectors appear - we figured it out, now we'll discuss how to identify them.
Maybe you already know about the program Victoria is a program specially designed for deep diagnostics of a hard drive. Victoria is available in 2 versions: with and without a graphical shell (DOS version).

Received Smart in the Victoria program
This is already a tested hard drive, and its main parameters are shown here, i.e. data SMART. During the surface test, you can get the response time to the request for each sector. The time is indicated from 5 milliseconds to 1.5 seconds and higher, the less - the better, the faster our hard drive reacts.
As for Smart, here you can navigate by the number of "", the more of them, the better. Judging by the quantity Hardware ECC recovered"It's time to change the hard drive.
Victoria also knows how to do many other operations with the HDD, up to sector closures.
With this feature, bad sectors can be closed, however, this will only slightly delay the failure.
You can download the Victoria program on the website, it is free and does not require installation on a computer.
If, for some reason, you did not like Victoria, then there is always an alternative, and many more, such as: Active boot disk, HDD Regenerator, R-Studio etc.
Bad sectors are not treated, but closed, and their disk space will be assigned to workers.
Over time, bad sectors appear on any HDD that are unreadable. When the number of bad blocks exceeds all allowable limits, the hard drive refuses to work. However, under certain conditions, the hard drive can be cured by using special software.
HDD (hard disk) is a series of magnetic disks, above which there is a head that writes and reads information. The drive surface is divided into tracks and sectors (the smallest division unit). If information is not read from a certain sector, then this is: bad, bad, broken, or just a bad block.
Recovery of bad sectors is not an easy task, but doable. If there are few bad blocks on the HDD, you can cure the disk, simultaneously extending its life.
The very presence of bad sectors is bad sign, therefore, even after repair, you cannot use the HDD for a long time - it can fail at any time.
VictoriaHDD is one of the most famous hard drive treatment programs. It is distributed under a free license and allows you to fix bad blocks in DOS mode. However, working with it requires some preparation.
Download the ISO image of the VictoriaHDD utility and burn it to a USB flash drive with the WinSetupFromUSB program.


After completing all the preparatory steps, restart your computer again. At startup, start pressing F11 to bring up the boot menu. Select the bootable Victoria flash drive to run the program in DOS mode.
To restore, do the following:


After working Victoria HDD, it is advisable to check the disk:

These measures will help you eliminate the bads on the disk, which will ultimately lead to an increase in the duration of the hard drive.
If Victoria seemed difficult, try repairing the disk and fixing the so-called bad blocks using the HDD Regenerator program. The peculiarity of this utility is that it has access to the software and hardware of the HDD. HDD Regenerator really tries to cure bad sectors, while most programs prohibit access to bad blocks, as a result of which the volume of the hard drive is reduced.

To fix this problem, start Task Manager (Ctrl+Shift+Esc) and close all applications. Click the Processes tab and end all processes started by the user. Click "Retry" to have the program try to access the disk partitions.
If the warning window appears again, restart the computer and start the system in safe mode. You can ignore the warning by pressing Cancel instead of Retry, but then HDD Regenerator will work with some limitations. 
A window resembling a command line will open. In it you will see 4 options for the program:
First select operating mode #2. The hard drive will be checked for bads. The next screen will appear, where it is proposed to specify the interval in which to search for bads. It is better to start testing from the beginning, so leave the value "0". 
After starting the disk scan, a progress bar will appear. You will have to wait a long time; sometimes the system will freeze - this indicates that the program has detected bad sectors and now determines the degree of their damage. 
When the hard disk surface analysis is completed, a report will appear. Examine the items "bad sectors founded" and "bad sectors recovered". These lines indicate the number of found and restored bads. If a lot of bad sectors are indicated in the line "bad sectors founded", then it is unlikely that you will be able to fix the bad sectors, but you can try.
Connect the flash drive and run the HDD Regenerator program. Select the "Bootable Flash Drive" mode. Highlight the connected drive and click OK. All information will be erased from the flash drive. Instead, files will be written that allow you to start DOS mode. Further:
The program will start in DOS - this mode is better suited for treating bad sectors. The window that you have already seen when working in Windows will appear. Select checking and restoring bad blocks (operation mode No. 1).
Copyright infringement Spam Invalid content Broken links
The computer hard drive is a very sensitive component. Errors in its file system, bad sectors on the surface, mechanical problems sometimes cause a complete failure of the computer system.
The same problems are typical for flash drives, which in essence are practically no different from a hard drive. How to determine the presence of errors and bad sectors and how to fix them if possible?
Many people simply confuse file system errors with bad sectors. Therefore, we will try to explain the difference between these phenomena and the reason for their occurrence. Also, let's determine what the symptoms of manifestations, errors that have appeared on the surface of the hard drive may turn out to be.
When they talk about hard drive errors and trying to fix them using the chkdsk utility built into Windows, they most often mean file system errors. Such errors are associated with metadata problems that describe the file system itself: errors in the $Bitmap, $BadClus files, the main file table, and various indexes.
For example, errors in the $Bitmap file of the NTFS file system can cause the system to incorrectly recognize the volume free space volumes. And problems with the $BadClus file can lead to incorrect detection of bad sectors and an attempt to write data to such sectors, which will cause the computer to freeze completely.
The nature of bad sectors is somewhat different. The hard disk is "cut" into sectors at the factory during production. It is then that its logical structure is created, then it receives magnetic properties for recording data. These structures become faulty as a result of the gradual degradation of the hard surface areas, which become so due to careless handling of the hard drive, which inadvertently once fell to the floor or was hit on the case even with an ordinary screwdriver.
Testing programs that fall on parts of a degrading surface detect so-called bad or damaged sectors - bad sectors. Sectors that have lost their magnetic properties do not allow reading and writing data to them. It is possible to eliminate the failed structures of the hard drive. To do this, manufacturers create special reserve areas of sectors. When a bad sector appears, diagnosed at a specific address, its address is reassigned to a sector from this reserve area.
We have already told a little about the symptoms of the manifestation of file system errors above. However, the symptoms are sometimes very varied. Here are some manifestations of errors and bad sectors that have arisen in the hard drive.
This is a far from complete list of error manifestations associated with file system problems and the presence of degrading areas of the hard drive. What to do in such cases?
Checking and correcting file system errors in Windows is carried out by the standard utility of this operating environment called chkdsk. It can also be useful in eliminating programmatic bad sectors as a result of viruses. It can be run both in a graphical environment and from command line. Consider the most affordable option its execution in a graphical environment.
Checking an inactive volume is the simplest. You can run it completely in graphical mode. By an inactive volume we mean a partition that does not have a valid this moment operating system. It can be another hard drive connected or, for example, drive D.
Click the "Perform verification" button.
The utility is launched from the "Service" tab of the volume properties. In this tab there is a button "Perform verification". If you click it, the chkdsk utility window will open. To check for bad sectors that appeared as a result of software errors, you need to check the box next to the corresponding option. Further, it is enough to press the "Run" button - the utility will check and correct errors.
The chkdsk utility checks volume D, also diagnosing bad sectors.
Checking and fixing errors on the system volume, where the operating environment is located at the time of the check, is carried out a little differently. The utility detects such a volume as connected, and therefore warns that it cannot perform a check, but suggests doing it the next time you reboot.
The chkdsk utility says it can't check the disk.
After restarting the computer, the user will find that during boot, after the Windows logo appears, a black screen appears. This black screen gradually fills up with lines of text. This is the chkdsk utility that checks the hard drive's system volume. After checking and making the necessary corrections, it will demonstrate the result, and then the operating system will continue to load.
The chkdsk utility checks volume C after a reboot.
On the market software there are a number of applications that can test the surface of a hard drive. In this case, not one volume is tested, but the entire surface of the hard drive. Of course, the user can independently set the boundary sectors and test individual areas. To identify bad sectors, a sector read test is usually performed.
Important: the results of the test for the presence of bad sectors must be considered in conjunction with SMART indicators, such as Reallocation Sector Count, Reallocation Event Count.
This utility was created by Western Digital developers. It is available for download on the official website of the company. Lifeguard Diagnostic works great with hard drives from almost any manufacturer, and not just hard drives native to WD, as one might think. It offers a number of tests: Quick, Advanced, as well as the ability to fill the sectors of the hard drive with zeros.
Data Lifeguard Diagnostic utility interface.
We are most interested in the extended test. This test allows you to detect bad sectors on the surface of disks. When the program finds a bad sector, it informs the user about this, prompting him to choose whether he wants to fix the detected error. If he agrees, then the application writes to sector 0, so sector data will be lost.
A selection of utility tests. We need an Extended Test.
The duration of this test is longer quick test. The test time depends on the size of the drive, since the test is carried out over the entire surface, starting from sector 0 and ending with the maximum LBA value.
Extended Test utilities at work.
The HDDScan application also seems to be an excellent hard drive surface tester. It can often be seen as part of entire software packages such as LiveCD. This application has a graphical interface and offers a number of tests, among which, in our case, the most interesting is "Surface Tests".
Select the Surface Test from the dropdown list.
Important: when conducting surface tests from under Windows, it is necessary to close all running programs in order to avoid random results during the test initiated by the action of these programs.
After selecting a test, an additional window will open in which the test parameters are presented. Let's leave the "Read" option enabled, which will only allow us to read data from sectors. So, we will define sectors from which information cannot be considered as set time(bad sectors), hover sectors and normal cells. We will leave the fields of the initial and final sectors unchanged if we want to check the entire surface.
Let's leave the Read option of the test enabled.
When tested by this program, a number of sectors are identified:
The test result of the program is available in the form of a line graph, a sector distribution map, and also in the form of a plain text report.
Checking the surface of the hard drive.
Unlike the programs discussed above, HDD Control is not free program. This application is a whole set of tools designed to restore the health of your hard drive. This program also offers the opportunity to test the surface of the hard drive.
Select the "Surface Test" option.
The test is very simple and accessible to an ordinary user of HDD Control. To run it, you just need to click the "Surface Test" button. It lacks additional options that would allow you to customize the type of test. When testing, only two types of sectors are revealed: with excellent result readings and bad sectors.
Victoria considers the health of the hard drive being checked "GOOD".
This application is able to collect information about the SMART health of the hard drive. Also, it allows you to test the disk surface, remap bad sectors with the Remap operation, and reset bad sectors. It also subdivides the sectors into groups:
To test the hard drive, you can run this program in Windows graphics mode. Next, you need to select the "Tests" tab. This is where the surface tests are located. There are four options for working with a hard surface:
First of all, you can carry out the Ignore test to determine if there are bad sectors on the surface of the hard drive. If they are, then you need to proceed with the Remap test. This test will allow you to reassign the addresses of bad sectors to the reserved sector area, where normal sectors are located.
Types of available tests and categories of sectors. Victoria checks the surface.
If, after the Remap test, Victoria continues to diagnose bad sectors, then you can still try to restore their performance by applying the Restore test. The Erase option must be used wisely from under Windows, as it writes zeros to sectors - it erases sector data. It can only be used within a selection of sectors whose data is not related to the operating system.
It should be noted that there is a difference between errors fixed by the chkdsk utility of the Windows operating system and bad sectors fixed by programs such as Victoria HDD. The former are caused by file system problems, while the latter are often the result of the loss of magnetic properties by sectors of the hard disk surface and its gradual degradation. However, chkdsk can also fix some bad sector problems.
To eliminate bad sectors, you can use applications such as: Data Lifeguard Diagnostic, Ashampoo HDD Control, HDDScan, Victoria. Let's single out the Victoria HDD application as the best for checking and eliminating bad sectors, as it offers a number of tests: Ignore, Remap, Erase and Restore. It allows not only to detect faulty hard surface structures, but also to treat the HDD.
Restoring bad sectors will help extend the life of your hard drive and even recover some previously lost files. However, you should remember that this is a responsible and rather risky business, since by clicking on the wrong buttons, you can completely ruin your hard drive. Follow strictly the instructions provided in this article and you will be able to recover some bad sectors. Before starting work, select the software with which you will restore sectors. There are many for you to choose from convenient programs: Victoria, HDAT2, HDDregenerator.
Working with this utility implies the presence of a boot disk or a bootable flash drive. How you can write them down, you will learn in another article. You must have Daemon Tools or Ultra ISO installed on your computer.


Please note that all your further work with this utility will take place entirely in BIOS. Read the fields you click on carefully.


Getting started with this utility, you can read a voluminous article about its work in order to roughly imagine the structure of the program: . The advantage of the utility is that you do not have to create a bootable USB flash drive or disk and go from under the BIOS. Experienced users note that this program actually fixes the problem by degaussing, and not just disabling bad sectors.
Download the program on the Internet, keep in mind that only its first use is free. If you want to treat broken sectors again, then you will have to buy the software.
Installing the program takes a matter of seconds.


Look carefully at the window interface:
Click on the top line.


Select your hard drive. The model, the amount of memory and all sectors will be written on it. Just double click on it.

Please note that all windows must be closed and all processes stopped. Only then can you start working with sectors - the hard disk must be unloaded as much as possible.
Select the second item in the menu that appears - “Normal Scan (with / without repair)”. This option repairs bad sectors right in the process of scanning all sectors of the hard disk. Please note that the mouse does not work in this program. You need to enter the number 2 and then press Enter.

Now you need the “Scan and repair” item to confirm your intention to fix all sectors. Enter the number 1.
You can also enter the number 3 to activate the “Regenerate all sectors” item. This option carries out the prevention of absolutely all sectors, even if they are not broken. This is more suitable for advanced users who can handle possible problems in the process of regeneration.


Now you have to choose the start of the scan:
It is better to start from the very beginning by selecting the first item.

The process will start instantly, you just have to wait.

INSTRUCTIONS AND PROPHECIES OF THE Blessed MOTHER ALIPIA GOLOSEEVSKY, Kyiv...

Eufillin dropper in ampoules is used to treat pathologies that ...

Among all ointments for the treatment and prevention of joint diseases, the most ...