Fresh pumpkin is ideal for preparing unusual dishes. She can...


wooden raft
A wooden raft is made of dry, resonant (when struck by the butt of an ax, it makes a resonant sound) wood: spruce or pine. Dead wood with rotten wood cannot be used: the tree quickly gets wet and the raft “sinks”. To determine the specific gravity, a log 10 cm long is sawn off from the end of the tree and lowered flat into the water. If the sawn circle has sunk no deeper than 5-6 cm, the tree can be used to build a raft. The maximum diameter of logs should not exceed 25-30, the minimum - 10 cm.
For better stability of the raft, thin woods are placed in the middle, and thick ones along the sides. If the harvested logs have a curvature, they are installed with a hump down. The gaps between the logs of the stave must be at least 2-4 cm, otherwise the raft will have reduced stability and slow floating. After laying the logs on the slipway, their top is marked and rolled to the sides. On the middle log at a distance of at least 80 cm from the ends, two grooves are cut out and cut out. The bottom planes of the cutouts must be at the same level. The depth of the grooves should not reach the middle of the log, otherwise, when driving the wedge, chipping of the sawn wood may occur. As a template, take the end of the hewn cross-ronzhina. Ronzhins are carved from raw wood, preferably from birch.
Ronzina is placed in the middle of the prepared log. The ronzhina should freely go from above into the groove of the log, i.e. the upper width of the groove should be wider than the lower wide side of the ronzhina. A wooden dry wedge is driven into the gap between the inclined plane of the ronzhina and the inclined wall of the groove. Both ronjins must lie in the same plane. With the help of templates, grooves are made on all the other logs and they are alternately on the right, then on the left - they are attached with wedges to the middle log. Before putting the extreme logs, grooves are cut out in them to stop the vag and three rail posts 10-12 thick and 60-70 cm high are cut into them, onto which the cord or the main rope is pulled.
On simple rivers, it is recommended to use a U-shaped bollard. On two racks, in advance, before assembling the stave, vertically cut into the logs of the raft, they put on and wedged a pillow in which they cut out a nest for rowing. So that the logs do not chip when wedging the racks, the racks are carried from the bow and stern by at least 0.5 m. For complex rivers, Sayan or Gorky podgrebits should be installed.
When rafting on calm rivers or for crossings on reservoirs, a simple knitted raft is made: logs are assembled into overhead ronzhins using wire twists (brackets, rope ties). To increase stability, the raft can be made wider due to the large gaps between the middle logs. Racks with a diameter of 10-12 cm are cut into the logs and wedged, on which the rows are hung.
Raft with a metal frame made of structural modules
It is assembled from modules of different lengths and shaped couplings. The design is labor-intensive in manufacturing (turning, drilling and welding, branding of mating parts), but the raft is easy to assemble and disassemble. The frame is packed in two kayak cases, prefabricated rows - in a separate package.
The frame can be transformed into two small rafts or catamarans and split lengthwise during portages. Car cameras, nacelles and elements protruding above the frame can be attached to it. If desired, work platforms can be fixed 30 cm below the frame to lower the center of gravity. 
Raft with transverse floats
This is easy to manufacture and has good stability, allows you to use various types of flooring and mesh, as well as attach inflatable elements along or across the raft. Such a raft can be suitable for rivers of all categories of complexity.
Moscow tourists N. Telegin, E. Reut, B. Anufriev, Yu. Mokhov worked out the design of a raft with a metal frame and a prefabricated metal ridge, with a nylon net instead of flooring.
The frame, assembled from metal tubular modules, has a narrow bow and a wider stern, the front raft is shifted by 1 m. This allows you to unload the bow of the raft, ensure "germination" on the shafts, and protects the raft from destruction when the frame hits the surface rocks.
Raft modules (pipe D16T with a diameter of 42 mm and a thickness of 1.5 mm) are articulated using triangular plates and metal plates - cheeks and M8 bolts. The frame has flexibility on the shafts, which, according to the authors, reduces stresses, especially fatigue ones. Opponents note that it is difficult to work on the stern row in the shafts: without a habit, it is not easy to stand on a swinging deck.
Novosibirsk tourists A. Yudushkin, A. Sazhnev and others tested several interesting designs of rafts with a metal frame. In order to lower the center of gravity of the loaded raft, they used hanging platforms for rowers. The platforms are made in the form of a frame, on which a nylon net is pulled, and it is attached to the frame using a parachute sling. The platform is lowered to the radius of the gondola.
At the same time, the bollard is lowered by about 30 cm, the design of the bollard is simplified; a variant of a pin header (shortened row) is possible. Rowers on a suspended platform in the ramparts can kneel on the gondolas in front or sit on those located behind.
A modification of this raft is a frame assembled with a 6 mm cable. Two-meter modules are connected by hinges (rubber and tension cable), which allows deflection by 15-20°. Frame weight 80 kg. However, on large shafts, the cables are likely to break.
A. Yudushkin and I. Ginzburg tested a raft-catamaran of two gondolas with a diameter of 80 cm; a cargo platform 1 m wide is suspended between the gondolas. The crossbars of the frame are used to secure the pin box. Rowing team type "crutch" (two longitudinal elements are put on the pin).
Biysk tourists (V. Bedarev and others) tested the raft without rows and rows, calling it "Chester". It's more of a catamaran than a raft. Rowers sit at the corners of the frame opposite each other, work with oars along the gondolas. Various modifications are possible (suspended platforms for rowers, knee landing, as on a catamaran, etc.). The raft is light, well “rises” on the wave, and is easily controlled. Tests on the Mazhoysky cascade of the Chuya River revealed its excellent driving performance.
Tomsk tourists (A. Fomin and others) tested several designs of rafts. Of greatest interest is the frame raft, with cushion-shaped displacement elements, which are fixed in the frame of the raft and are widely spaced in width.
On the sides of the raft, gondolas of reserve buoyancy were fixed, they also contributed to the protection of the crew from being washed away in powerful shafts.
It turned out that this dignity during the coup turns into a disaster for those who are under the raft. In this case, the only chance to get on the raft is to cut the nylon net (flooring).
Tourists in the Siberian zone are intensively exploring mini-rafts, that is, rafts suitable for rafting two or three people. There is a tendency to use gondolas with a diameter of 70-100 cm, a wooden light frame, hanging platforms for rowers or special seats for rigid fixation of rowers. Such rafts are stable in waterfall sinks up to 2 m and in powerful shafts and are able to compete with traditional rafts known to us.

A raft of car cameras
Have you decided to spend the summer on the banks of a river or lake? Can't do without boats! Take advantage of the design of a shallow-draught tourist raft that can support 5-6 people with backpacks, has an enviable stability even on a steep wave. Assembly technology is extremely simple - take a look at the picture.
Stock up on 6-10 car cameras with a diameter of 1-1.5 meters. You will also need wooden poles, trimmings of duralumin pipes and steel or duralumin strips about 10 mm wide.
Start assembly from the base. Wooden poles - three 5 m long and four 1.7 m long (at least 6 cm in diameter) - lay as shown in the figure and knock them down with nails.
Now let's deal with the main deck and the "captain's" bridges. As you can see, they are three shields from poles knocked down in the selection. First make the main deck. On two hewn poles 1.7 m long, arrange poles or, even better, trimmings of two-meter boards 20 mm thick, into the selection, and knock them down with nails. "Captain's" bridges are made in the same way. Construction - in the figure.
Willow twigs will serve as supports for the awning. Start assembling the raft after they are installed. First, tie the inflatable chambers to the base with ropes, then install the main deck and the "captain's" bridges. Make the sides from four hewn poles, and the awning from a piece of polyethylene.
Position the paddles (steering oars) on the bridges diagonally: on the front - on the right, and on the back - on the left. Bend them out of three duralumin pipes and reinforce them with two strips of duralumin or steel. Make the rows themselves from poles 250 cm long, and the blades from aluminum sheets or plywood. Choose your own sizes.
We all love adventure, we are always looking for new sensations and something memorable. Build a raft and ride it down the river, that's the real adventure! There are many options on how to make a raft, there are many materials, all that remains to be done is to start building it, so let's not delay a minute - let's get started!
First thing- let's decide what our raft will be made of? The simplest and most common option is plastic bottles. They will make a good base and with enough, the raft will never sink. Depending on the frame and the number of bottles, the raft will support a different number of people. For example:
Option number 1.
It will require:
Plastic bottles
. Scotch
1.
We prepare the bottles, they must be empty and very tightly screwed with a lid.
2
. We take 3-4 bottles and wrap them with tape. We make such blanks 30-50 pieces.
3
. Then we tie these blanks together with adhesive tape in the form of a raft.
Option number 2.

Would need:
Plastic bottles
. Cot
. Rope
. beer crates
. Scotch
1
. The frame of an old cot is ideal for building a simple raft structure, so we will use it. It should be completely free of all fasteners, fabrics and other things.
2.
Bottles should be placed in beer crates and screwed tightly with lids. With the help of a rope we will fix them there.
3.
The last step is to connect the frame to the boxes. We can use clamps, cable, rope and other elements for fastening.
For ease of movement, a wooden board can be attached to the frame, on which you can sit.
Option number 3.

This is the most difficult to work, but the best option in terms of quality. For such a raft, the following materials are needed:
wooden boards
. Cellophane bags
. Plastic bottles
. Rope
Let's get started!
1.
Close empty plastic bottles tightly with lids and fill or bags. The more bags there are, the better the raft will stay on the water.
2.
We tie bags with bottles well with a rope.
3.
We construct the frame of the raft from the boards. We make a grid of them, fastening them together with a rope or nails.
4
. We fasten the bags to the structure.

Such a raft can withstand several people. You can even travel on it!
Probably, every person made in USSR had a dream in childhood to make a raft and go to distant places on us. Dreams Come True! We tried and it worked!
There were many projects on how to build a raft, what size and what it was made of. After much discussion, it was decided that the base of the raft would be large-radius car cameras, the number of which depended on the size.
In fact, it turned out that buying inexpensive cameras is not an easy task, the most profitable and fastest option was much smaller cameras than expected. R16. The cameras turned out to be Chinese and the seller honestly warned us that they do not normally stick. But we decided to take a chance.
Given that 8 people were going to sail on the raft (actually it turned out to be 6) + things + products + the weight of the wooden flooring, the load capacity of the cylinders should have been at least 800 kg, but we took it with a margin - 43 cameras, which corresponded to a load capacity of 1200 kg.
The cells were supposed to be covered with a wooden shield assembled from boards, 4x6 meters in size. But even here circumstances intervened: at the sawmill, we managed to buy boards only 4 meters long. So it was decided to make the raft square 4x4 meters.

This is how the design turned out.
Let's dwell on the main points in more detail.
The raft was assembled directly on the bank of the river.

First, we started pumping 43 cameras using a car compressor.

The compressor did not like this task, and he refused to work on the floor of the road. I had to urgently resuscitate him. the frog pump, which was supposed to sail with us, could not pump the chambers to the desired state, which affected the size. If in the case of repair this would be acceptable, then I did not want to start the journey on under-inflated cameras.

As a result, we won the compressor and, applying wet rags to it to cool, we pumped up all the chambers.

They brought the purchased boards and timber, the length, as I said, is 4 meters.

Let's see how it will be.

The assembled raft frame with the first layer of chambers. For the frame used timber 100x50 and 200x50.
40 cameras were used, 3 were taken as spares.

They stuffed 25 mm boards on top. I would like the gap between the boards to be much smaller, but we did not calculate the number of boards when buying, we decided not to bother with the purchase again. They lowered the raft into the water.

The beginning of the erection of supports for the awning.

For supports, a beam of 50x50 mm was used. The height of the side supports is 2 meters, the central one is 2.5 meters (it is only being made in the photo). Initially, the awning was supposed to be used only as a roof, but in the end it was also used as a sail, which I will discuss below.
All wooden structures were fastened together with screw nails.

The raft was named "Gene" - as they say in the well-known cartoon about Cheburashka: "Because it is green and flat." The construction took 1 day (started early in the morning, set off in the evening).
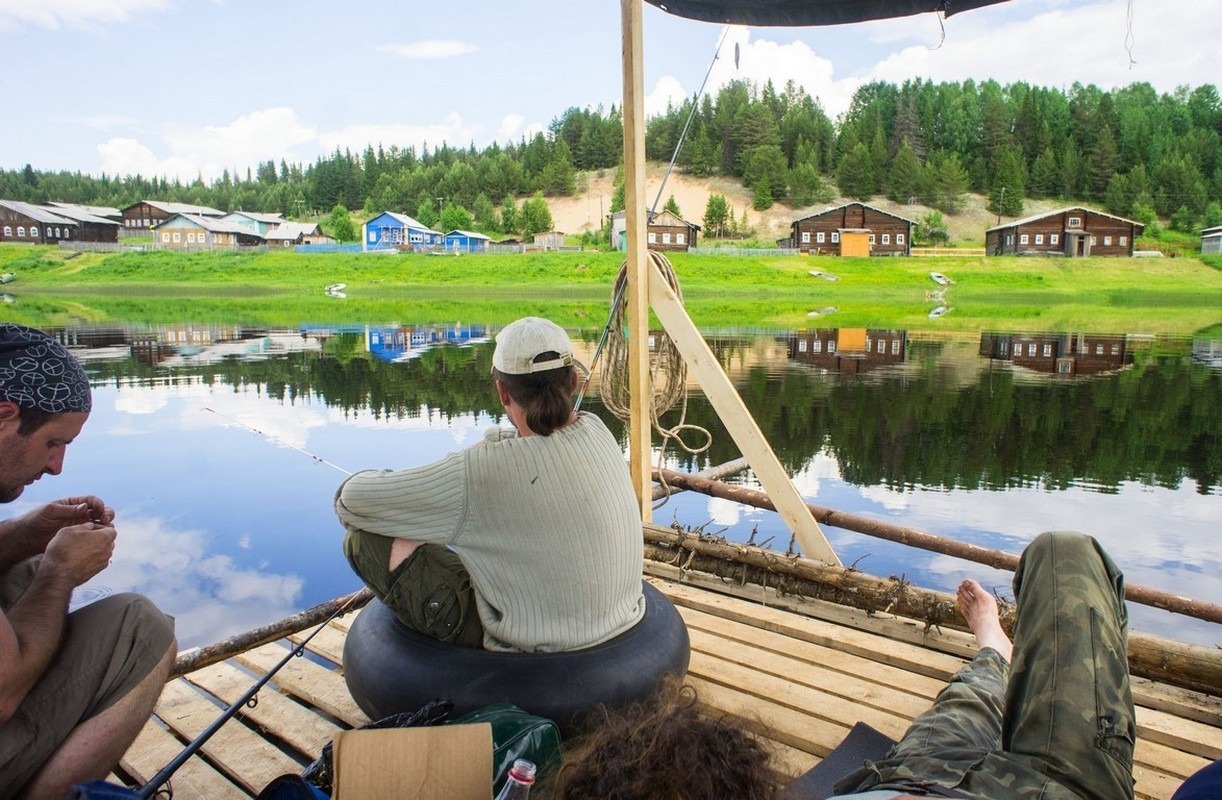
In this photo, he is ready to sail, it remains only to firmly fasten the rubber boat along one of the sides with ropes.
Why the boat was needed is an interesting question, the correct answer would be: we were calmer that way. In fact, it turned out to be very useful: they dumped all the shmurdyak, which is only needed for spending the night, clothes and tents, in the evening they fished from it when we needed to be in the village, but it didn’t work out normally on a raft to the shore, messengers went on a boat .
All things, sleeping bags, first aid kit and other wet things were packed in specially sewn hermetic bags. Cereals, salt, sugar, etc. poured into plastic bottles. Documents, telephones, a camera and other equipment were stored in a separate hermetic bag, which “if anything” was supposed to be dropped in the first place.
In the center of the raft were a pile of basic necessities and some groceries in a large bag. It did not look aesthetically pleasing at all, but in general it turned out to be convenient.
Foams lay on the boards, i.e. at night we slept on them in tents, during the day they moved to the raft.
Spare cameras turned out to be successful chairs, though one of them was soon used for its intended purpose - it went under the corner of the raft, on which both (2 layers) of the cameras burst.
At night we landed on the shore and set up camp there, but you won’t get enough tea in the morning for the whole day and you won’t be in the toilet.

Everything was simple with the kitchen: a brazier was rigidly fixed on two elongated boards above the water. Firewood was collected on the shore, sawn and chopped right in the process of movement. For ignition, so as not to fool around, dry fuel tablets were used.

With the toilet it is more difficult: under the oar you can see two shortened boards - this is the treasured point.

There are also beams on both sides that you can hold on to. An opaque reinforced film was thrown over the rope, behind which a person did his business. Initially, there was an idea to make something like a permanent screen out of the film, but it did not always create the necessary windage, then they wanted to attach it to the rope with clothespins, but in the end they just held it with their hands.
During the voyage, many things got their regular places. So the ax was drowned on the very first evening, and the new one they got was tied up and left to live near the firewood. A pot with bowls and spoons was hung on a nail near the barbecue, dishwashing liquid, along with a sponge, was inserted into a pocket made of adhesive tape near the products.

Regular place of fishing rods.

Solar battery. With the help of it, it was supposed to charge phones and the camera battery, in fact there was no connection, they took little pictures, and it was not particularly needed.

Cooling of liquids.

All sorts of necessities hung on a central support on a nail, which I did not want to wet and drown, but they were needed in the process of swimming. The main thing is Garmin, which runs on batteries, we learned from it where we were, how fast we were moving and what to expect ahead.
It remains to say about controllability.
In general, everything affects the raft: the wind, the current, how many people are crowded on one side, which side the raft is turned, etc. etc.
At first, there were 2 controls: a paddle and a cue.

The oars were boat oars and there were only 2 of them, if they knew that they would be the most effective in maneuvers, they would take 4. The process of rowing is not the easiest thing to do.
Cue is a long pole (we had about 2 meters), which can be pushed off the bottom in shallow water. At first we had 4 of them, then they drowned one, another one was used for a sail. Unfortunately, not a single photo of the work with a cue has been preserved - at these moments everyone was busy.
On the third day of the journey, a fair wind blew and we discovered another way to control the raft - a sail.

The length of the awning was enough not only to be a roof, but also to cover one of the sides. Through long games of ropes, sticks and an awning, a movement strategy was developed. The sail turned with its feet, pulled up with ropes, and, as unnecessary, folded up and tied to the supports. If the wind was oncoming, it was necessary to turn off not only the sail, but also the “roof”.
Thanks to the sail, the raft acquired an additional letter in the name "Gena-M" (which means Gene - modified) and developed a speed of just over 6 km / h at a river flow rate of 2.3 km / h, although this did not happen often. Basically, we were moving at a speed of 3-4 km / h.
The Mezen River along which we sailed is replete with sandbanks. At first, we thought that we would run into them every now and then and drag the raft, tearing the chambers. As a result, we ran aground just a couple of times.

When the bottom was very close, they jumped off the raft and pushed or pulled away on a rope to the depth.
Gena - M served us faithfully for 6 days and 130 kilometers, during this period the edges of 2 boards broke off, the design of the awning-sail was slightly loosened and for various reasons about 10 chambers ended (more precisely, they did not count). All this did not affect buoyancy in any way.
How could the design be improved?
A raft is a fairly simple means of transportation on the water, which is often used by fishermen or tourists on hikes. Such devices are made from different materials. The most popular and effective is a log raft. Its design is completely affordable, so you can make a wooden swimming device with your own hands.
The wooden raft has a simple structure. Its main constituent elements are:
All valuable items are transported in bright waterproof bags so that they are easy to find even in the river.
Logs are the most common material for building a raft. The tree has excellent floating characteristics. In addition, the material is quite affordable.
The wood for the raft must be:
A tree with a high moisture content does not hold well in water. To check the quality of the logs, you should hit them with an ax - sufficiently dry wood makes a ringing sound.
The lightest material is balsa wood. It's completely easy to handle. But such a breed grows in the tropics. Therefore, dry pine or spruce is most often used. Logs are selected with a diameter of not less than ten and not more than thirty centimeters.
To prepare a tree for a raft, cut off all the branches with an ax and inspect for splits and knots. If necessary, the wood surface is leveled.
In order for the raft to hold securely with passengers on the water, it is necessary to check the characteristics of the future watercraft before construction. Such calculations allow you to find out the amount of wood material needed for construction.
The main purpose of the calculation is to determine the carrying capacity of the raft. For calculation it is necessary:
The carrying capacity of a raft can be determined using the following equation:
In such a formula, D is the length of the logs, N is their number, and A is the carrying capacity of a running meter of a log. The last value is taken from special installed tables.
Calculate the volume of logs according to the formula Q = G / (1 - U). In this case, Q is the volume of wood in cubic meters, G is the required load capacity and U is the specific gravity of the wooden material. The last indicator for pine is 0.19-0.35, and for spruce - 0.3-0.44.
It is quite easy to build a raft from logs. A floating craft can be made by almost everyone with little skills in carpentry.
Necessary tools and materials
In the process of building a boat from logs, one cannot do without such wood tools:

You also need to purchase fasteners:
As materials are used:
For flooring, you can take plywood, boards or bark.
The construction of a raft is best carried out near a reservoir, since the construction, especially for a large number of people, can be very heavy.
To make a simple raft yourself you need:

After that, the steering gear is attached and, if necessary, small fences are installed along the edges of the craft.
Logs can also be fixed with special steel brackets. This does not require the construction of a frame base.
The flooring is mounted on already fixed logs. Sheets of selected material are attached so that a flat, smooth surface is obtained.
When building a raft near a reservoir, it is quite easy to drain its water. It is recommended to start laying logs at the same level with the shore. This will allow you to easily move the craft to the river.
The easiest way is to launch a raft built on supports located parallel to the channel of the reservoir. Such a design should simply be rolled up to the river.
You can make a small raft from logs with a diameter of up to thirty centimeters. Its construction consists of the following stages:

Flooring is laid on top. Optionally, supports are made from slats to cover the hut.
In order for a boat made of logs to be launched more than once, you should follow the rules for storing and caring for it:
With proper operation, the swimming device will last for many years without changing its original characteristics.
A log raft is a convenient watercraft that allows you to safely move around various water bodies. You can make it yourself by adhering to the exact construction technology. If you equip the upper part as a shelter from the rain, install a control mechanism and take care of the safety elements, then you can safely go on a short trip with friends along the river.
It is quite simple to make a raft for rafting on the river with your own hands, the main thing is to understand the basic principles. Such a swimming facility has a rather uncomplicated design; without special knowledge and skills, you can easily build a raft for fishing with your own hands from wood and improvised materials.
Big raft with tent
Materials and accessories
To build a good raft from logs with your own hands, you need to make the following key structural components:
The frame is the basis of the structure, on which all other components are fixed. It is necessary to achieve the highest possible strength of the frame in order to exclude destruction under sufficiently high loads, which the structure will necessarily be subjected to during use. At the same time, it is important to try to minimize its weight. This is important for the convenience of launching the structure into the water. At the same time, the frame must be rigid, resistant to deformation. Otherwise, the integrity of the structure may be violated right on the water, which is fraught with the most negative consequences.
Usually rafts are built in an inflatable or wooden configuration. In the case of a wooden one, a log frame is used as a frame base. In an inflatable structure, the base is constructed with a crate.
It is extremely important to observe the correct proportions of the dimensions of the raft. The ratio of width to length should be 1:3. In the event of a significant deviation from this norm, the stability and controllability of the floating facility will be impaired.
Pontoons are designed to hold the structure on the water. They can be made from a variety of improvised materials. Here it is worth starting from what is available to you.
The most popular pontoon options:
It is very easy to make a do-it-yourself camera raft; this is one of the most affordable and easy-to-perform options.
It must be equipped with properly equipped controls.
Most often used:
It is not necessary to make flooring, but it is desirable, this will make the use of the craft much more comfortable. The roof can be made in any form, based on the available materials.
The design must necessarily provide for the presence of safety elements. They must be responsible for the stability of people in the process of movement and, most importantly, in any collision. For this, special footrests are equipped. Hands are usually insured by control elements. From the sides, it is necessary to provide special posts that allow you to hold on in case of collisions or strong currents. And if possible, you should take inflatable vests on the raft.
To conveniently store things and protect them from getting wet, raised platforms are equipped for folding everything you need. You can equip a kind of "greenhouse", a structure that, if necessary, can be quickly covered with a film. The crew can also hide in it during the rain. For storing documents, it is worth using special hermetically sealed bags.
You can organize a special place for a fire to warm food. If you plan a long rafting, it is worth equipping comfortable places for sleeping and relaxing.
How to build a raft with your own hands - video, drawings and photos
See how the finished raft, made by hand, looks like in the photo:

Wooden raft
This is one of the simplest and easiest structures to build. This raft is made entirely of wood.
And the video below demonstrates the process of launching a raft made of plastic kegs, made by hand:
But, in this case, not only wood is used, but also large plastic containers, ensuring its free retention on the water. Therefore, if you want to make a raft from 200 liter barrels with your own hands, drawings and videos will definitely come in handy.
First, let's talk about simple wooden rafts. First of all, you need to be puzzled by the selection of suitable wood. It is important to use only dry materials. Usually a thickness of 10 cm is enough, such a raft is easy to build and launch. Whether a tree is suitable is very easy to check. Just dip the log into the water, if it sinks a maximum of half, this is the right material.
Wood does not need special treatment. Just remove unnecessary branches and try to achieve the most even surface. If the logs differ slightly in thickness, thinner ones are placed in the middle of the structure. As you approach the edges, the logs should thicken. Thanks to this, the design will turn out to be very durable.
Fold the logs side by side, and place the cross beams on top. Nails or strong ropes can be used as connecting elements. You can use wire and other improvised materials that will strengthen the structure. But, in the case of using a rope, it must first be moistened. This is necessary so that when wet in water, the nodes do not relax, otherwise the structure may even collapse. It is better to make connections using U-shaped brackets.
After connecting the logs, the raft can already be used. But, to make operation more comfortable, you can make flooring. For this, plywood, boards, tin sheets and other improvised materials are suitable.
You can use not only wood, but also combine it with various improvised materials that provide better buoyancy. You can use, for example, pieces of foam and similar lightweight materials that do not soak and do not sink in water.
For example, this solution is demonstrated in the following video:
How to make a raft of cameras with your own hands (video)
Very often, car chambers are used as pontoons on makeshift rafts. They are easy enough to find. This solution is very efficient. Compared to the wooden version, such a raft has a lot of advantages. Its weight is much lower, due to which it is convenient to carry on the shore or in shallow water. On the water, it is more stable and more responsive to control.
The photo below shows a do-it-yourself raft with a sail. Its peculiarity lies precisely in the presence of a sail, due to which movement on water is ensured. Here the sail is of the most primitive type, but it fully fulfills the task. Since the raft is built on chambers, it is light, glides well on the water, so even a slight wind is enough to move. Naturally, you should not rely only on the sail, on the raft you must also take oars or, at least, a pole.

Raft on cameras
So, we make a light raft with our own hands using cameras.
The main features of the construction process of the structure:
Take 1-2 spare cameras on the raft, as there is a risk of damage to them from all sorts of obstacles. Even if the chamber bursts, the raft, of course, will not sink, but the controllability will noticeably deteriorate.

Ready raft on cameras
How to make a raft of plastic bottles with your own hands (video, photo)
One of the most popular options is to use simple plastic bottles. You can use both small and 20-liter. Bottles are easy to find, so there should be no difficulties with materials. The frame of the raft can be made of wood, to which a large number of bottles can be tied. Make sure each bottle is tightly sealed.
The easiest way is with large bottles. With small ones it is somewhat more difficult, but also feasible. But, such bottles need much more. For example, a small raft needs about 100 bottles.

Bottle raft
The easiest way is to arrange the bottles horizontally. You can connect them with adhesive tape, and additionally tie them with ropes to increase strength. Use a special moisture-resistant adhesive tape. Point the bottles with their necks in one direction. Moreover, in the rows, the bottles should be connected as follows: necks to necks, bottoms to bottoms, so the design will be as compact and stable as possible on the water.
One good option is to pack the bottles in bags. Depending on the size of the raft, prepare the required number of bottles. Such pontoons turn out to be very voluminous, which will ensure good stability and high carrying capacity of the raft. The bags must be tightly tied so that the bottles remain in place on the water. Bags can be tied to the frame with ropes and tape. We invite you to watch the video "How I built a raft with my own hands", which demonstrates the construction of a large raft of bottles in bags. The design turned out to be very large, stable and load-bearing.
The video also demonstrates the rafting of several people with a lot of things on such a raft:
Bottles can also be placed in a vertical position. Divide the bottles into blocks of 4, connected together. Then connect these blocks in rows. Any structure, including a wooden frame, can be used as the basis for a raft.

Bottles are arranged vertically
One of the most successful and easy-to-implement solutions is to make a raft from 200 liter barrels with your own hands. You can use barrels of other sizes. The difficulty lies in the availability of the material, it is not always possible to get the required number of such barrels. If there are unnecessary, it is best to make a raft of them. Depending on the size of the structure, determine the required number of barrels. For a small raft, 6-8 pieces are enough. It is important to securely screw the barrels, preferably with sealant, this will prevent leaks. As a frame, you can use bars or boards. The flooring is preferably made of boards. Inside the frame, it is also necessary to provide several separate beams to which the barrels will be attached. Use ropes to secure barrels.

Raft on barrels
Raft care
If you plan to use the raft more than once, it must be serviced to extend its service life. The structure must be well dried after each alloy. To do this, simply take it ashore and leave it in a dry place. With rafts on bottles, barrels or chambers, everything is simple, because they are light. In the case of a heavy wooden raft, it is better to equip special guides on the shore to facilitate beaching.
It is advisable to move the raft indoors for the winter. In the absence of such an opportunity, it is necessary to arrange suitable storage conditions right on the shore. At a minimum, it must be carefully covered with a tarp. It is advisable to impregnate the structure with a special agent that repels moisture, this will significantly increase durability.

Publication 2017-11-03 Liked 12 Views 17675 Talk...

A well-groomed face is not always a gift from above. It's also healthy food...