Hmm, yoda_daro claims that this is a test to determine their sexuality...


Today we will make funny birds - flamingos, storks, crows, parrots and yellow chicks. One of the hot topics for creativity in kindergarten or holding a homework contest - this is a bird craft.
With children, before starting to create this craft, you can preliminarily conduct a thematic lesson, talk about the life of birds in the summer, about why it is at this time that we most often hear bird voices around us.
If the goal is interesting craft do-it-yourself birds, to the garden or to the center early development for the competition, then to create it you need to use the most beautiful and original materials.
Undoubtedly, real feathers will decorate such a craft. From them you can lay out a whole image of a bird, based on the color of the pen. For example, white feathers can turn into a charming stork. To create a beak and legs, use voluminous materials, and for more naturalism, place the bird in a nest of real straw or dry grass.
A very original postcard with a stork will be obtained using voluminous paper elements.

You can use feathers as a decoration for the finished image - create a tuft, wings or tail from them. Here, for example, what kind of parrot can be made from feathers and ice cream sticks.

You can make a bird out of paper, but place it in a voluminous basket made from two disposable plates.

A wonderful chicken can be made from folded paper or a cardboard roll.

Made from food coloring eggshell make adorable chicks. If they are planted in unpainted shell halves, we will get a touching composition “hatched chickens”!

And here is a lovely couple - a cockerel and an eggshell hen.

Another version of the chicken and chicken is made of felt.

This craft would make a wonderful Easter basket.

Easter basket "chicken"
From felt and satin ribbons, you can make a wonderful souvenir in the form of a chicken with a flower.

Another lovely chick in the shell can be made using the quilling technique.

Watch the video "how to make a bird in a cage:"
You can add zest to the application by bringing the paws and head of the bird out of the cardboard base.

If multi-colored wings are available, you can make a fantastic flamingo. An old CD will serve as its body, make paws from chenille wire, and head and neck from felt or velvet cardboard.

You can do without feathers.
A beautiful voluminous stork will turn out from cotton wool and thick yarn for knitting.

Or from round, folded in half, white and black paper blanks. The application of such modules looks very strict and impressive.

Instead of paper, it is convenient to use disposable plates to create semicircular modules. One plate at the same time becomes the body of one bird.

And this is a funny application "flying birds with a feather."

Very spectacular bright birds are obtained from plain paper. By two opposite sides thin sticks are glued on a paper circle. The circle is folded in half - the sticks are connected together to form the legs of the bird. They can be fixed with plasticine - then the bird will stand. The beak, wings, tail and comb are made from brightly colored paper strips.

A variety of birds can be made from natural materials. For example, a cockerel made of apples can become a real table decoration.

A smart penguin with glasses can be made from eggplant and carrots.

A penguin can be made using the technique of paper and cotton appliqué.

Application "penguin" from paper and cotton
A funny turkey can be made from maple leaves.

And the wings of a variety of prints of different colors will come in handy for a chic bright parrot.

You can vice versa - draw the body of a bird, and make the wings from a different material. For example, a disposable plate.

From cardboard and paper folded like an accordion, a spectacular lark is obtained.

In the same technique, you can make a variety of colored birds. Watch the video on how to do it:
A paper lark can also be made using the popular origami technique:
You can decorate the finished application with strokes of paint, which will look much more interesting if you use a tree glued from a decorative wood-colored film and colored paper as the main background.

The application "birds in the nest" can turn out to be very touching and spring. The application looks interesting, in which the nest will use a combination of materials. For example, for the manufacture of this application, we used paper, napkins and plasticine.

Application "Birds make a nest"
Using various materials for creativity, you can make a three-dimensional application with birds and insects.

See how to make a beautiful spring application with birds and birches:
Very interesting birds can be made using the trimming technique. The basis of the craft is smeared plasticine. Insert pieces of paper into it using a small stick or toothpick. We made a graceful swan in the technique of trimming.

But such a charming swan can be made from a cone, a CD and plasticine.

You can make extremely charming owls out of cones.

Another awesome way to make a swan is to glue it together with beautiful white shells.

A very beautiful bird is obtained from smooth pebbles.

Perhaps the most original idea making birds, make them in the form of soap.


Another wonderful bird is obtained from nuts.

A wonderful fluffy winter bullfinch can be made from thread.

Look at the video "how to make a beautiful bird out of thread":
The drawn bullfinch will be a wonderful decoration for a winter picture or postcard.

Drawing "Bullfinch"
The smallest artists can draw birds with their hands and fingers.

Drawing with palms and fingers "birds"
Spring birds on a branch gouache drawing:

DIY bird crafts can be so different, photos of which you could now see.
"How much different options) do it, you can’t do it”) (Ksyu)
I really liked the bullfinch made of thread) (Sasha)
Both in winter and summer, you can find a lot of sources of inspiration for creating bird-themed crafts. We can watch our smaller brothers in parks, in the grandmother's poultry houses in the village, in the zoo. The ability to understand ornithology will certainly help you make beautiful ones, but if you literally don’t understand anything in birds, then some of the ideas that we will see may come in handy. Moreover, we will try to consider in detail how to make this or that bird using various techniques and improvised materials.
The first among our small subtopics - crafts on the theme of poultry. Toddlers can also illustrative examples, and from your favorite books to find out what the inhabitants of the poultry yard are like. Cockerels and hens, geese and ducks, important turkeys and small quails - they all have their external features, which can be easily depicted on crafts. But, if only the most attentive adult distinguishes a goose from a duck on standard ones, then it will not be difficult to make a chicken and a cockerel look like “prototypes”.
Other news
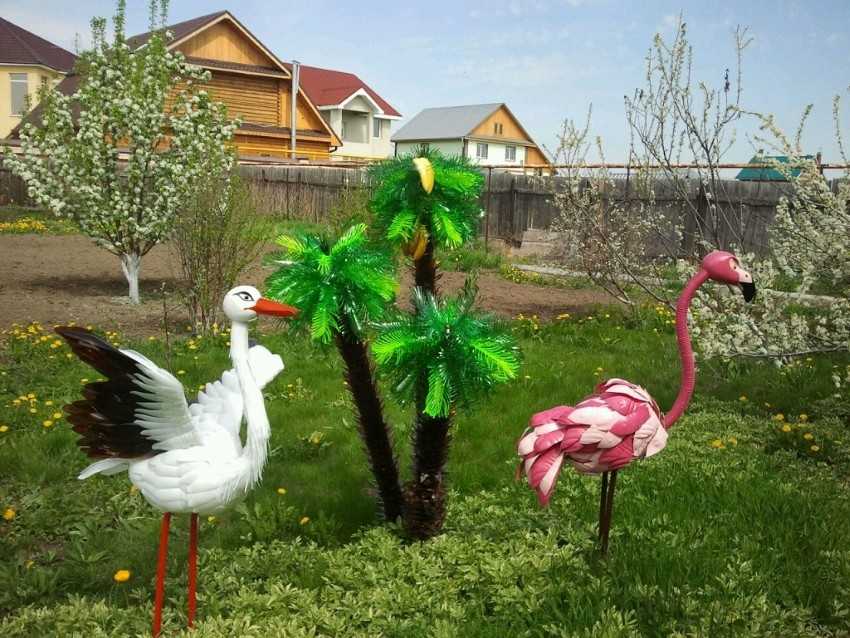
For many years, bird crafts have been especially popular among lovers of home art. This is due to their versatility, because feathered creatures will look equally harmonious both on the bedside table shelf and on any of the home green spaces. Unfortunately, there are people who do not know how to make a bird with their own hands and our task is to help them figure it out.
To create a peacock from bottles, you will need the following elements:

The torso and head of the peacock are cut out of the foam, small holes need to be made in the eye area. Using a metal twig, it is necessary to attach the body and head of the peacock to a wooden block.

Bird feathers are created from multi-colored plastic bottles. In total, three types of feathers are required: long - will be attached to the tail, short - will be attached to the neck, medium - are used for the body of the bird.


In order to make feathers, you will need to cut off the neck and bottom from the bottle, and then cut it lengthwise into three parts. One of the ends of each strip is rounded with scissors, after which the edges of the large strip are cut into thin strips, as a result, something similar to a bird's feather should be obtained.

The rounded part of the feathers that will be used for the tail should be decorated with two or three ovals of different colors, made of foil and plastic. They are attached with a stapler.

From red plastic bottle a beak is cut out, and attached to the place intended for it. Then, using a special gun, you need to start gluing feathers on the bird's body. You need to start from the tail, and end with the neck, the feathers of the bird are slightly overlapped, this can be seen in the photo.

From plastic of different colors, you need to cut out a crest of any shape and glue it to the bird's head. Taking advantage acrylic paints you need to draw the eyes of a bird. If desired, the eyes can be supplemented with eyelashes, which must first be cut from a colorless plastic bottle.

You should start making a peacock tail, for this an abrasive mesh is used. Holes must be made at the base of the feathers, and then, using a thin wire, attach them to the grid.

You need to start making the tail from the end, laying the feathers one on top of the other in rows, the actions are performed until the tail is completely ready. The tail is attached to the body. Such a bird will be the perfect decoration for any garden plot.


The presented birds will be a wonderful decoration for any preschool. To create chickens, you will need the following elements:

Having prepared all these things, you can proceed to the direct manufacture of birds:
In order to make one bird, you need to prepare five sponges. One of the disks is cut in half, and the rest are left in one piece.

Using glue, you need to fix four cotton pads on a wooden skewer, this is done in such a way that the skewer is inside. The first pair of sponges acts as the bird's head, and the second as the body.

Halves of cotton pads are attached to the already created body on both sides, they act as wings.

Attach the beak and eyes to the bird's head with glue. The beak is made of colored paper. The neck of the chicken is decorated with a thin ribbon.

Above are only the most simple options making birds. If you already had experience in creating such crafts, then you should pay attention to the birds of paradise from polymer clay, colored paper owls and salt dough firebird.

When using food paint in the latter case, the resulting bird can even be eaten, which will further cheer up a creative person.


Marina Suzdaleva
Spring is coming into its own. return home from warm countries, build nests and prepare for the appearance of chicks. Such changes in nature could not go unnoticed by enthusiastic mothers and their babies. The participants of "" prepared 7 detailed master classes on making do-it-yourself bird crafts. Chickens in different techniques, birds made of paper and cones, a dove of peace and a bird's nest will make your spring creative activities with children even more interesting and varied.
My daughter has turned into a little why. She is almost 3 years old and is interested in everything she sees. In anticipation of the central street of our small town took. When asked what it is and why, I decided to tell about the great heroes who saved the world. Including about her great-grandfathers, one of whom reached.
At home, we decided to make a postcard for great-grandfather in the form of a dove of peace, which carries a postcard.

We needed:
The dove is made in origami style. In this video you will find detailed wizard Class:
When the dove is ready, cut out a small rectangle and fold it in half.
We make a slot on the card and under the pigeon's tail.
We insert the tape into the slots and tie the ends.
We hide the knot under the pigeon's tail.

Decorate a postcard. We glued a St. George ribbon from orange and black velvet paper. The inside of the card was decorated with paints and a cotton swab. True, I planned to draw a salute, but Nastya wanted flowers.
It turned out original gift made by hand. I hope grandpa likes it.
Victoria Pechieva with babies Nastenka 2 years old. 8 months and Matveyka, 11 months old, Belorechensk
In the first week of May, we accidentally ended up in Nakhabino, Moscow Region, so nature itself helped us in creating crafts!
We had white paper, colored pencils, felt-tip pens and a glue stick. Collected on site. They cut out of paper - a tail, wings and a muzzle so that they could be folded in half. Colored with pencils and markers. Details glued to the bump.

Now the birds decorate the yard, waiting for us on.
Olga Antonenko and Olesya 1 year 7 months, Yaroslavl.
We got a moving bird craft. Her wings move when you pull the string from below.
For crafts, we used: cardboard, colored paper, scissors, an awl, glue stick, brads, thread.

Manufacturing process: the body of a bird and two separate wings were drawn on cardboard. They cut it out, and in the place where the wings and the body were fastened, holes were made with an awl. Then they began to decorate the body and wings of the bird with “feathers” made of colored paper. At the end, glued the eyes and beak. After that, they connected the wings together with a thread (folded several times so that it was thicker). They made a loop (ring) of thread between the wings. The wings were attached to the body with the help of brads. The bird is ready.

Pull the thread from the bottom and the wings of the bird will rise up.
Salimova Olga and daughter Alena (2 years 4 months), Yekaterinburg.
For crafts we need:
We start by preparing the nest: painting pasta nests brown paint.

While the nest dries up, we make a bird: we attach eyes, beak, tail and wings from plasticine to the box from Kinder Surprise.
We roll another piece of plasticine into an egg and decorate it with sequins (and / or beads). You can attach decorations with your fingers or roll the egg over decorations scattered on the table.
At the last stage, we assemble the craft: we place the egg and the bird in the nest using plasticine.
If the child has the strength and desire, then you can make a second bird or several eggs.
Kudryashova Nadezhda and Misha 1 year old 5 months, St. Petersburg.
I didn’t have a question what kind of bird to do - that means it’s a chicken. To make a bird, I discovered a new waste material -. This is ready-made papier-mâché - soak and sculpt. I took note of this, and for today's craft I decided to take the cells themselves.

I cut out the parts necessary for the idea from the trays, and removed the rest. For the chicken, I took two recesses and connected them with masking tape so that it opens like a box.
Now all the blanks need to be painted, which my son did with pleasure. When painting, they got a little wet with us, but we left them to dry and then continued to create.

I cut out yellow wings and a beak from cardboard, and paws from orange. We glued all the blanks to the chicken, painted eyes with gouache and our chicken came to life! For the cockerel and hen, I cut out only the beaks and scallops. I glued them with PVA glue. Eyes also painted with gouache.

Here we have such a funny chicken family. You can use them as candy bowls, and the chicken as a surprise box.
Kosteva Oksana and son Sashenka 1 year old. 11 months old, Dolgoprudny.
First, we cut out two circles with a diameter of 8 cm from cardboard, and inside the large circles we cut out a smaller one with a diameter of 4 cm (we no longer need these small circles of 4 cm here).
 We put two circles of 8 cm together and wrap them with yellow knitting threads, the more you wrap, the more magnificent the pompom will be. Then we cut the threads with small scissors along the outer circle of the thread and at the same time insert the thread between the circles of cardboard, tighten this thread and tie it. Remove cardboard circles. The pompom is ready, it will be the body of the chicken.
In the same way we will make the head of a chicken, only a smaller pompom. To do this, cut out two circles of cardboard with a diameter of 6 cm, and inside them circles with a diameter of 3 cm, then similarly.
Tie two pom poms together. On the head we glue eyes and a beak made of red leatherette or hard felt, or you can knit it from red threads. Glue the paws on the body. I made from twigs, you can also use hard brown felt.
Such a funny chicken is ready!
For a postcard in the form of a chicken that hatched from an egg, my daughter and I made handprints with yellow paint on a white sheet. It was possible, of course, to circle the palms with a pencil on yellow paper, but this is not at all interesting for my daughter.

While our palms were drying, we cut out an oval from yellow cardboard for the figure of a chicken, a semicircle for the shell was cut out of white cardboard, and a beak from red cardboard.
We prepared the basis - our postcard, where we will collect the chicken. The palms were cut out along the contour and re-glued onto a postcard, then a yellow oval was glued. On the yellow oval - the shell, eyes and beak.
We sign a card for memory and you can give!
Gavrilova Faina and daughter Taisiya, 1 year old. 2 months, Arkhangelsk.
At all times, children, regardless of age, liked activities that allowed them to express their creativity, and so it is today. Applications, beadwork and many other types of creativity are available to modern representatives of the younger generation. And they may also like the bird craft. With your own hands, offer your child to make this thing from plasticine, yarn, paper, natural or many other materials. At the same time, you can be sure that the baby will like both the manufacturing process of the product and the result.
One of the birds most beloved by children is the peacock, because it is he who is the prototype of the bewitching kids from the TV screen or drawings in the book of the firebird. Therefore, a child will be very willing to get to work if he is shown at least her image, but it is better if, for example, there is already a ready-made “bird” handicraft at hand. With his own hands, a child can make a torso and a magnificent tail out of paper, and then connect these parts with glue.
So, to make a bird, we need colored and white paper, scissors. To facilitate the task of making the body, you can print the template below in advance and hand it to the baby. In this case, it remains only to put the blank on a colored sheet, circle, cut out and finish the missing details: crest, eyes, beak.
When making the body of a peacock, it is important to lengthen the lower part, since in the future it will need to be bent in order to make the finished bird craft more stable. With your own hands, in order to lengthen it, you can also glue a strip of paper to the finished body, if the initial height of the sheet on which the kid drew the template was not enough.
The tail is probably the main detail of a paper peacock, since it is it that gives the bird splendor. Therefore, it is very important to do it properly. To make this part, you will need a sheet of bright paper (green, pink or red) 9x9 cm in size. It must be folded diagonally, and the resulting triangle bent in half again.
From the side of the base of the triangle, you need to draw the outlines of the feathers and cut them out. It is important that the top of the triangle remains intact. After that, the part must be expanded to the state of the first triangle and draw feathers on both sides with a felt-tip pen. At the final stage of manufacturing the tail, it is necessary to cut the outer line of each feather with scissors.
Now it remains to connect the body and tail, for this the first part should be bent at the base, creating a stand, and glue a bright triangle to the back, turning it upside down. So the craft "bird" is ready. With his own hands out of paper, a child will be able to create this little thing in just 10-15 minutes, and he will receive a huge amount of positive emotions.

Each child needs to convey the information that the do-it-yourself "bird" craft from natural material and plasticine can be made quite easily, in any case, no more difficult than from paper. The only difference in the creation of this souvenir is the campaign for necessary materials not only to the stationery store, but also to the forest or park. So, you need to find a spruce cone, a few dry leaves different forms and sizes (you can also take green ones, but they will have to be dried at home) and a rose hip. In the stationery store you will need to buy plasticine and toothpicks. For the stand, you should also pick up a small square plate 1-1.5 cm thick.
So, if everything you need is already at hand, you can be sure that in a few minutes the “bird” craft will already show off on the table. With his own hands, the child will fold it in less than half an hour. As the body, the tail will act as the head, the wings and crest - leaves, and the legs - toothpicks.

It is necessary to take a cone, turn it to a horizontal position, and attach a rosehip to the wide side with a piece of plasticine. For the tail, you will need to stick a long narrow leaf (for example, oak) into the cone from the narrow side. Attach the wings to the corresponding places on the body - halves of a wide leaf. Stick a crest into the dogrose head. Insert toothpicks into the underside of the cone, and then attach the finished craft to the board. And, it would seem that the “bird” craft is already ready. With your own hands from plasticine, however, it is still necessary to make some details, namely, eyes, and attach them to the appropriate places on the head. And after that, the bird can already be installed on the shelf as a souvenir. If desired ready product covered with paint or gloss.
Yarn is another material that can be used to make a great bird craft. With your own hands, you can make a magnificent sparrow from threads, teip tape, a dart, beads and a piece of newspaper. You will also need a glue gun, scissors, a sheet of thick cardboard measuring 9x12 cm.

First you need to make blanks for the wings, breast and back. Note that the different parts of the sparrow have different colour. For the manufacture of the first two parts, it is necessary to wind the yarn across the cardboard sheet in two places. The last blank is made by winding threads along the template. At one end, the yarn must be cut, and the part that will be used as wings should be tied in the middle.
Next, the threads for the breast and back should be folded crosswise so that the first part crosses the second in the upper part. Then, with a longer winding, wrap around the short one and fasten the back with a thread, after which the same action should be done with the breast. As a result of these actions, a head will be created, and the “bird” craft will soon be ready.

With your own hands, you will then need to clasp a piece of newspaper with the yarn prepared for the wings, and put this part between the two already existing ones - as a result of this, you will get a torso. Next, from the opposite end, you need to tie all the threads together and trim them. The legs can be made of wire, and wrapped with teip tape on top. Then attach them with glue to the appropriate places, as well as sew on beads as eyes and make a beak from a seed by gluing it to the head. Such a bird can decorate any room in the house by placing it on a shelf or hanging it on a thread.

Instruction The frames of the film merge for us into continuous movement due to ...

Pranayama is a breathing practice in yoga. Pranayama literally translates as...