So I bring to your attention a simple, but very long recipe for cooking ...


The final stage of the construction of any building is the construction of the roof. This design refers to important parts of the structure, which should reliably protect it from the penetration of precipitation, wind and cold. The methods of mounting individual roof elements primarily depend on the type of construction chosen for the house.
One of the most common design options is a gable broken mansard roof. Source hi.decorexpro.com
Different types of roofs differ in their design features and shapes. When arranging the roof, pitched roofing options (single-pitched, multi-pitched) are usually used.
The simplest for installation are single-pitched, they are characterized by low labor intensity and high installation speed, due to the too low under-roof space it is not possible to equip a full-fledged attic (mansard). Such a roof is installed on a building, the two walls of which have different heights. A shed roof is rarely equipped on residential buildings (usually in climatic zones where strong winds predominate). Most often they are installed in garages and all kinds of outbuildings.
According to the features of the arrangement, multi-pitched roofs are among the most complex types of roofs. They consist of a large number of structural elements. The installation of the truss system of such roofs should be carried out with particular care. Pitched roofs (according to their design features) are divided into:

With this design, there is no usable space under the roof Source blog-potolok.ru
Before you build the roof of the house, you need to choose a certain type of multi-pitched structure:

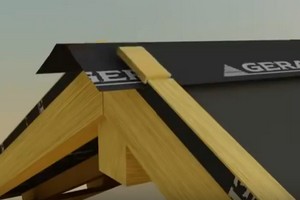
The main types of construction of the truss system Source zen.yandex.ru
To find out the approximate cost of various types of roofing, use the following calculator.:
Before you make the roof of the house, you should decide on the type of roofing material. The load acting on the frame depends on its weight. This affects which truss system will be built. It is necessary to provide for the features of fastening individual elements of the roof. It is necessary to take into account the use of additional structures, the use of which strengthens the truss system.
Pitched roofs are usually covered with:

Modern "soft" roof Source krovlyakryshi.ru
Ceramic tiles are the heaviest. If this type of roofing is chosen, then the truss system must be calculated taking into account such a significant load.
To equip the truss system, coniferous wood should be purchased (moisture content 20%, without knots, blue and other defects). Before starting the installation of the roof, it is also necessary to purchase the following materials:
The calculation of the required material must be made according to the drawing of the roof, on which the connecting nodes of the truss system, as well as reinforcing elements, must be placed.
On our website you can find contacts of construction companies that offer roof design and repair services. You can directly communicate with representatives by visiting the exhibition of houses "Low-Rise Country".
For mounting the Mauerlat, a wooden beam (square or rectangular section) is used. It serves as the basis of the entire structure and is the place where the roof is attached to the building. Mauerlat allows you to evenly distribute the load on the walls of the building.

Mauerlat "collects" the load from the rafters and distributes it over the surface of the wall Source notperfect.ru
The cross section of the beam is calculated based on the complexity of the roof and the weight of the frame. When mounting the Mauerlat around the entire perimeter of the building, its elements are connected to each other according to the cutting principle. Additional reliability is provided by nails or bolted connections.
The rafter system is installed on the Mauerlat and serves as the basis for laying the roofing pie. Be sure to provide for the angle of the roof slope. A roof with a large slope is faster freed from water and snow. Therefore, for the arrangement of roofs with a slope of 50º, rafters of a smaller section are used than for more gentle roofs. This information must be reflected in the project documentation.
If the roof is erected on a structure of small width, then A-shaped structures are mounted (a ridge run is not needed). The horizontal jumper (crossbar) provides the required rigidity, and also reduces the load on the spacer. The upper fastening of the rafter legs is reinforced with a wooden or metal lining.
The bottom of the rafters can rest against the Mauerlat with a cut end (design without overhang). If the project provides for an overhang, then a recess is made at the bottom of the rafter. The upper part of the cutout rests on the Mauerlat.

The design of rafters without an overhang is used very rarely. Source strindustry.ru
When arranging mansard roofs, layered truss systems are usually installed, in which the rafter legs are equipped with an additional point of support. For this, support posts are used, which are connected by girders. Additional structural rigidity is provided by struts and other elements.
After the installation of the rafter system, the roofing pie is equipped. First, waterproofing is laid, for which a special membrane is used. It must be fixed on the rafters. In order not to worsen the ventilation of the roof, the overlap of the membrane over the ridge should be avoided. On top of the waterproofing, bars (counter-lattice) are attached to the rafters. This ensures the required air gap.
The crate is attached to the counter-crate. Depending on the type of roofing, it is made of:
Roofing is attached to the crate. It takes on the entire load and redirects it to the design of the truss system.

If the roof is not "broken", then the attic will not occupy the entire usable area of the attic. Source lilyass.com
The construction process includes the following steps:
Before erecting a roof, you should order a project for the roof of the house. After the construction of the walls of the building is completed, waterproofing (roofing, roofing felt) should be laid on top of them (under the Mauerlat). When arranging a gable (single-pitched) roof, it is laid on two walls, on which the rafter legs rest. When a hipped roof is being built, the Mauerlat is installed around the entire perimeter of the building. Waterproofing is also laid on all walls.
After that, the floor beams should be installed. The ends of the beams should protrude to the planned width of the eaves (usually within 0.4-0.5 m). First, the extreme beams are laid, then the remaining ones are set up (the step depends on the step of the rafters, usually 0.6 m). The beams are fixed on the Mauerlat with nails or self-tapping screws. Boards are laid on top (not fixed).

Assembled the "skeleton" of the roof in a frame house Source izoluks.ru
Further construction work includes the installation of racks, for which a 50x150 board is used. They are fixed using spacers, and their height depends on the design of a particular roof. First, the extreme racks are installed, after which the rest are exposed. A ridge beam is attached to them with self-tapping screws.
The frame of the pediment is being equipped, sheathed with an inch board. Then the cornice is completely mounted. The ends of the overlap are closed with a frontal board, and 2 belts of boards are attached from below. Gutter holders should be installed.
A waterproofing membrane is attached to the rafters. A counter-lattice is made from above, and then a crate is arranged. Roofing material is laid on it.
The roof is insulated from the inside with modern heat insulators. More often, mineral wool is used for this. More expensive (sheet, sprayed polymeric heaters) are used less frequently.

Insulation of the roof of a house with an attic Source euroace.org
The heat insulator is closed with a vapor barrier (special membrane). The material protects the insulation and the entire wooden structure from moisture.
Visually and step by step the entire process of installing the roof and roofing in the following video:
Before you build a roof at home, you should consider the following nuances:

A non-specialist can easily confuse a hip roof with a hipped roof. Source bazaznaniyst.ru

A complicated version of a gable roof Source yandex.ru

Sloping roof for a house with an attic Source biznes-stroi.ru

Conical roof on the rounded part of the house Source stroi-remontirui.ru

A combination of old and new - a gable roof on a modern house Source fasad-master.com.ua

The complex multi-tiered roof looks very impressive Source mirstrojka.ru
A few more beautiful and practical types of roofs in the following video:
A well-made roof is a guarantee of a warm and dry home. Therefore, it is important to strictly observe all stages of the technology for erecting a truss system and laying a roofing pie. To avoid the need to redo the entire structure over time, trust the construction to professionals.
Roof installation is a complex multi-stage process. In order to independently assemble and install the truss system, it is necessary to carefully study the methods of connecting the elements, calculate the length of the rafters and the slope angle, and select the appropriate materials. If you do not have the necessary experience, you should not take on complex designs. The best option for a small residential building is a do-it-yourself gable roof.

A standard roof of this type consists of the following elements:

Mauerlat is a beam laid on top of the walls along the perimeter of the building. It is fixed with threaded steel rods immured into the wall or anchor bolts. The beam must be made of coniferous wood and have a square section of 100x100 mm or 150x150 mm. Mauerlat takes on the load from the rafters and transfers it to the outer walls.

rafter legs- these are long boards with a section of 50x150 mm or 100x150 mm. They are attached to each other at an angle and give the roof a triangular shape. The design of their two rafter legs is called a truss. The number of farms depends on the length of the house and the type of roofing. The minimum distance between them is 60 cm, the maximum is 120 cm. When calculating the pitch of the rafter legs, one should take into account not only the weight of the coating, but also the wind load, as well as the amount of snow in the winter.

It is located at the highest point of the roof and most often represents a longitudinal bar connecting both slopes. From below, the timber is supported by vertical racks, and the ends of the rafters are attached to the sides. Sometimes the ridge consists of two boards, which are nailed to the top of the rafters on both sides and connected at a certain angle.

Racks - vertical bars with a section of 100x100 mm, located inside each farm and serving to transfer the load from the ridge run to the load-bearing walls inside the house.
The struts are made from timber scraps and set at an angle between the uprights and the rafters. The side faces of the truss are strengthened with struts, the bearing capacity of the structure is increased.
Puff - a beam connecting the lower parts of the rafters, the base of the truss triangle. Together with struts, such a beam serves to strengthen the truss, increases its resistance to loads.
Lying is a long bar with a section of 100x100 mm, laid along the central load-bearing wall, on which vertical racks rest. Lying is used when installing layered rafters, when the run between the outer walls is more than 10 m.
The crate is a board or timber stuffed on the rafters. The crate is solid and with gaps, depending on the type of roof. It is always attached perpendicular to the direction of the rafters, most often horizontally.
If there is no more than 10 m between the outer walls and there is no load-bearing wall in the middle, arrange hanging rafter system. With such a system, the upper ends of adjacent rafters are sawn at an angle and connected to each other with nails, excluding the installation of racks and ridge timber. The lower ends of the rafter legs rest on the outer walls. Due to the lack of racks, the attic space can be used to equip the attic. Very often, floor beams perform the function of puffs. To strengthen the structure, it is recommended to install the upper puff at a distance of 50 cm from the ridge.

In the presence of a central supporting wall, the arrangement is more justified layered truss system. A bed is laid on the wall, support posts are attached to it, and a ridge beam is nailed to the posts. This installation method is quite economical and easier to perform. If the ceilings in the interior are designed at different levels, the racks are replaced with a brick wall dividing the attic into two halves.

The installation process of the roof includes several stages: attaching the Mauerlat to the walls, assembling the truss trusses, installing the rafters on the floors, installing the ridge, and attaching the batten. All wooden elements before assembly are carefully treated with any antiseptic composition and dried in the air.
For work you will need:

in wooden houses Mauerlat functions are performed by logs of the last row, which greatly simplifies the workflow. To install the rafters, it is enough to cut grooves of the appropriate size on the inside of the logs.

in brick houses or buildings from blocks, the installation of the Mauerlat is as follows:

Mauerlat bars should form a regular rectangle and be in the same horizontal plane. This will facilitate further installation of the roof and provide the structure with the necessary stability. In conclusion, markings are made on the bars for the rafters and grooves are cut along the thickness of the bar.

When choosing a hanging truss system, it is necessary to assemble the trusses on the ground, and then install them above the floors. First you need to draw up a drawing and calculate the length of the rafter legs and the angle of their connection. Typically, the roof slope is 35-40 degrees, but in open, heavily ventilated areas, it is reduced to 15-20 degrees. To find out at what angle to connect the rafters, you should multiply the angle of the roof by 2.

Knowing the length of the run between the outer walls and the angle of connection of the rafters, you can calculate the length of the rafter legs. Most often, it is 4-6 m, taking into account the cornice overhang 50-60 cm wide.

The upper ends of the rafters can be fastened in several ways: overlap, butt and "in the paw", that is, with cut grooves. For fixing use metal pads or bolts. Next, the lower and upper puffs are mounted, and then the finished trusses are lifted up and installed above the ceilings.

The extreme trusses are attached first: with the help of a plumb line, the rafters are set vertically, the length of the overhang is adjusted and attached to the Mauerlat with bolts or steel plates. So that during the installation process the farm does not move, it is strengthened with temporary jibs from a bar. After installing the extreme rafters, the rest are exposed, keeping the same distance between them. When all the trusses are fixed, they take a board with a section of 50x150 mm, the length of which is 20-30 cm longer than the length of the eaves, and nail it along the upper edge of the slope. Do the same on the other side of the roof.


The first option: on the rafter leg, at the place of contact with the Mauerlat, a rectangular groove is cut out 1/3 of the beam width. Stepping back from the top of the box 15 cm, a steel crutch is driven into the wall. The rafter is leveled, the grooves are aligned, then a wire clamp is thrown on top and the beam is pulled close to the wall. The ends of the wire are securely fixed on the crutch. The lower edges of the rafters are carefully cut with a circular saw, leaving an overhang of 50 cm.

The second option: the upper rows of walls are laid out with a stepped brick cornice, and the Mauerlat is placed flush with the inner surface of the wall and a groove is cut in it for the rafter. The edge of the rafter leg is cut at the level of the upper corner of the eaves. This method is simpler than the others, but the overhang is too narrow.

The third option: ceiling beams are extended beyond the edge of the outer wall by 40-50 cm, and roof trusses are installed on the beams. The ends of the rafter legs are cut at an angle and rest against the beams, fixing with metal plates and bolts. This method allows you to slightly increase the width of the attic.

1 shows the cutting of the struts of the rafters into a bed laid on intermediate supports, and in Fig. 2 - supporting the rafter leg on the Mauerlat
The procedure for installing a layered truss system:

When the main elements are fixed, the surface of the rafters is treated with flame retardants. Now you can start making the crate.

A beam of 50x50 mm is suitable for the crate, as well as boards with a thickness of 3-4 cm and a width of 12 cm or more. Waterproofing material is usually laid under the crate to protect the truss system from getting wet. The waterproofing film is laid in horizontal stripes from the eaves to the roof ridge. The material spreads with an overlap of 10-15 cm, after which the joints are fastened with adhesive tape. The bottom edges of the film must completely cover the ends of the rafters.

It is necessary to leave a ventilation gap between the boards and the film, so first wooden slats 3-4 cm thick are stuffed onto the film, placing them along the rafters.

The next stage is the sheathing of the truss system with boards; they are stuffed perpendicular to the rails, starting from the roof eaves. The step of the lathing is affected not only by the type of roofing, but also by the angle of inclination of the slopes: the larger the angle, the greater the distance between the boards.

After the installation of the battens is completed, they begin to sheath the gables and overhangs. You can close the gables with boards, plastic panels, clapboard, waterproof plywood or corrugated board - it all depends on financial capabilities and personal preferences. Sheathing is attached to the side of the rafters, nails or self-tapping screws are used as fasteners. Overhangs are also hemmed with various materials - from wood to siding.
Roof design begins with the collection of loads. It is necessary to calculate the total weight of one square meter of the entire roof structure. To do this, you must first draw the drawings of the roof and calculate the snow and wind load according to the area where construction is underway.
In order to correctly collect the load, you need to know the specific gravity of all materials that are used for the construction of the roof, from the type of wood to the type of insulation and outer coating. These data are necessary for the correct selection of the pitch of the rafter legs. The greater the load, the smaller the distance should be between the rafters.
The maximum distance that is allowed between the rafters should not exceed 1200 mm. The optimal distance is one meter. Next, you should choose the cross section of the beam.
To calculate the roof structure, there is a special algorithm from a variety of formulas, but all of them are intended only for analyzing the construction of large industrial buildings. For private construction, the process of selecting a section can be simplified.
The height of the beam is calculated from the maximum length of the rafter leg. 1/20 of the length will be the optimal beam height. But 1/3 of the resulting height - this will be the required width of the timber. The result is a robust system that can withstand heavy loads.
In a wooden house, the upper strapping beam for a frame house will serve as a support for the rafters. In a brick house, along the upper edge of the masonry, it is necessary to install a Mauerlat - a horizontal powerful bar that is attached to the wall with crutches.
A do-it-yourself roof is built in a few days, if you plan the whole process correctly. At the junction of two different materials, for example, brick and wood, it is always necessary to lay waterproofing. Instructions for the construction of the roof begins with the correct laying of the supporting beams. Then inclined rafters are installed at an angle, which is provided for in the project.

To fix the rafters, slopes and strapping boards are installed as part of the crate. The fastening of all rafters into a single structure makes a wooden roof stable. At this stage, it is important to accurately align the position of the rafter legs, they must be in the same plane, strictly in the correct design position.
After fixing the rafter legs, a crate is stuffed, which is a series of boards with a certain step, then the final coating will be attached to them. If the roof is provided from soft materials, the crate is made of a solid type from plywood sheets. In all other cases, it is enough to nail the elements of the crate at a certain distance from each other.
After that, protective materials (insulation and vapor barrier) are laid and the final roofing is installed. In some cases, insulation is done inside the structure after the installation of the roofing material. The rafter roof must be ventilated to ensure a normal microclimate for structures and their durability.
Any work can be divided into stages. So, do-it-yourself roof step by step.
First step. Make a calculation of the roof, collect the load, determine the cross section of the beam, its length. Be sure to summarize all the data in the material consumption specification.
Second step. Prepare all the necessary tools, purchase material, prepare a place for storage. Consider a mechanism for feeding heavy structures to the roof. On the day of work, you may need to hire a truck crane.

Third step. Prepare the surface for work. Start installing the power plate, strapping beam and rafter legs. Carefully check the design position of the rafters. At the end of the working day, make sure that the working structure is securely fastened.
Fourth step. Submission of batten boards. Fastening the battens and laying protective materials under the roof. At this stage, you will have to do a lot of cutting work. It is difficult and long to work with a hacksaw, so you need to rent a parquet or jigsaw.
Fifth step. Installation of roofing material, checking joints. Here, after the installation work is completed, the box can be hemmed to exclude wind pressure from the side of the wall under the coating structure.
A gable sloping roof significantly improves the functionality of the attic space. A conventional gable roof creates a dead space with an inclined plane in which one cannot stand in full height.
A gable sloping roof expands the space due to the special design of the kink of the inclined plane. Thus, a full-fledged interior space is obtained, which can be equipped as a bedroom.

According to the drawings, such a roof of the house is built by installing strictly vertical racks and horizontal puffs, and hanging and layered rafters are lined up on the sides of the impromptu rectangle. To provide the structure with the necessary strength, struts are installed from the floor beam to the middle of the layered rafters.
All other work is performed similarly to the scheme described above. The main difficulty in building a gable sloping roof structure is to choose the right cross-section of the beam and install all the elements according to the drawing. In most cases, insulation and vapor barrier are added to the roofing cake. This greatly complicates the process of installing a rafter roof, but without these elements it makes no sense to make an attic room.
For a private house, it is preferable to choose a pitched roof with a slope of more than 2.5%. The simplest option is a shed roof, but this is used only on utility-type structures. The design of the character is one flat, sloping roof plane that rests on the two side walls of the building.
A gable roof is considered universal, which rests on two outer walls at the same level, and the inclined planes converge in the middle into one ridge knot. The end part of such a roof is called a gable and is usually sealed with the same material from which the load-bearing part of the house is built.
The hip roof is a hipped roof without a gable. On all sides of the building, the roof is reduced from the upper edge of the wall upwards. Such a roof is better than others adapted to perceive wind and snow loads, but it is quite difficult to build. All nodes of the roof frame must be built in compliance with the complex laws of the statics of structures.

A hipped roof looks something like a hip roof, but its main difference is that all four roof planes are strictly triangular in shape. As a result, from the center of the building, the inclined planes diverge in four directions, forming a tent.
A broken or mansard roof is the creation of broken roof planes at an obtuse angle. The result is a rather voluminous attic-type room, which can be used as a residential one.
All types of roofs have their advantages and disadvantages. Some look better, but require significant construction costs, others are easy to build, but also unpresentable in appearance. Roof selection is usually made after determining the snow and wind area. It is important to agree on the type of roof at the design stage.
In fact, the construction of the roof of a frame house is no different from the construction of a roof for other types of buildings. The only point concerns the fixing of the rafter legs on the supporting structures. Here, instead of a Mauerlat, a strapping beam is used.

All other methods are similar. For the convenience of construction, before starting it is necessary to build a raised floor or mount a full-fledged wooden floor. Installing rafters from scaffolds is inconvenient and time consuming.
For a frame house, it is recommended to choose the least massive roof structure, so that it does not create critical pressure on the supporting elements. Do not build on additional elements on the roof, including dormer windows, if they are not provided in advance in the project.
Depending on the roof structure, the amount of materials and the cross section of the support bars should be selected. For a private house, especially a frame type, a gable and gable sloping roof is the most effective. All other structures are quite complex and require a large number of retaining elements, which significantly increase the weight of the entire roof.
For a frame house, it is better not to use natural ceramic tiles as a coating. In addition to the fact that it is very heavy, for installation you will need to fill the crate thickly. As a result, it will be necessary to additionally strengthen the supporting racks or reduce the step between them, which will lead to an overrun of materials.
The support beam serves to fasten the rafters at the bottom. It is not advisable to rest the rafters on the wall, therefore, an additional beam is used, which perceives the inclined load and transfers it to the supporting structures strictly vertically.

As a support beam, a beam of a sufficiently large section should be used. It must be firmly fixed to the wall. In the case when the roof, together with the supporting beam, simply lies on the wall, the roof can be blown up by the wind. Despite the large weight of the entire roof, it can fly away with heavy gusts of wind.
Every master who started an independent construction project understands that doing a roof with his own hands step by step is a difficult task, but still doable. In the material below, we will try to understand all the intricacies of the work and understand what the phased construction of a gable type roof looks like.
Important: in order for the assembly of the roof of a private house to be as accurate as possible, and all the material to be purchased for it with a small margin, it is better to involve professionals in the design of the roof. At the design stages, they will calculate the slope of the roof slopes and the amount of building material needed for it, including steam and heat insulation, as well as roofing material, and will give you a finished roof project.
To understand what a roof in a private house will look like with your own hands, you need to understand what types of roofs exist in general. Based on this, choose the type of construction.
Important: however, when designing a roof, it is always worth considering the wind and sedimentary (rain, snow) load on the ceiling, as well as the weight of the roofing material.
So, today most often they mount such roofs of a private house with their own hands:
Important: it is worth remembering that the step-by-step construction of a roof for a house will be the more difficult, the more complex the configuration of the room. This is due to the fact that a complex structure requires a complex truss system.

Independent construction of the roof of a private house requires the preparation of the necessary tools and materials. In particular, you will need:
Video: how to make a roof correctly (step-by-step instructions for building a roof with your own hands).
Important: the installation step of the rafter legs depends on the weight of the future roofing material. The heavier it is, the smaller the pitch of the rafters should be.
Important: below for a complete understanding of the work process, a detailed video is presented.
Photo 1: 
To mount the roof of a private house strong and reliable, you need to take care of fastening the Mauerlat - the wooden trim of the house, which serves as a transitional boundary from the stone to the wooden part of the building. Fix it in two ways:
Important: the height of the studs above the wall should be equal to the height of the beam being laid plus 3 cm. Such a calculation is necessary in order to securely fix the Mauerlat with nuts and bolts.
Photo 2: 
The rafter system for the roof is the most difficult part of the job. It is important not only to install the rafter legs, but also to cut them correctly. In the event of the slightest distortion, the entire roof frame will “walk”, which is not good for the roof. So, do-it-yourself roofing will be easier and faster to build if you cut out a rafter pattern from one beam in advance and form all the rest on it.
To create a pattern, it is necessary to make an internal cut in the lower part of the rafter board at a right angle. This place she will rest against the Mauerlat. The cut is made not from the very edge of the board, but stepping back from it upwards of 50 cm. These will be roof overhangs that protect the walls of the house from rain. A cutout can be made according to a bar template or simply by drawing a right angle on the board.
Now it is necessary to cut off the top edge of the board in such a way that the rafter system of two parallel legs can be joined by cut edges without voids and gaps. To do this, you need to raise the board up, lean it on the Mauerlat and raise it to the desired slope angle. A vertical line must be drawn along the center of the floor to the rafters. This will be the cutting line of the board. That is, in the upper part of the rafter leg, we will get an oblique cut.
Photo 3: 
We assemble all the rafter legs cut according to the pattern on the ground, securely connecting them in the upper part (ridge) with brackets, ties and bolts.
Important: if the length of the rafter exceeds 3 meters, then it is desirable to additionally strengthen the system with crossbars - transverse beams that are mounted horizontally with respect to the rafter triangle. The location of the crossbar should be in the first third of the upper part of the triangle.
Installation of the truss system begins with two extreme gables. They are installed, a control cord is pulled between them, and the entire skeleton of the roof is already leveled along it. All rafters are fixed to the Mauerlat with special corners and brackets.
Photo 4: 
Important: you can additionally strengthen the frame with special racks that support the crossbars. And the racks, in turn, should preferably be installed on the beds (special wide boards like skis, which will remove the point load of the racks on the floor).
In continuation of the topic “how to build a roof”, it is worth noting that the next step will be the installation of the crate and the construction roofing pie. As soon as the rafter system is ready, it is necessary to lay the crate, which will become the basis for all other materials of the pie - vapor and waterproofing, as well as insulation and roofing material.
Photo 5: 
The crate on the roof can be mounted from unedged boards with a section of 100x50 mm. In this case, the spacing of the boards depends entirely on the final roofing material. The heavier it is, the smaller the step of the crate should be. In general, the check of the crate is approximately 30 cm.
Important: it is advisable to pre-lay a layer of vapor barrier under the crate. It will protect the insulation from vapors penetrating from the premises of the house. Lathing boards are already laid on top of the vapor barrier.
Now, perpendicular to the wood of the crate, a beam is laid in increments equal to the width of the plates or rolls of insulation material. A heater is laid between them, reliably driving it into the existing grooves.
Photo 6: 
From above, everything is covered with a layer of waterproofing material and fixed with another perpendicular crate (in this case, horizontal). And already on it the final roofing material is mounted.
Photo 7: 
At the very end of the installation of the roof on a one-story house, it is also necessary to install a drain. It is made from plastic pipes cut along, or ready-made drain elements are bought in advance. Now it remains to sew up the gables of the roof with the selected material. It can be either wood or stone.
To learn how to make a roof with your own hands correctly, you need to study a few instructions for doing this rather complicated job. It should be noted right away that there are several types of roofs, each of which has its own device scheme and requires a special approach. In addition, the choice of the type of roof will depend on the purpose of the building that will be covered by it.
Properly erected roof elements will be able to protect the house not only from precipitation, but also keep precious heat inside the building in winter. Therefore, a well-built and insulated roof is no less important than reliable warm walls.
As mentioned above, there are several types of roofs. When choosing an option suitable for a particular building, it is worth considering some of them in order to know what they are.
 Different types of roofs...
 To date, the following main types of roofs are satisfied in construction practice: single-pitched, gable with a slope, tent, mansard, hip four-slope, half-hip, multi-slope.
 … from the simplest to the most complex
 shed roof
This option is usually used to cover garages or outbuildings, but sometimes such a roof is also suitable for residential private houses.
Such a design can be called one of the simplest of all existing ones, especially in cases where the slope of the slope is very small. If there are plans to equip another room under the roof, then the design becomes somewhat more complicated. Nevertheless, this type of roof is the most economical in terms of roofing and lumber consumption.
Gable roof
The gable version of the roof is considered traditional for residential buildings, country houses and is installed more often than all other types. Apparently, this is due to the fact that such a roof can be arranged for any structure of the building. The slope of the slopes will depend on the distance between the outer walls and the location of the load-bearing walls inside the house.
hipped roof
This is a fairly complex design, which is almost never used in recent times. However, if it is decided to choose it, then it is better to use a beam-tightening system with struts and racks for the device.
The roof consists of four isosceles triangles - their vertices converge at one point. The hipped roof resembles a tetrahedral pyramid or tent, hence its name.
Double pitched roof
Such a roof is arranged according to the scheme of a gable roof, but it has bevels of different slopes in the front part.
Hip or pitched roof
This design is somewhat reminiscent of a hip roof version, but, unlike it, it has a ridge. The roof is quite complex in design, and most often a scheme with double puffs and beams is used to build it.
Half hip roof
This design has hardly been used in recent years, since it is rather complicated in the device. If it is chosen, then it is mainly arranged according to the truss scheme with puffs.
pitched roof
Such a roof is arranged in houses with complex layouts, or if an extension is made to the main building. The design of a multi-pitched roof is quite complex, and it is used only in extreme cases.
mansard roof
 You can’t call a mansard roof simple in execution ...
 Due to the fact that this design allows you to solve two problems at once - to get an additional room at the same time as a reliable roof, the attic version can be called one of the most popular after the gable type.
 ... but under certain conditions, a residential attic can also be located under a conventional gable roof
 It is very important to make the correct slope of the roof - the durability of not only the structure covering the house, but the entire building will depend on this. In regions with cold winters and a lot of snow, the slope plays a particularly important role, since if it is insufficient, then snowdrifts will collect on the surface, which, when melted, can simply fail the roof. That is why it is recommended to make the slope at least 40 ÷ 45 degrees.
In addition to the location of the building, the roofing material also affects the choice of roof slope. So, if it is planned to use tiles or slate for covering, then the slope should not be less than 25 degrees, otherwise water may seep into the attic at the joints, as there will be a small intensity of water runoff.
When constructing a gable structure, the slope is usually made from 30 to 45, and for a single slope 25 ÷ 30 degrees.
In different roof systems, the elements vary, but the main ones still remain the same. These include the following:

Before installing any structure made of wood, the material must first be coated with antiseptics and fire retardants, which can protect it from fungal formations, insect colonies and increase the fire safety of the entire system.

The main element in the rafter system is the rafters, laid on the Mauerlat, supported by racks, fastened with beds and puffs.
In the upper part, the rafters are overlapped and fastened, while the lower ones are fixed to the Mauerlat or to the bars laid between the rafters.
The rafter system has different shapes and can be layered or hanging.
You can make a simplified version when a crate is stuffed on the rafters, and roofing material is immediately laid on top of it. But the very first winter will show that the roof requires insulation. Therefore, it is best to immediately do everything right and not return to this issue again.
 Approximate structure of the "sandwich" of the insulated roof
Above, the process of arranging the under-roofing system and roofing with tiles was outlined briefly, with a simple enumeration of the main steps. It probably makes sense to consider it in more detail, literally step by step.
Roof tiles
Nowadays, a very wide variety of different roofing materials is presented on the construction market. Nevertheless, tile against this “background” does not lose its popularity, although it is one of the most complex and time-consuming roofing installations.
Ceramic tiles are represented by several European and domestic companies, and it may differ in some design nuances. But the principle of mounting the crate and the coating itself is the same.
For the installation and fixing of the tiles, it is necessary to create the correct basis - the crate, therefore, it is necessary to begin the consideration of the process with the installation of this particular design department.
| Illustration | |
|---|---|
 | At the initial stage, of course, one of the types of truss systems is created, the design of which is described above. Before starting work on the installation of the batten on the rafters, the elements of the system must be additionally checked for their evenness and correct geometry. If irregularities are found on one of the rafter legs, then it must be leveled, since this flaw may adversely affect further work. The check is carried out using a perfectly even beam and a building level. |
 | The next step along the entire cornice line, a metal cornice strip is nailed to the edges of the rafters, which will protect the ends of the rafters from moisture getting on them. Separate planks are laid and overlapped. |
 | Further, on top of the truss system, a vapor-permeable membrane is stretched and fixed with brackets. Its first canvas is laid from left to right on top of the cornice strip. |
 | The next strip of material is laid horizontally, overlapping 150 mm on the bottom sheet. The membrane is mounted with an inscription, which is applied to one of the surfaces, outward. Along the cornice edge, the canvas is additionally fixed on the cornice strip with the help of construction double-sided tape. |
 | The last top sheet should protrude above the ridge, as it bends onto the second roof slope. |
 | At the next stage, the vapor-permeable membrane is fixed from above to the rafter legs with counter rails. It should be noted that if the length of the slope is not more than 6000 mm, the thickness of the counter rail should be 24 mm, with a length of not more than 12000 mm - 28 mm, from 12000 mm - 40 mm. The counter rails should not reach the ridge rib by 120÷150 mm. |
 | Further, on the ridge at the top of the junction of the rafter legs, pieces of timber 150 ÷ 200 long and with a section of 50 × 50 mm are fixed. The space remaining between them will play the role of ventilation gaps. |
 | After that, the ridge is covered with a sheet of a vapor-permeable membrane, which should be on the slopes and go beyond the structure from the gables to a distance of 200 ÷ 250 mm. |
 | On top of the membrane, laid along the ridge, for its fixation, sections of the beam are fixed in continuation of the counter-rails. Their size should be equal to the distance from the end of the counter rail to the crest of the ridge. |
 | When forming the cornice overhang, a perforated mesh-plate is mounted on the ends of the counter-rails and on the cornice strip, designed to provide ventilation of the space formed under the roofing material and protect against the penetration of various insects into this gap. |
 | Further, brackets are fixed in the eaves of the counter-rails for mounting gutters on them. Each of them is fixed with two screws or nails. |
 | In order for the gutter to be laid into the brackets without problems, they must be installed exactly in line with the formation of a slope for free flow of water. To do this, craftsmen often install two extreme brackets with the necessary difference, then pull a cord between them, and, already focusing on it, fix the rest of the hooks. |
 | After installing the brackets, a hinged beam is nailed along the cornice edge of the counter-rails along the entire length of the slope eaves. It also becomes the starting beam of the crate under the tiles. |
 | From the hinged beam on the extreme (at gables or roof profile fractures) counter-rails of the slope, the distance (step) with which the battens of the crate will be fixed is marked. This step will depend on the length and overlap of the particular shingle model. Most often it varies from 340 mm to 370 mm. Marking must be done on the extreme counter-rails. Then, on the marked risks, a nail is hammered in, a tracer colored cord is fixed and pulled on them, and with the help of it, a common line is beaten off on all counter-rails to secure the battens of the crate. |
 | The next step on the entire plane of the slope along the markings, horizontal battens of the crate are nailed to the counter-rails. Their cross-sectional size should be 70 × 30 or 70 × 25 mm. |
 | Upon completion of the installation, the crate should look like this. |
 | Next, it is necessary to prepare the roof ridge for further installation of ridge tiles on it - this can be done by attaching two beams to the ridge along the entire length, one on top of the other. |
 | Another option is to use special elements called ridge bar holders. They are screwed to the counter rails using two self-tapping screws on each side of the ridge. |
 | A wooden bar is installed and fixed in the fixed holders. Holders are convenient in that they can have different sizes and heights, so you can always choose it according to the required parameters. |
 | Further, a gutter is installed and fixed in the brackets along the entire length of the eaves. |
 | The gutter is additionally pressed by another cornice strip mounted on the eaves rail. This element, fixed along the entire length of the cornice, closes the entrance to the under-roof space, thereby protecting it from moisture, and descends into the gutter. |
 | Further, on top of the crate along the edges of the slope from the side of the gables, bars with a section of 70 × 70 mm are nailed. They will become the basis for fixing the wind board from the gable part of the roof, as well as limit and close the edge of the tiled masonry. |
 | After that, wind boards are installed and fixed along the pediment, which are additionally interconnected in the ridge area with a metal corner. On this, the preparation of the crate for the installation of a tile coating can be considered completed. |
The installation of most models of ceramic tiles is almost identical, no matter what manufacturer's material is chosen by the owners.
| Illustration | Brief description of the operation to be performed |
|---|---|
 | Installation of tiles starts from the eaves on the right side of the slope. The corner tile is laid first, which is fixed to the second rail from the eaves. |
 | The first tile is fixed in the upper part with the help of two self-tapping screws that are not completely screwed in. |
 | Further, the entire first row of tiles is laid out, each of which is fixed in the upper part on the lathing rail with the help of one self-tapping screw through a hole drilled in it in advance. |
 | At the end of the first row of tiles, the last left corner tile is installed and screwed with two self-tapping screws. |
 | Further, from the bottom to the ridge, the first vertical gable row is mounted, consisting of corner tiles, each of which is fixed with two self-tapping screws. |
 | Next, you will need to prepare the tiles, which will be laid on top of the bracket for mounting a snow barrier on it. In order for the tile to neatly stand up and close the bracket, its location is marked on its reverse side and part of the lock is carefully knocked out with a hammer. |
 | Now, in the second horizontal row with a step of 900 mm, the brackets themselves are installed. This element is hooked with a hook and screwed to the third lath of the crate from the eaves. With the lower side, it is installed on top of the lower tile of the first row. |
 | Once installed and secured, the bracket should look like this illustration. |
 | Further, the prepared tile is installed on top of the fixed bracket and screwed to the third lath of the crate. |
 | The tile covering the bracket is additionally fixed with a wire hook, with which it is hooked to the side edge and twisted to the lath of the crate. In this way, every third tile of this row is fixed, which is laid on brackets-holders. In this illustration, a wire hook is clearly visible, located on the left edge of the tiles of the second row. |
 | Having installed the shingles of the second row, and having fixed all the brackets for the snow barrier, you need to try it on in place as it will be fixed later. It does not make sense to fix the barrier yet, as it will interfere with the further installation of the tiles. |
 | Further, laying of ordinary and corner tiles is overlapped, with their connection to locks, also from right to left, from bottom to top to those areas where additional elements necessary for the normal functioning of the roof structure are built into the coating. |
 | In this way, most often it is necessary to lay special ventilation tiles. If the roof has a length of up to 4500 mm, then these elements are not used. With a length of 4500 to 7000 mm, one row of ventilation tiles is mounted on the second row, counting from the ridge. On longer roofs, ventilation tiles are installed in three rows with a spacing of 1500 mm between them. |
 | On the third or fourth row from the ridge, in the middle part of the slope, a tile with a ventilation pipe, called a passage, is installed. |
 | In combination with other elements of the roof, this element looks like it is shown in this illustration. |
 | Having tried on this tile on a slope, it is temporarily removed, and a round hole is marked and cut out in the membrane under it. Then a sealing ring is installed in it. |
 | Further, from the attic side, a corrugated connecting pipe is inserted into the ring. Usually its diameter is 120 mm. Then, it is connected with the reverse side to the ventilation duct of the building. |
 | A protective cap is put on top of the ventilation pipe, which will protect the entire channel from atmospheric precipitation, dust and debris. |
 | Complete with tiles, a bench (step) for a chimney sweep is often purchased. This element of the roofing system is fixed on the fourth or fifth row from the ridge. The bench brackets are also of a hook design, and they are hooked and screwed to the top lath of the batten in the laying of the row. The lower side of the brackets is installed in the recesses on the tiles of the underlying row. |
 | In order for the closing brackets of the tiles of the upper row to fit snugly against the lath of the crate, chips are made in its locks located in the upper part after fitting. Then, the tiles are laid on top of the hook-brackets and fixed with screws and a wire hook - by analogy with what has already been discussed above. |
 | Another important and complex node when covering the roof is the design of the adjunction of the roofing material to the walls of the chimney. The joint between them must be sealed correctly and tightly. The most convenient way to work on the formation of the abutment is to use a flexible self-adhesive tape made using lead and aluminum. It well accepts a relief form of a tile and is well pasted to it. Adjacency finishing works are carried out in a certain sequence. First, the tape is glued to the front of the pipe with a call to its side walls, as well as to the tiles of the row passing in front of the chimney. To do this, in place, cuts of the desired shape are made on the tape. Then, it is measured and cut off, and then the tape is glued to the side walls and the tiles adjacent to them. |
 | To form a joint on the back side of the pipe, two pieces of tape of the same length are taken, which exceeds the width of the pipe by 20 ÷ 30 mm. They are glued to each other in width. Then, having combined the middle of the tape and the width of the pipe at a height of 150 ÷ 200 mm, the waterproofing is glued to the wall of the chimney and onto a metal sheet previously fixed to the crate on the upper side of the pipe. After that, on a tape glued to the metal, a row of tiles is laid on top. The parts of the tape protruding at the corners are cut, wrapped on the sides of the pipe, and overlapped on the waterproofing already fixed to them. |
 | Some craftsmen prefer to decorate the junction with sheet metal, which is cut into strips of the desired width, mounted according to the same principle as a self-adhesive waterproofing tape. The connection of the edges of the metal at the corners is carried out with the help of rivets and folding. |
 | Having fixed a waterproofing tape or a metal casing around the entire perimeter of the pipe, along its upper line on the pipe walls, a metal profile bar is fixed, pressing the flexible tape to the surfaces of the chimney. Then, the gap remaining between the upper edge of the plank and the wall of the chimney pipe is filled with a roofing sealant. Often a groove is cut through the wall of the pipe, into which the bent edge of this metal tide is inserted. Then the shtraba is sealed with the same sealant. |
 | Next, proceed to work on the ridge knot. First, a perforated sealing ventilation tape made using aluminum and lead is laid on the fixed ridge beam overlapping the top row of tiles. |
 | Due to its flexibility, this ribbon skirt perfectly adapts to the shape of the tiles without much effort. |
 | After the tape has been laid, the end ridge element is screwed from the gable side of the ridge, and the first ridge tile is tried on to it. |
 | Further, the first tile is removed, and a ridge clamp with a bracket, which comes with the ridge tile, is screwed to the timber fixed on the ridge of the roof. |
 | Then the first ridge tile is installed in it. Further, it is fastened on the other side with the next clamp using a self-tapping screw. |
  | The next step is to install the second tile into the fixed bracket, which is also fixed at the end with a clamp - and so on, until the ridge is fully formed. |
 | When finished, the roof ridge should look like this illustration. |
 | The final stage in the design of the ridge is the fixing of the second end element. If necessary, the last tile of this row is cut to the desired size. |
 | When all the additional elements of the roofing are installed, the last step to the brackets installed at the bottom of the slope is to fix the lattice barrier that holds back the sliding of snow. |
 | This illustration shows a view of the finished roof slab as viewed from the eaves side. |
 | This is how the roof slope will look with all the elements installed on it. |
After completing the roof covering, you can move to the attic to remove the temporary decking and lay the already stationary wooden floor. Installation begins to be carried out from the side of the attic or from the side of the room. The attic floor also consists of several layers and is arranged in different ways. The main thing is that if the roof is arranged, then work can be carried out slowly, without fear of precipitation on permeable materials and inside the premises.
In conclusion, it is worth emphasizing once again that the installation of a roof is a laborious, responsible and rather dangerous process. Therefore, to carry out the installation of the entire roofing system, it is sometimes better to invite specialists who are professionally engaged in the construction of houses, arrangement and roofing.
So I bring to your attention a simple, but very long recipe for cooking ...

Trout in cream - general principles of preparationBefore cooking trout ...

Alexander Gushchin I can't vouch for the taste, but it will be hot :) Contents The usual...