


Weaving from newspaper tubes is a very popular activity, and this is not surprising:...


The vast majority of floors in both private and apartment buildings are made of wood. The support for a multi-layer, pie-like wood structure is most often logs. Logs are long bars made of wood (less often metal and reinforced concrete) laid transversely to the finishing flooring, serving as its solid foundation. This structure is installed both on a monolithic concrete floor and on supporting posts and beams. Installing floors on wooden joists is very profitable due to the relatively low price of materials and ease of installation.
Logs installed as a support on a wooden floor are very functional. In addition to their direct responsibilities, they also:
In addition, individual joist bars can be easily replaced if necessary, without spending money on large-scale renovations in the house.
The installation of a finished wooden floor on joists is somewhat reminiscent of a multi-layer cake, in which it is necessary to lay boards, joists, a waterproofing layer, insulation, and a finishing floor covering over the floor in layers.
Installing a floor on joists involves laying waterproofing and insulation Moreover, regardless of the type of flooring, the insulated floor pie includes additional elements:
This design of floors on joists is relevant for the first floors of private houses. All subsequent floors do not need such serious insulation; installation of a waterproofing layer of the pie in this case is only necessary in direct contact with concrete and brick.
 It is necessary to insulate the floors of the first floors and concrete or brick foundations
 Logs can be purchased at the store, or you can make them yourself. The second option will be relatively cheaper. Wood with a moisture content of no more than 15-17%, 2nd or 3rd grade, is best suited for these purposes. Logs can be made from pine, fir, spruce, aspen and larch.
If you make the logs yourself, keep in mind that the cross-section of the beam should be rectangular. The height is approximately twice the width. The required size is determined based on the parameters of the room, to be more precise: based on the exact distance between the links of the timber frame.
 The size of the bars depends on the distance between the strapping links
 In addition, it is necessary to take into account the thickness of the insulating layer and the size of the spans. In the illustration you can see approximate calculations with laying lags at a distance of 70 cm from each other.

If your room has an intermediate size between the indicated values, you should take a larger value as a basis. This way you will have a certain supply of material, which will allow you to lay it without gaps and make the structure more durable.
To make a wooden floor with your own hands, you can use both edged and tongue-and-groove boards. The second option is much preferable, because its design involves a groove and a tenon, therefore, installing a fine finishing coating is no longer so relevant.
 It is preferable to use tongue and groove boards due to the tongue-and-groove system
 You can use floorboards made of cedar, larch, spruce, aspen and pine. The most expensive and durable materials are solid oak and pine: provided that the installation is carried out correctly, they will last for several decades. In turn, larch is excellent for rooms with high humidity, because it is not susceptible to rotting, and healthy aspen and alder boards are great for sleeping areas.
 Oak and pine boards will last a long time
If you purchase first-grade floorboards, you don’t have to spend money on the final flooring, and at the final stage simply sand the boards and varnish them.
The main thing is that before laying, be sure to treat the boards with antiseptic antifungal preparations and impregnate them with a water-repellent composition.
If you are installing a wooden floor with your own hands, be careful when choosing wood: the boards should be dry, but not overdried. Wet wood, after drying and under the pressure of furniture, can become deformed. Always buy boards with a margin of 15-20% in case of need for trimming, mistakes and defects.
When you install a floor on logs, use the rule: the thicker the floor board, the wider the installation and the farther apart the logs are located.
For example, for a board whose size is 5 cm, you can make a step (the distance between the lags) of one and a half meters.

If you use thin boards, you can take small steps so that the board does not sag. The most common step length between joists is 50-70 cm.
 The distance between the lags is most often 50-70 cm
 Also keep in mind that you will need additional space to make it convenient to lay the insulation inside. If the size of the base does not correspond to the values in the table, then it is calculated upward.
When installing logs yourself, you should strictly follow the following rules:

Wood is a flooring proven by time and centuries of experience. When laid correctly, it can serve for decades without losing its visual appeal. In addition, this is the most environmentally friendly, “breathable” floor, guaranteeing a high degree of heat and sound insulation of the premises of both a private and apartment building.
 Wooden floor construction with joists
 To make laying a wooden floor on joists quick and comfortable, you will need the following tools: level, hammer drill, saw and axe, hammer, nail puller, drill, screwdriver and keys. And also the following materials: floorboards (sometimes the role of the subfloor is given to plywood boards), logs, insulating material, fasteners (anchor bolts, screws and nails).
If all the necessary materials for installation are available, you can begin laying the logs on top of the soundproofing material. As already mentioned, the surface must be leveled, checking its horizontalness with a building level. The boards are attached to the joists using dowels.
Now it’s worth taking a closer look at the entire technology of installing floors on joists in a private house.
The first step is marking the work area and preparing the base. First, you should compact the soil and secure the formwork with ten-centimeter sides. A reinforced mesh is placed at the bottom and then the concrete mixture is poured. You need to wait a couple of days for the concrete to dry. After this, a waterproofing polyethylene film is laid on top of the concrete floor, and then supporting structures are constructed.
If the floor is cold, the space that remains under it after its construction must be filled with sand or expanded clay (do not fill it to the top, you need to leave about 5 cm of free space).
 You can insulate the floor using expanded clay
 The second step will be to ensure normal ventilation of the space under the floors. For these purposes, small holes are made along the perimeter of the plinth (for every 15 sq.m.), which, in order to prevent mice from entering the house, are covered with a non-ferrous metal mesh.
The next step is insulating the floor. Expanded polystyrene, isospan or thermal insulation roll material are perfect for these purposes. This material is laid on a waterproofing layer of isolon, which is attached to the joists in advance using an industrial stapler.
After laying the insulation, you can begin laying the plank covering over the joists.. Installation must begin from the corner of the room. The boards are screwed directly to the joists using self-tapping screws.
 Scheme of a wooden floor
 If the boards are processed and sanded well, they can play the role of finishing flooring. If a layer of finishing coating is expected (laminate, parquet, linoleum, etc.), you can begin laying it immediately after finishing the work with attaching the boards to the joists.
Thus, installing a floor on wooden joists has many advantages over laying the floor directly on top of a concrete or soil floor. In addition to the fact that it smoothes out all the unevenness of the floors and distributes the load evenly, it also perfectly insulates the home and promotes sound absorption.
Today, natural materials are at the peak of popularity. A special place is occupied by wood, which is an environmentally friendly building element and is perfect for arranging floors. Very often you can find a wooden floor in a country house. Despite the fact that laying the floor is the most important moment in construction and renovation, you can refuse the services of specialists and make the floor in a private house with your own hands. But this requires maximum effort and attention. The floor must be reliable, strong and durable, so you should take seriously the study of flooring technology.
 Pie of wooden floor on joists. Key points: vapor and waterproofing, insulation and ventilation gap
Usually, special requirements are put forward to the floor, since this part of the room in a private house is subjected to the greatest tests. Mechanical loads, chemical exposure and a high degree of abrasion are reasons that force a number of rules to be followed:
If we talk about the most suitable time to install a wooden floor, then this is the end of the heating season. During this period, optimal air humidity can be observed, and the likelihood of the tree absorbing large amounts of moisture is minimal. But if you still have to install a wooden floor in the summer, then it’s worth timing the moment when the weather outside will be dry and sunny for at least two weeks.
 Arranging a wooden floor
 The following materials can be used to furnish floors in the house:
The first two options are ideal for a rough wood floor. In this case, further finishing of the floor with a finishing coating is provided. But glue beams and folded boards can be used as a finishing structure. The finished floor is usually later varnished or painted. Ideally, the board will be solid across the entire width of the room.
Before installation and choosing a laying method, it is recommended to assess the condition of the soil. For example, in some areas, logs can be laid directly on the ground, but first lay waterproofing underneath them. It is this device that allows a wooden floor to last for decades. In some cases, it is better to additionally use crushed stone and sand, but sometimes even this is not enough. So, a video on the topic:
Since there are no specific instructions for matching the characteristics of the room and installation methods, it is best to use the best option that is suitable for any conditions, even for places with high humidity.
To this day, the most win-win option is a wooden floor in a private house on or. Such a floor can act as a rigid base or waterproofing. But the main point will still be soil planning. To be able to regulate the consumption of building materials, the soil is thoroughly compacted. And already on compacted soil you can pour sand 20 mm thick or more. Waterproofing is laid on top of the sand, which can be cellophane or roofing felt.
 Scheme of installing a wooden floor on the ground on logs (with heaving soil)
 The installation of a wooden floor can only begin after the frame structure of posts and beams is finally ready. A layer of roofing material is laid on the posts, which serves as good waterproofing. Beams are installed on the waterproofing layer, and for additional strength, logs are fixed to the beams. It’s good when the width of the room corresponds to the length of the logs, but if you have to connect the logs, then it is better that the joints are directly on the supporting pillars, and they are fastened with self-tapping screws.
The structure of the wooden floor itself can be either single or double. Single floors are not very durable and are usually installed in summer cottages. This type of floor does not withstand weather fluctuations well and is not intended for year-round use. To make you feel comfortable in winter, it is recommended to build double ones. It will require a lot of time and the necessary material. But the extra effort is worth it because it increases durability and reliability. To do this, a list of works is performed in a certain sequence:
 Double plank floor pie
 To create a subfloor, low grade boards with a thickness of 15-50 mm are suitable. Such boards, carefully processed, are adjusted to each other. Then the finished boards are attached to the joists using self-tapping screws.
The boards are laid 15-20 mm from the wall. This promotes ventilation and prevents the floor from swelling during seasonal wood deformation. Waterproofing is carried out using a polyethylene film with a thickness of 200 microns, and additional thermal insulation is made of polyethylene foam. The film is laid overlapping, the edges are glued together with tape. You need to make an overlap of 20 cm on the walls and glue it with tape. After this, the finishing floor and finishing coating are laid.
For finishing flooring, either solid wood or solid wood is used. The plywood is placed on top of the thermal insulation layer and secured with self-tapping screws.
It has an attractive appearance, is convenient to install, and is also easy to use. The advantage of solid wood flooring is that you can apply varnish or paint to the floor and thereby avoid additional costs for finishing materials. Solid boards are produced in two versions: regular and tongue-and-groove. The difference between them is in the installation method. A tongue and groove board is much easier to install. However, before installation, it must lie indoors for three days.
 The solid board is laid on plywood sheets. The base can be either a concrete floor or a wooden floor on joists.
It is laid "staggered". Solid parquet boards can also be used as a finished floor. In essence, this is the same tongue-and-groove solid board, only shorter. Its installation is slightly different:
Wood is a natural, environmentally friendly material that requires constant care. To ensure that wooden floors in your home last as long as possible, take care of protecting the material in advance. Laying wooden floors is a painstaking, difficult job, however, following the instructions and advice of professionals, any beginner with his own hands can make a private home or cottage beautiful, warm and cozy. Leave your opinion on the article or share your experience in the comments!
It is quite logical to lay a wooden floor in a wooden house, but in an ordinary brick house or apartment it will look great and can play an important role in creating a suitable microclimate. There is no difficulty in laying a wooden floor with your own hands. This is a fairly simple process and you can even do it yourself. The main thing is just to take into account the important points and prepare a little in the theoretical part before starting work.
This article will consider two options for constructing a wooden floor:
The first option is the most common for creating floors in private homes. At the same time, it is suitable for placement on the ground floor or basement, and for forming floors on the second and above floors as a ceiling on beams.
In the case when the basis for a wooden floor is a concrete screed or reinforced concrete floor slabs, its design is significantly modified and can be modified in order to reduce the cost and facilitate installation.
Below we will take a closer look at the implementation of each option. Before this, it is worth mentioning the same points for any wooden floor.
It is best to carry out all work at the end of the heating season. This is due to the humidity of the air and wood. During this period, the likelihood is that the floorboards will absorb too much moisture. If you still need to lay a wooden floor in the summer, then it is better to wait until the weather has been sunny and dry for at least a week or a week and a half.
Important: All lumber that is used in flooring is the same as any wood used in construction, and is fire retardant.
Materials for arranging wooden floors
The following options can be used as materials for a wooden floor:
Of the first two options, the so-called rough wooden floor is laid. It involves further installation of the floor covering. The last two options are used to form a finishing layer, which is subsequently painted or varnished and left as the base of the floor in the room. It is advisable to select a solid board for the entire width of the room. The board is most often meant to be made of pine, larch, cedar, and less often of hardwood.

A wooden floor looks great not only in a country house or country house, but also in a city apartment.
If the wooden floor is laid on a soil base, then it is necessary to ensure that the joists are securely fastened. In addition, waterproofing and thermal insulation of the space under the floor should be ensured. To do this, you need to prepare the groundwork. Along the entire perimeter of the room, a layer of soil is removed so thick as to go 20-25 cm lower than the ground level around the house. Next, an embankment is made of crushed stone and river sand on top of it. All layers are one by one moistened with plenty of water and compacted.
On a prepared sand base, it is necessary to build a series of brick columns on which the logs will rest. The width of the columns is usually taken to be two bricks. The height of the pillars is in the range of 20-40 cm. When erecting the pillars, the bricks are placed on the mortar and placed along the upper edge in one level. To check the level and its compliance, you can use a laser level or stretch a net of rope or fishing line attached to the walls. When distributing the columns, it is taken into account that each joist requires at least two columns along the edges. If necessary, if the lag is long, pillars are added in the middle. The distance between the supporting columns for each of them should be calculated based on the size of the board that is used in the form of logs and the design load that they must withstand. Any design organization or certified builder-designer can help with the calculations. You can also calculate it yourself using GOST and SNiP data. Speaking roughly, for a living space it is enough to use 100x50 mm boards as joists, distributed at intervals of 600 mm. In this case, the posts are attached at the edges, and if the length of the lag is over 3 meters, an intermediate one is added in the middle.
Important: If the floor is laid on beams between floors, no preparatory work is required and the installation of the joists can begin immediately.
A waterproofing layer in the form of roofing felt sheets is laid on top of the columns or beams. Next, logs are laid on wooden plates 2-3 cm wide. The logs are attached to the posts using anchors. Using wooden plates that are placed under the logs, it is necessary to bring the upper edge of the logs into a single plane.
Initially, two logs are laid on opposite edges of the room. And on two extreme supports each. They are leveled, checking for correct installation using a laser, bubble or water level. Alternatively, it is best to use a laser or water level to draw a level line along the perimeter of the room on the walls in advance at a distance of 1 meter above the level of the proposed floor and, in relation to this line, check the position of the control logs. The bubble level is still less reliable and in such work often gives inaccurate results due to low accuracy.

A fishing line is stretched between the leveled outer logs and all other logs are laid in relation to it.
Along the lower edge of the joists, it is necessary to fill 50x50 mm bars to form a rough flooring. In the case of a soil base and the location of the logs on posts, the bars are nailed across the logs at a distance of 40-60 cm from each other along the entire length of the room. In the case of laying on beams, the bars are nailed to the side of the joist along the bottom edge on both sides. The bars should be secured either with nails or self-tapping screws with a length of at least 100 mm.
As insulation for wooden floors, a material with high vapor permeability is required, that is, one that can allow air and moisture to pass through. Options such as mineral wool or basalt slabs are suitable. In the case of lags located every 600 mm, there will be no problems with laying the heat insulator at all. The standard size of mineral wool rolls is either 600 or 1200 mm. Under no circumstances should the insulation material be cut to fit the gap between the joists to a millimeter. The strips are inserted tightly into the gaps so as not to leave any gaps anywhere. The height of the heat insulator is selected so that there is a small gap of 2-2.5 cm between it and the edge of the joist for ventilation. The heat insulator, among other things, serves as a sound insulator.
A vapor-waterproofing membrane is spread over the joists before laying the wooden floor. The film strips are laid with a mandatory overlap of 20 cm. The joints are taped. In various versions, the vapor barrier layer is reinforced with slats nailed along the joists, or simply secured with staples on the joists. The choice of fastening method depends on the material of the floor covering. Under specially produced flooring boards that have a ventilation channel, you don’t have to put slats in them.
A wooden floor can easily be installed on a concrete base or on top of reinforced concrete floor slabs. In this case, the installation of a wooden floor is much simpler and easier to implement. It is no longer necessary to prepare the base and it is possible to strengthen the logs very often, which reduces the bending load. Thus, it turns out that using large cross-section logs does not make sense. As a material, you can choose timber measuring 50x50. As will be seen later, the process of setting the log by level is also significantly easier.
To secure the logs, construction studs with a diameter of 8-10 mm are used. Using a nut, the lower part of the stud is limited, which is fixed in the concrete base of the floor. Also, the level of the lower end of the joist is limited by a nut and a wide washer.
The studs are strengthened along the lag installation line every 50-60 cm. Holes for the studs are drilled in the bars. At the same time, the holes on the upper edge of the block are also widened enough to hide the fastening nut and washer.
Two logs are installed on opposite sides of the room and leveled on studs at the edges. Next, using the fishing line stretched between them, the installation of all other lags is adjusted. After securing all the joists, the excess protruding studs are cut off with an angle grinder (grinder). Next, you can begin covering with floorboards or the required sheet material.

If a wooden floor is laid as an intermediate leveling option before the finishing coating, then it is reasonable to use it as a “buffer”
You can begin laying the boards on the prepared logs. The first board is attached near the window opposite the entrance to the room. You should leave a gap of 10-15 mm between the wall and the array of boards.
You can fasten the boards using self-tapping screws; their length should be chosen equal to at least two and a half times the thickness of the board, or with nails 4-5 times longer than the width of the board.
Nails are driven at an angle onto each joist or at an angle into the groove at the end of the board, if such fastening of the boards is provided.
Next, two or three more rows of boards are laid. Stepping back a little from them, an ordinary metal bracket or Smolyakov bracket is driven into the joists. Wooden wedges are driven between the bracket and the laid boards, thereby joining them tightly to each other. After this, the boards are secured with nails. Thus, they continue to lay the wooden floor until the very end.
If the length of one board is less than the width of the floor, then they are cut so that the ends of the boards in one row are located in the middle of the log. In adjacent rows, the boards are laid in a checkerboard pattern.
Are you faced with the task of leveling, raising or insulating the floor and you don’t know how to do it? Then you have come to the right place, because today we will look at how a floor is installed on joists and talk about its advantages and disadvantages. This technology has been used by people for a very long time, but it has still not lost its relevance. Of course, there are situations when it will not be possible to apply it - what we are talking about, you will understand after reading the entire article. So, let's go!
By and large, a floor on joists is part of a hollow wooden floor that was installed in houses before; now this technology is also actively used in low-rise construction. The idea is very simple and is as follows. The base of the floor is formed by beams installed at a certain pitch, on top of which a rough flooring is made, which, in fact, is already the floor.

If the ceiling uses powerful beams that can support the weight of the entire structure, as well as furniture and people in the room, then when leveling or raising the floor on the joists, it is enough to use a beam of small cross-section, since underneath there is already a solid foundation on which it will rest securely .

The logs are aligned in one plane and, if necessary, securely fixed. The average cross-section of a log laid on a concrete base is 50*50 mm. This means that this floor will be higher than the old one. On the one hand, this may be a drawback, for example, doors are already installed in the room, or the floor will simply be higher than the entrance threshold. This happens mainly in apartments and houses, where such structures were not originally planned.

On the other hand, such a structure promises us the following opportunities. Firstly, under the logs or between them we can pass various communication lines, for example, heating or water supply pipes. In this case, you will not need to ditch or mask anything. Secondly, it becomes possible to place layers of heat and sound insulation under the floor (we are mainly talking about the first point). Thirdly, in this way you will level your floors quickly and efficiently; you will not need to bother with wet and dirty screed. And fourthly, it is possible to raise the floor to the desired level in a short time.

A rough coating is laid on the joists. These can be wooden boards or made from wood-polymer composite (WPC) - the second material is more often used for installation outdoors. Sheet materials are also popular: plywood and OSB. They are the easiest way to sheathe logs, since the size of one sheet is on average 1.5 * 1.5 m, however, unlike boards, they are necessarily finished with finishing material, while they can also be used as a finishing coating.

The finishing of the plywood floor on the joists can be anything: carpet, and even.
Interesting to know! Any finishing floor covering ideally needs a good, solid and level base. A floor on joists is exactly that. It will greatly facilitate the installation of any of the above materials and will be the key to their long service life, naturally, subject to all installation standards and rules.
Now let's take a closer look at how the floor is installed on joists.
Preparations for work involve more than just purchasing materials. This also includes purchasing the necessary tools and processing the base with materials. Let's talk about everything in detail and in order.
There is nothing special here; almost everything can be found at any home craftsman. The rest can be purchased, rented or found from friends.
Table 1. Required tools
| Tool, photo | Description |
|---|---|
| When setting lags, accuracy and consistency are important. It is necessary to check the distance between them, otherwise problems may arise with the installation of the rough coating and its operation. If the distance is too large, the floor will sag. You can add other marking tools to the tape measure: a carpenter's square, a long ruler (guide) and a pencil. |
| Both the joists and the flooring material will need to be adjusted to the required dimensions. In many cases, a hand tool will be sufficient. Even if you plan not to use it, you should still have it in reserve. |
| While you can cut bars and boards with hand tools, this will not work with sheet material. For plywood, and even more so OSB boards, you cannot do without a power tool. It must have a powerful motor and a convenient cutting guidance system so that the work proceeds quickly and accurately. Advice! Buy several replacement wood files, as they may burn out during intensive use. Do not buy cheap consumables from Chinese manufacturers, as they are extremely unreliable. Pay a little extra and take products from the same Bosch company. |
| This tool is an indispensable assistant for any installation work. In our case, it will be useful when laying mineral wool for insulation. |
| The hammer drill is also extremely versatile and comes in handy almost always. It will be useful to us when we need to permanently tie the logs to the base with anchors. |
| In certain cases, both the base and the logs themselves are recommended to be treated with special impregnations. They can be applied with a brush or roller, but it is most convenient and quick to do this with a sprayer. This device also allows you to significantly save fluid consumption. |
| The flooring is securely attached to the joists. Self-tapping screws, or less often nails, are used for this. In the first case, you will not be able to do without a screwdriver. It is worth purchasing a tool with good traction so that it can cope with wrapping long hardware without any problems. |
Additionally, you may need other tools, for example: a hammer, a nail puller, a steel knife, etc. Here everyone looks for themselves, depending on the situation.
Table 2. Required materials
| Materials, photos | Description |
|---|---|
| Logs, as already mentioned, are durable boards or beams. It is worth purchasing clean lumber, with good geometry and a polished surface. The choice must be made responsibly. When purchasing, check each beam for curvature and select the best material. This will not cost you anything except the extra five minutes spent, but this will speed up your work many times over. For joists, it is best to take wood that is resistant to moisture. These include affordable pine. |
| We will consider plywood as a priority, since this is the material that is used most often than others. The standard sheet size is 1525*1525 mm. The thickness is selected individually, but you should not buy material thinner than 16 mm, as it will sag significantly under load. The optimal thickness would be 20 mm - with this type of flooring, the distance between the joists can be safely made 50 cm. |
| Floor joists can begin to rot over time, especially if there is a risk of moisture getting inside. Also, wood-boring insects can settle in the tree, which in a short time will render the entire system unusable. To maximize their service life, the wood must be treated with an antiseptic and biocidal composition. Impregnation with fire retardants to protect against fire will not hurt either. |
| Mold can also appear on concrete foundations. Of course, it will not rot like wood, but only multiplying microorganisms will begin to enter the air you breathe, which is unpleasant and harmful. Therefore, before installing a lag floor, it is worth treating the base. |
| Concrete floor slabs may contain severe surface damage. There may be joints on them if a concrete screed has not yet been made. All this significantly reduces the level of sound and heat insulation. We will fix the problem using polyurethane foam. By the way, it’s worth purchasing a special pistol for it. |
| We will connect the flooring with the joists using self-tapping screws. Usually oxidized (black) ones are used, but you can also use galvanized ones - they are much more reliable and are not subject to oxidation. The amount of fasteners is difficult to calculate, so buy it in packs. |
Again, we have named only the main consumables; you may need something else. Everything is decided directly on site.
So, let's get straight to the workflow. We start by preparing the foundation.

We start by inspecting the concrete floor for damage. As you can see, we had several holes like this in our slab. Under no circumstances should you leave them, we fill everything with foam.
In order for the foam to adhere well to the concrete surface, it must first be moistened, which is what the master in the photo does. Water from the sprayer is sprayed inside the holes and along the edges from above.
Why do this? The fact is that polyurethane foam hardens and gains strength by coming into contact with moisture contained in the air, that is, water is the catalyst for the process, which means we thus enhance the effect and accelerate it.

Immediately after applying water, fill the holes with foam. Please note that professional material is used. It has low secondary expansion and is consumed much more economically. So if you have a lot of work, buy a foam gun and use it. It’s more convenient and cheaper in the end.
Advice! After use, the gun must be purged with a special cleaner that is screwed onto it instead of foam.

After all the procedures described above, the floor should be cleaned of dirt and dust. For this we use a brush, or better yet, a construction vacuum cleaner. Cleaning is necessary for the next stage.


Now the craftsmen are strengthening the previously laid pipes through which the coolant will circulate from the boiler to the heating radiators. The pipes are laid around the perimeter of the room so that they do not interfere with the installation of the joists. If this is not possible, then it is necessary to accurately calculate the position of each element so that later there are no intersections with communications.
Please note that the craftsmen fix the pipes using special clips. They lay a thermal insulating tape (penofol) under them so that all the heat during the winter season is reflected upward, and the concrete, which is unnecessary in this case, does not heat up.

We have already written about the need to treat logs to prevent their premature damage by microorganisms and insects. This procedure is performed at this stage. Everything is done outside so that the material dries quickly and the master does not inhale the chemicals.
After processing, the wood needs to dry. The instructions on the impregnation packaging will tell you the exact time.
So, all our preparations are complete. Let's move on to installation.

We start by cutting all the beams to the size of the room in which they will be installed. We mark everything out in advance.
Advice! It is better to do markup in bulk to speed up the process. To do this, align one edge of several bars in a line. On the extreme ones, set aside the size according to the tape measure. Connect the marks using dye thread.
Using the existing cutting tool, we cut the beams along the lines. We bring the finished material into the room.

We lay out logs throughout the room. We remember that the distance between them must be strictly verified. To do this, you can use dyeing thread, a tape measure and a pencil. As an option, you can make a template out of timber, on which grooves will be made at the required distance, along which the position of the lag will be set. Everything happens very quickly, the main thing is to accurately determine the position of the first element.

The position of the beam must be strictly horizontal. To set it we use linings. They can be chopped from the same timber, or you can use special plastic wedges. We check using a building level.
To fix the elements, we use polyurethane foam - we apply it under the joist in a small amount so that when it expands, the beam does not lift.

Now the logs need to be firmly fixed so that no processes can subsequently dislodge them from the supports. For this we use concrete screws, they are also called turbo screws. To do this, the joist, lining and concrete are drilled with a hammer drill, after which a long screw is screwed into the holes.
In order not to check the position of each element with a level, you can do this. We install the extreme logs, check their level relative to each other and fix them. The intermediate bars are aligned according to the rule applied across from above - quickly and conveniently.

Then the floor needs to be insulated. You can skip this step, but it definitely won’t be superfluous. An energy efficient home requires much less heat to warm up. You will save significantly on heating, and gradually recoup the money spent.
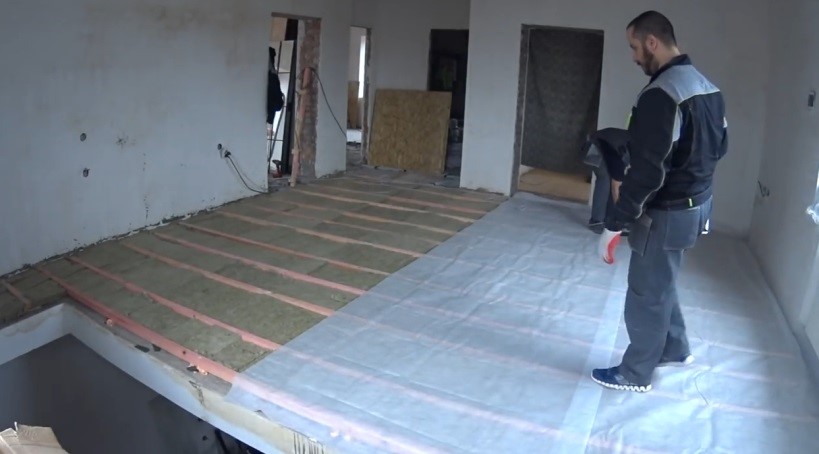
Mineral wool is very sensitive to moisture, so it must be protected from water and steam. This is done using a special membrane film that is stretched directly over the logs. Also, this material will not allow the smallest particles of insulation to get into the air.
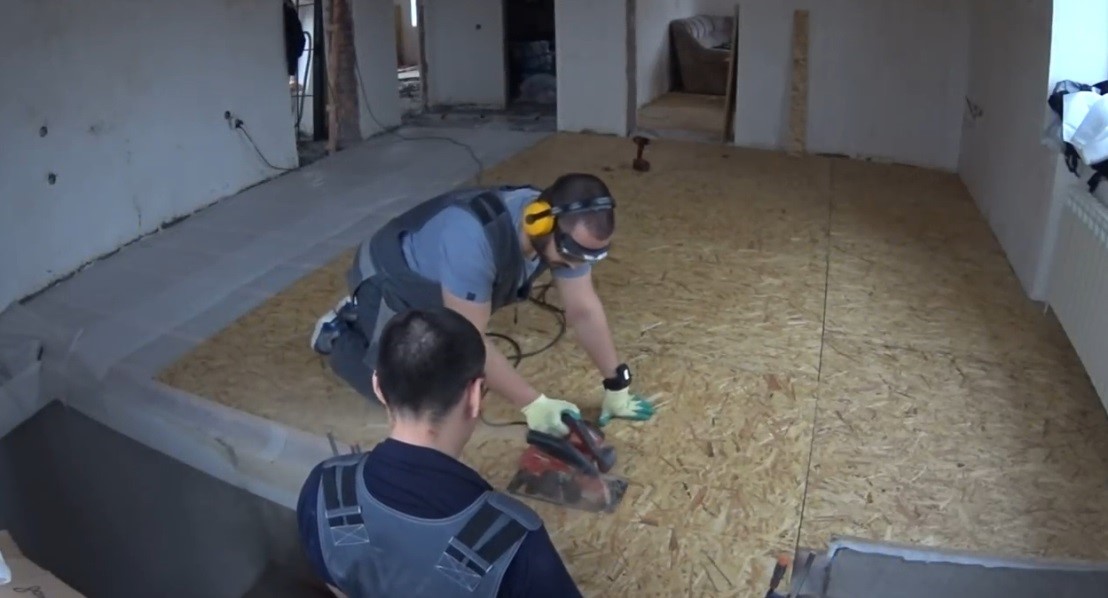
At the last stage, the flooring is made. In our case, the craftsmen used OSB panels. The material is cut in place and screwed onto self-tapping screws.
As you can see, there is nothing complicated in such work, the main thing is to comply with all the standards, not skip any important stages and accurately and firmly set the joists, as they will determine the quality of the future floor.
floor boards
It is quite possible to lay a wooden floor with your own hands if you first study the instructions for carrying out this work. Plank flooring has always been more popular than floors made from other materials, as it differs from them in its natural warmth, environmental friendliness and ability to create a specific, especially healthy microclimate in living spaces.
Most often, coniferous wood is chosen for flooring in the house. Mostly larch is used, which shows particular resistance to both temperature changes and high humidity. Thanks to the natural antiseptic qualities of this tree, destructive fungal formations do not occur on it, which means that processes of rotting and destruction are excluded.
Wooden flooring must meet certain requirements, without which the floors will not last long and will not be comfortable for residents. These criteria can safely include:
To achieve all the mentioned qualities of a wooden floor, you need to choose the right material for its construction.

In order for the floors to serve for a long time without the boards drying out or deforming, when choosing wood you need to pay attention to the following material parameters:
Its quality will directly depend on the grade of wood. Even when purchasing the highest grade material, you need to pay attention to the presence of possible defects, such as chips, cracks and knots - they should either be completely absent or be in a minimal quantity.
| Step between joists in mm | Floorboard thickness in mm |
|---|---|
| 300 | 20 |
| 400 | 24 |
| 500 | 30 |
| 600 | 35 |
| 700 | 40 |
| 800 | 45 |
| 900 | 50 |
| 1000 | 55 |
When purchasing any building material, after the necessary calculations have been made, you must add 15% reserve to this amount - this rule has been tested by experienced builders, so it is recommended to follow it.
Before installing joists and floorboards, they must be prepared. Typically, flooring material is sold already planed, but if burrs are revealed during inspection, they must be removed using an electric planer.

Their installation begins only after the material has completely dried.
Knowing all the requirements for the covering material, you need to decide on the design of the floor, since each specific case will have its own option, depending on the conditions under which the installation will take place.
There are several main types of wooden floor designs:
These methods of installing a wooden floor have become the most popular, as they give creative freedom to the craftsman, who can make his own adjustments to the design. But, one way or another, for each room it is necessary to choose the only option that suits it to a greater extent.


What should be the thickness of the joists and floor beams? This mainly depends on the free span width (the distance between adjacent support points). Typically based on the following indicators (see table):


Often, to create a layer for the floor in apartments, a wooden floor on joists is also installed on a concrete base. Here the whole difficulty lies in leveling the joists on the surface, especially if it is planned to raise the wooden covering a few centimeters above the concrete slab.
If the apartment is located above the first floor, then most often the logs are laid out, leveled, and then secured to the concrete base using anchors.

In both the first and second options, the logs are drilled through. To raise the logs above the base, various metal and plastic elements are used. In this case, the photo shows the studs. They allow you to raise and lower the logs on one side or the other, leveling them. The excess section of the stud, after bringing the lag to the desired height, is cut off using a grinder.
In each of the options, insulation can be laid on the concrete between the joists, which will add thermal insulation to the coating and also help muffle noise, both from the lower apartment and from the rooms where joists are installed under the wooden floor. Mineral wool, polystyrene foam or can be used as insulation material.
Sometimes a wooden floor is laid on a concrete floor without the use of joists. Floorboards or plywood are used as covering. It is advisable to lay a thin insulating material under such a floor - most often foamed polyethylene is used for this, but it is better to choose one that has a foil coating.

Separate sheets of backing material are fastened together with tape to create a solid coating - it will make the floor warmer and muffle noise. If plywood is used for flooring, you need to remember that a decorative covering must be laid on top of it. Floors made from fairly thick boards will look respectable if they are covered with varnish, wax or high-quality paint.
Having chosen the boards of the required thickness, it is important to determine the correct direction for laying them on the floor. As many years of experience have shown, the best option is to lay the boards in the direction of natural light, that is, from the window. Therefore, you need to start planning the laying of the boards by marking and securing the joists.
Floorboards have different types of connections:

1. Connection using an insert-liner in the grooves of two boards.
2. Groove-tenon connection in the presence of tongue-and-groove boards.
3. Quarter connection.
The last type of connection is the easiest to install, so floorboards with this type of fastening are most often used. In addition, the “quarter” connection creates a single covering with almost imperceptible gaps between the boards, so it optimally retains heat in the room.
Boards can be attached to two methods of fastening:


Find out, and also consider the causes of squeaking and methods of elimination, from our new article.
Floor coverings
After the floor has been rebuilt and secured, its surface may need to be scraped. This process is carried out if, when the board dries, it becomes a little wobbly and the surface becomes uneven.
The starting varnish helps to identify insufficiently smooth areas on the surface of the boards, and therefore, after it dries, it is easier to find rough spots and carry out additional sanding.
After sanding, skirting boards are installed that will well hide the gaps between the wall and the floor boards. If, as a result of this operation, gaps remain between the floor and the baseboard, they are sealed with putty to match the color of the wood.
Now that the floor has been prepared in this way, you can proceed to finishing the surface with wax, oil, varnish or paint.
The plank flooring is covered with a finishing compound not only to give it aesthetics and respectability, but also to protect it, and therefore ensure maximum long-term use.
If the boards have a beautiful, pronounced textured pattern, then a special oil is often used to cover it. It makes the floors warmer, not as slippery as with coating, and also gives it antistatic properties. The oil penetrates the structure of the wood and reliably protects it from the penetration of moisture from the outside, practically repelling it.

Wood coated with oil is less susceptible to various types of damage, and existing flaws become virtually invisible. The oil does not clog the pores of the wood, preserving its naturalness, allowing the material to “breathe”, which creates a favorable microclimate in the living room.
Floors that are coated with oil must be protected from dust until it is completely absorbed. During operation, such a floor requires special care using special means. It is very important to remember that it is not recommended to place furniture with metal legs on such a surface, as there is a risk of unwanted reactions that may result in dark stains remaining on the wood.
Oiling floors is recommended in rooms with high humidity - bathrooms, terraces and kitchens. This coating is also good for a hallway or corridor, since boards impregnated with this substance are more resistant to abrasion.
There are compositions for floor coverings that do not consist of pure oil, but with the addition of liquid wax, which gives the floors a matte, soft shine. Pure oils are also applied to the surface of wood; they are well absorbed into the surface, are economical to apply and do not require a long wait to dry.
Floor oil can be colorless, or it can have different shades that make the wood darker or give it a special, pleasant and warm color.
The oil is applied in two or three steps. It can be rubbed in or applied with a brush, and its excess is immediately wiped off to avoid the formation of a film on top, which will create uneven coverage.
The oil composition can be applied hot and cold in several layers. The faster the wood absorbs oil, the more coats will need to be applied. The heated composition penetrates much faster and deeper into the pores of the wood, and this coating lasts much longer than with a cold application method.
Wax is most often combined with an oil finish. So, sometimes waxing occurs with a composition that consists of natural beeswax and linseed oil. This coating protects floor surfaces well from scratches and dirt, as well as from moisture absorption, but will not protect the wood from cracking and intense mechanical stress. The wax coating gives the surface a pleasant matte shine and golden hue.

The wax is applied to the cleaned floor using a wide roller in several layers. The first of them must be very thin in order to be well absorbed into the surface. Next, the floor is sanded, and then it is covered with another layer of the compound and sanded again.
Wax combined with oil is an environmentally friendly coating material and is very good to use in children's rooms and adult bedrooms. Wood that has undergone this treatment has the ability to “breathe”, so the floors will last a long time and create a favorable microclimate in the room.

Applying varnish to floors is a rather complex undertaking that requires careful selection of the composition for a specific type of wood. Therefore, if this particular method of processing a wooden floor is chosen, it is better to entrust the work to a specialist who will determine the amount of work and select the necessary materials.
The varnish coating is quite fragile and easily damaged by mechanical stress, so it is not advisable to walk on it in thin heels or move furniture. In addition, varnishes are most often produced on chemical bases, which, by clogging the pores of the wood, do not allow it to “breathe”.
Recently, paint is rarely used to cover wooden floors, but it still happens, especially in cases where a special interior style is chosen. In addition, paint is used in cases where it is necessary to cover up the not entirely attractive appearance of wood, since such a coating completely covers the surface of the floor. For this finishing treatment, you can choose paints on different bases: oil, enamel, nitrocellulose, as well as acrylic, water-dispersion and latex.

Water-based paints are preferable for residential premises, as they do not contain solvents and additives harmful to the human body. They are produced in different color shades, so you can always choose the one that is more suitable for a particular interior.
Enamels and other paints based on chemical solvents are also used for living rooms, but after applying them, the rooms require long-term ventilation, since these fumes can pose a threat to human health.
Before painting the floor with water-based compounds, the boards are coated with a special primer. For other coating materials, the base must be prepared using impregnating compositions, the main component of which is usually drying oil.
The paint can be applied in one, two layers or as a last resort, at three o'clok. It is recommended to choose the “golden mean”, since paint applied in a layer that is too thin will quickly begin to wear out, and if applied in a thick layer, on the contrary, it will peel off. Each coat of primer or paint must be thoroughly dry before the next one is applied.
It is described in great detail in the corresponding publication of our portal.
So, if you have the basic understanding of working with wood, and also have the necessary materials and tools, you can try laying floors from boards or plywood yourself. If you have questions, you can always seek clarification and advice from articles that will help solve any problem. And at the end of the article - another interesting video on the technology of laying wooden floors.
Weaving from newspaper tubes is a very popular activity, and this is not surprising:...

Fluorescent lamps have become widespread over the past few...

Aluminum and its alloys are only slightly inferior in strength to steel, but very...