Bell pepper is a wonderful tasty and healthy vegetable that you can ...


Hello! The reasons why, when you turn on the computer, instead of the desired and familiar screensaver of the operating system, a black screen appears. They can be very different.
First, no matter how ridiculous it sounds - check if the monitor itself is turned on - in the network or the button on it. Perhaps someone accidentally passing by pulled the cord and it disconnected. Or someone close to you just turned off the button on the monitor.
To exclude damage to the monitor itself, you will have to connect your system unit to some other monitor. If at the same time everything starts to load properly, then the problem is in the monitor itself. In this case, either contact the workshop or replace the monitor with a new one. Just in case, when connecting the system unit to another monitor, to make sure that the problem is not in the system unit, work with another monitor for a while.
There may also be problems with certain components of your system unit: video card, motherboard, RAM. To check this, the components are usually removed from the faulty computer in turn, replacing them with those that really work, and the faulty part is calculated by the method of elimination. Naturally broken thing must be replaced with a serviceable one. If you yourself do not understand anything about this, then contact the professionals.
A breakdown can also be in the power supply of the system unit. In this case, the computer itself can turn on. To make sure what exactly is broken for you, you need to try to connect another monitor to the computer and see. If that monitor works, it means that your monitor needs repair. If that does not work, therefore, the power supply has flown. But if the monitor screen remains black, then this is a clear sign of a monitor breakdown.
In addition, the hard drive could break down or the operating system itself "crashed" for some reason.
Also, some computer users with Windows 7 installed on them often complain about this problem. If you are one of them, read the following link http://www.dsg-network.narod.ru/otvety/blue_screen_of_death_in_windows_7.html "How to eliminate the black screen of death when you turn on your computer or while working in Windows 7".
As you can see, there are many possible reasons. You need to find out everything on the spot.
Hello dear readers!
We continue our topic of computer equipment repair. Our today's article will be devoted to what to do if your computer (or rather the system unit) does not turn on. Or it happens - the system unit turns on, the fans make noise (coolers work) as usual, but the monitor is quiet and dark ... It's just a black screen and the speaker doesn't beep.
So, in our last article (), we considered the problems with the operating systems windows 7 and windows 10 in software terms, and also touched on the following possible problems, which relate more to technical issues related to peripherals and hardware. And which did not have time to make out in the framework of the last article.
Subscribe to the blog to know not only, but also understand computer issues. We try to help exclusively with your problem. But we draw your attention to the fact that the symptoms and causes can be different. And if you have a special problem, then write below in the comments.
So, the common reasons that occur are as follows:
Well, today we will focus exclusively on problems with starting a computer. And along the way, I’ll also tell you how to solve a number of other problems.
The article turns out to be long, because there are actually many reasons - and the symptoms are the same, I have already listed them.
In general, today I will try to combine these causes and problems into one solution. Because we have a reason for this - we will perform an autopsy ...
We will open the system unit! It's a bold decision, so why don't we touch on the highlights today - you'll know when it's necessary and when it's not. And learn to do it yourself.
« But how can we open it ourselves - it's dangerous!"- exclaims a careful reader.
I hasten to reassure our readers ...
Of course, if the computer is still under warranty, you cannot open it!
In other cases, you can. Why - I'll tell you now. At the dawn of the development of modern computers (this is about the beginning of the 80s of the 20th century), most companies produced their personal computers (in one word) - "disposable". The most famous representative who has kept this trend so far is the corporation Apple... When such a computer becomes outdated, it can be difficult to upgrade the hardware. It's easier to buy a new one. And here is the company IBM long ago suggested a different principle. The body has a removable filling - from different manufacturers. And the user can assemble his own computer as a constructor - if only the parts are compatible. And in the event of a breakdown of the "part", it can be thrown away and delivered intact. Or more productive .
This principle is called “ Open architecture principle". Thanks to him, the system blocks "IBM PC compatible" quickly ousted Apple computers and others from the market. And because of this, we are using Windows, not MacOS. And the trend of "constructor" is still relevant for us.
Besides laptops! Laptops (and also monoblocks) are a separate class, their hardware depends entirely on the manufacturer and on the specific model. This principle does not work for them.
When the computer turned into a "patient".
We prepare him for the "operation". First, you need to disconnect everything from it - the keyboard, mouse, monitor, power supply, webcam - we turn off everything, put the "patient" on the operating table. To carry out the "operation", we first need: good lighting, a Phillips screwdriver, a small brush, wet alcohol wipes, if there is a lot of dust, a vacuum cleaner ..
We put the system unit with the top cover facing us, look for two metal bolts and unscrew them.
From the side of the unscrewed bolts, we pull - we will pull the lid until we pull it out, and this is approximately what we see:
So, the autopsy showed that death came as a result of the autopsy ... Hm .... What am I talking about?
We start solving problems in order.
And the reasons are usually as follows:
- static electricity;
- shut down CMOS or in common people - BIOS;
- the equipment connected through the slots to the motherboard does not work. These include video cards, network adapters, modems, random access memory, devices for recording, transferring, storing information, as well as USB connectors for card readers.
Power supply defective
Defective computer motherboard (severe but relatively rare case)
Despite such a frightening list, you can do it on your own, it is not as difficult as you might think.
Read carefully and do everything slowly - and you will succeed!
Warning. All actions must be performed with the power completely disconnected. Failure to comply with these requirements may damage the motherboard, the author of the article in this case is not responsible!
Take a close look at the connectors from which you have just disconnected all peripheral devices; we carefully examine the connectors on the front panel.
Very often the reason lies in them - they broke the plug from the headphones - remained inside; a flash drive broke the USB connector (s), the contacts are bent, sometimes there are foreign objects inside, dirt, dust. We inspect all connectors - keyboard, network card, monitor, card reader. There should be no damage, bent, closed contacts
This is how good connectors look like:
In the case of damaged connectors, use a thin needle to unbend the contacts so that they do not touch; We glue the faulty connector with tape, electrical tape and no longer use it.
If everything is in order, we proceed to inspect the motherboard.
The first thing we see is dust. There is no dust in my photo, but you have it. Dust is a source of static electricity. Accumulating inside, it settles on conductive elements, accumulates an electric charge. Power supplies "see" its presence, go into protection and here's another reason for you - the computer works, but does not start (does not start). Brush off the dust. With a large accumulation of it, we actively use a vacuum cleaner, remove dust from the fans. Carefully wipe a thin layer of dust with an alcohol napkin wherever you can reach.
We use the vacuum cleaner carefully, it is better to turn it on for blowing out, and in any case keep it at a distance from the board. You just need to get rid of the dust. And often, it's enough just to go down and blow hard with your mouth, so as not to damage anything! Also try not to use or wipe the boards with wet wipes. Only wiping outside and inside the case is allowed.
You need to act carefully, fanaticism and force should not be used in any case.

We take out the round battery with a thin screwdriver from the socket.
We check its voltage.
If it is lower than what is written on the battery, we replace the battery. Pulling out the battery, we finally deprive the power supply board, and at the same time some BIOS settings will be reset to the factory settings. Replacing the battery also solves some problems with starting the system unit - here's another possible problem has been eliminated.
By the way! Even without checking the battery for a charge, you can simply replace it with the same one. Just grab it and buy one at your nearest computer store in your city. A dead battery is one of the common reasons the computer does not start. There just isn't enough tension! For computers less than 3 years old, the problem is rare. Usually, the battery lasts 3-5 years in my experience. If you have encountered the same problem, please post a comment below.
Disconnect all cables from the motherboard - hard drive (s), power supply:
 This is how the connectors of the power supply are disconnected:
 And here:
 Hard drive (s); disconnect the power supply (the same connector on the DVD drive):

If a removable video card is installed, we also disconnect it. We unscrew the screw, take out the card, examine it. We remove the dust, we also wipe the video card slot from dust with a damp cloth. We examine the fan of the video card - we remove all the dust from under it; check if it dangles. If everything is in order - good, if not - read on.
Warning: Do not touch the wires leading to the buttons of the system unit and to external USB ports; removing them takes much less time than putting them back in place!
If there are more devices in the adjacent slots, we take out all of them and repeat the steps.
We take out the ramps:

Click on the latches, take out the strips from the slot. We carefully remove dust everywhere with a damp cloth.
We apply the vacuum cleaner and napkins with diligence- to all slots.

Having freed the motherboard from the equipment, we carefully remove the remnants of dust from it.
Hooray! The system unit and the motherboard are clean! If dust is to blame, we have fixed the problem. If not yet, they still carried out a general cleaning - carried out preventive maintenance.
It's time to consider a solution to this problem. While all organs are removed and the patient is "under anesthesia" on the operating table. It's about time!
This is a processor or CPU fan. Who remembers the movie Terminator 2? It was a cool plot!

Hooray! Now we will also get to the processor))
Warning! CPU fan heatsink mountings are different on different types of motherboards! As an example - mounts for Intel processors. They are cunning, more cunning than AMD. It is easy to remove, but to install without damaging it is more difficult. Be careful, careful and take your time.
Why do we remove a radiator with a fan? This must be done when replacing them, to clean the heatsink from dust and to add fresh thermal paste to the processor. All these measures are designed to protect yourCpufrom overheating.
We will supplement the symptoms of overheating with the following:
Other problems can also be attributed to this. Namely:
Warning! These symptoms can fully apply to a malfunction of the video card, including on which the fan is installed.
Sometimes, if the settings are made when the processor overheats, the system unit emits lingering squeaks (more often during the heat) and turns off after a short time, or beeps for a long time immediately after starting.
On older models, there are noisy processor-cooler bundles. Over time, noise comes from wear on the fan bearings. In these cases, the radiator with a fan must be replaced with a more modern and less noisy one. Before proceeding with the repair further, write down the name of your motherboard, it is almost always available on the board itself (photo below) and in the store select a suitable cooler for it. It always comes with a radiator and the price is not high. Buy thermal paste as well.

We turn in the direction of the arrow (which is pushed aside) alternately all four latches. Lift the latches one by one, then raise the radiator too. Do not forget to disconnect the fan power supply.

Removing the remnants of the old thermal paste from the processor and cooler

Carefully apply a new one, a small amount of paste is required. As shown in the image below. Next, just gently smear it with your finger (the main thing is not to overdo it ...).

We carefully put the radiator in place.
Attention! Insert the clamps into the board very carefully, without using force, until a characteristic click. Only after making sure that they have become correct - carefully press down, otherwise you will break. After that, do not forget to turn the latches into place.
If the radiator stands firmly, does not jump out and does not dangle, then that's it! The processor's life has been made easier.
This is one of the symptoms of a video card failure. Sometimes a video card is built-in (it looks like this)

... and not built-in 🙂 (discrete), it ...

... plugs into a slot on the motherboard.
In our example, there are two cards. If you also have two at the same time, it is very easy to check which one does not work. Usually, if the “discrete” one stops working, we disconnect the monitor from it, be sure to pull it out of the slot, and connect the cord from the monitor to the built-in one. Otherwise, you have to do the opposite. As a rule, an image from one of the cards will appear necessarily.
In some cases, video cards start to fail when their fan is broken or "worn out". You can also try to change it by picking it up in the appropriate store. We replace the faulty video card. If you have only a built-in video card on your computer, you need to buy a new one - discrete; compatible ones are selected for the motherboard based on your preferences.
In general, if the problem already arises in replacing computer parts, but you have no experience, then the most correct thing is to contact the service center, where they will consult you for free, and also recommend to improve, upgrade your computer or laptop.
Motherboard marking:

Malfunction of modules or RAM strips can also prevent the computer from starting, cause failures, freezes. If we see that the PC starts without RAM strips, but not with strips, it means that the contact is poor if installed incorrectly, or one of the strips is out of order. We select a new bar again - according to compatibility with your motherboard, volume and price.
Installing more RAM will significantly speed up your computer!
The last malfunction that we will consider today concerns the power supply.

Failure of the power supply is a frequent occurrence. All of the above symptoms can also apply to the power supply when it fails. He also has a fan that can make noise and fail. There are electronic components that fail over time.
If you have done all of the above points, installed everything in place, and the computer still does not start, check the power supply. I do this by connecting a working unit to the motherboard (not necessary for the rest of the devices yet). At the same time, I do not remove the old block yet. If the computer starts up successfully, I change it to a new unit, of the same power and with the same number of connectors (sometimes their number is different, this must be taken into account).
The power supply is very easy to change. After you have completely disconnected its connectors from all devices - unscrew a few screws on the case:
... put a new block, fix it with screws and that's it.
Warning! If you plan to install more powerful equipment on the board (for example, an additional video card or additional hard disks), the power of the new block should be higher than that on the old block. The higher the better!
After we are done, we carefully put all the devices in place - first the processor cooler, a new power supply unit; then RAM, then a video card; connect the power supply to the motherboard. We put all other devices in the slots. We connect the monitor.
Do not forget to put the round battery back in place.
After we have checked everything, we turn on the power. The computer should start with a short, triumphant squeak. No noise. A picture appeared on the monitor. Hooray!
Turn off, put the cover from the system unit in place, fix it with screws.
So, stop, what is this detail?Oh, this is from another TV!:):):):):)
We connect all the wires to their places. Everything, our "patient" came to life and recovered.
In this article, I have consistently tried to familiarize you with the process of self-diagnosis and troubleshooting - from start to finish, but you can start, for example, right from the power supply, if you are sure that this is the case. This is a matter of a specific case. The principle - "Do not interfere with the machine to work" - the same must be observed. 🙂
This article is for you, decide for yourself. In it, I did not touch on the repair of motherboards, hard drives. Because this is a separate big "sore" topic.
If you have specific questions - write in the comments, you will definitely be helped.
That's all for today. All readers - more health and good mood. Till!
Suddenly, after the next launch of Windows 7, instead of the login screen or desktop, a black background with a cursor on it may appear. Before proceeding with the solution of the problem, let's delve into its essence, because even a few template instructions for various cases will not always help.
Most often, a black screen and a cursor on it become a consequence of the functioning of a virus or malicious software. Such a program interferes with the system settings, making it so that instead of the explorer.exe process it starts itself or completely replaces the aforementioned file (many remember the Win32 family of viruses that hid files and directories, replaced them with their own "bodies" and even copied their icons for disguise). After all, he is responsible for the Windows graphical interface: everything that the user sees on the desktop, etc.
It is impossible not to recall the Avast antivirus, which tends to block system processes, including explorer.exe due to the manifestation of excessive activity when starting the PC.
The likelihood of a sudden appearance of collisions between video card drivers and the operating system is low, although in the case of a recent update, it increases significantly. And the drivers loaded from nowhere or the use of driverpacks only warms up the situation.
More deplorable will be the appearance of bad sectors on the hard disk, and even when they contain fragments of system files, the same explorer.exe. Partially damaged strips of RAM will not be bypassed either, but last but not least.
First of all, let's try to start the computer in one of the additional boot options - with the last successful configuration. It is a collection of system state settings stored in the registry for the drivers, applications, and services that Windows 7 last successfully booted with. If, before restarting or shutting down the PC, something was installed, the registry or the list of automatically launched applications was edited, the method will clearly help. To implement it, we do the following.
This is done using the Reset key or through the task manager.


Did not help? This means that the source of the trouble is different. Let's go further.
If the "seven" is protected by a comprehensive antivirus solution from Avast, the application can be the culprit for the fact that the explorer does not load. Removing the antivirus is not an option, but adding the file with which the problem occurs to the exceptions is necessary.
Not relevant for all versions of Avast, but it's worth a try, since such behavior is noticed behind it.


Is there a blinking cursor on a black background again? Let's move on.
You can open the program responsible for the graphical interface on the problem computer in several simple ways.


If the process does not start, then the corresponding file is damaged, missing or there is no access to it.
System rollback will help here, which we will touch on later, restoring the "seven" from an installation flash drive, fighting viruses and their consequences, or editing registry entries. In the latter case, you will have to get a bootable disk with an anti-virus program, start from it by selecting the CD / USB with the distribution of the anti-virus program in the BIOS. Depending on it, the method of starting a scan may differ, but the meaning is obvious: we find and remove all viruses, at least on the system volume.
Even a laptop that is not infected with viruses today can crash, displaying a black screen without or with a cursor. By the way, in the first case, the video driver may become the source of the problem. And all because the virus did its own thing, replacing the path to explorer.exe with its own. It is noteworthy that the following method works even without loading in safe mode, and you can also call the registry editor through the task manager.


If this does not help, you will have to return to one of the previously saved states of the computer's operating system.
Here, we will do time travel, provided that the system restore function is activated.


When the process is complete, a notification will appear.

The next time you turn on your PC, the desktop should appear.
Drivers are rarely rolled back when the system is rolled back. It is good if the installation of the graphics driver was carried out quite recently, and if it was installed a couple of weeks ago, many files and applications may suffer during the resuscitation of the "seven". To get rid of such software, rolling back the driver will help, and even then, if the problem does not arise when starting in safe mode.


You can also try to remove or update the video adapter driver by downloading it from the official website.
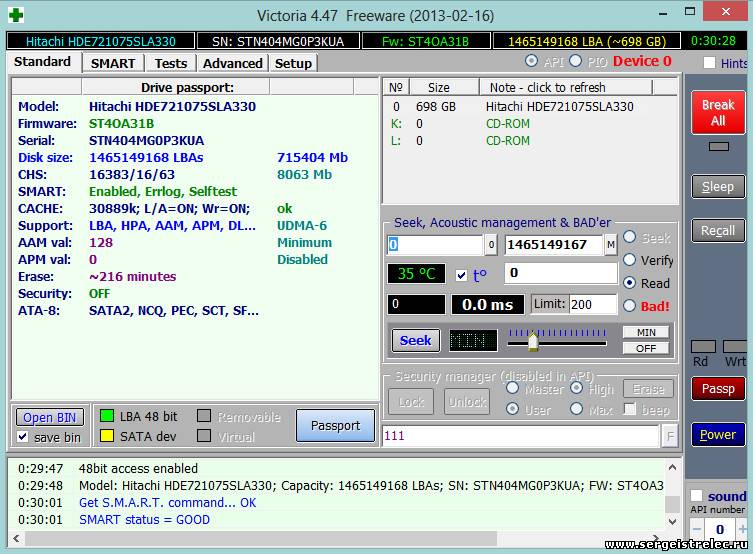
Before that, you should test the RAM strips through a utility like Victoria 4.47, check the HDD for faulty memory cells (chkdsk C: / f) and the integrity of important system resources (the "sfc / scannow" command). They are executed through the command line.
After exiting standby mode, a black background may appear instead of the desktop or user selection interface. In such cases, there will be several outputs, depending on the situation:
Let's consider the last option in more detail. You can restore your PC to work using a mouse or keyboard. It is possible that one of the devices is blocking the return of the computer to a normally functioning state, and it is not difficult to determine this, if only by the increased activity of the fan blades. In this case, deactivating the hibernation option for the mouse or keyboard will help.
Do not disable it for both devices at the same time, because then you will not be able to get out of sleep mode!

I made myself some tea, turned on the computer, set up to work effectively, but it didn't work: after a few seconds of loading Windows, a black screen appeared out of nowhere. Just like in a children's horror story. But it’s hardly a laughing matter, you have to do something with it, it’s not in vain that the tea was brewing for so long! Well said - done, because the solution to the problem lies on the surface. Don't believe me? Let's check it out!
The very first thing to start with in the event of a black screen after booting Windows is to try starting it in Safe Mode. To do this, depending on the version of the OS, you can use different methods. The easiest way, of course, is to turn off the PC and use hotkeys (for example, F8, Del or Shift + F8) when Windows starts up, and then select one of the options to load Safe Mode:

This method is perfect for XP and Windows 7, but for 8-ki you may need other methods (). If, after booting, the computer starts normally in safe mode, it is most likely that the matter is in a system settings failure (registry, drivers, updates, etc.). In this case, you can solve the problem by reading the information described in step no. 1.1. - 1.7.
However, if none of the methods have succeeded in starting Windows in safe mode, you can try putting the computer to sleep (step # 2) or using special boot disks.
In 50% of cases, the reason for the failure of Windows due to the unexpected appearance of a black screen when starting the computer is the use of an unlicensed copy of the operating system, or rather, its recent update. This happens because, having updated, the system did not pass the authentication check and, in fact, issued you headlong to the Windows developers.
It's easy to verify this: just boot the OS in safe mode. If the problem is related to this, a black screen will be displayed on the desktop instead of the usual background image, and at the bottom a corresponding message about using a non-genuine version of Windows will be displayed. On XP it will look like this:

How to get rid of the problem? Activate your beloved Windows, no matter what - 7, XP or 8. How to do it? Purchase an activation key or, in extreme cases, crack it with a special program (for example, RemoveWAT21). The latter option, however, will save you from the black screen for a short while: with the next system update, it is likely that the problem will reoccur. Well, maybe you're lucky, who knows?
If a black screen appears after Windows boots precisely because of a failure in updating an unlicensed version, activating it, you can sleep peacefully.
Often a black screen is displayed in Windows versions XP, 7, 8 after booting up the computer and when, for some reason, the video card drivers are damaged or simply flew off. In this case, the only correct solution is to download and install them on your computer. You can download the drivers from the manufacturers' official website, and it's completely free.
However, it should be borne in mind that to eliminate the black screen during Windows boot, you will need only those video card drivers that are completely suitable for your PC. Note that they differ by manufacturer (NVidia and AMD), OS type (32- or 64-bit), its release (Mac, Linux, Windows) and version (for example, Windows XP, 8, Vista, 7).
If you do not know what drivers you need, but Windows XP, 7 still managed to load (for example, in safe mode), you can press R on the keyboard at the same time and set the dxdiag parameter for the Run utility:

After that, in the window that opens, select the "Screen" tab and read the information about the video card drivers. Using this data, we download the necessary updates, install and configure them on our PC. If the problem was in them, after a new boot of the OS, the black screen will no longer appear.
At the time of loading Windows 7 and XP, a black screen often appears in case of data corruption in the registry by viruses. It is clear that the solution to such a problem must be sought in the restoration of its full-fledged work. How to do it? First, start the task manager with the Ctrl, Esc and Shift keys. After that, open the "Application" tab in it and click the "New task" button at the bottom of the window:

As a result, Windows will offer to create a new task. Enter regedit in the free field and click on the OK button:

As a result, the "Registry Editor" window will appear on the screen. You need to find the same branch and file in it:

After that, double-click on the Shell file, delete all entries in the window that opens, type in the explorer.exe parameter into an empty field and save the settings:

The final touch is to restart your PC. If all the actions were performed correctly and the reason for the black screen after booting the computer with Windows 7 (XP) was the corruption of the registry data, as a result of their debugging, the problem will be resolved. If this does not happen, it is very likely that the cause of the problem was not correctly identified and a different solution is therefore required.
You can also use the AVZ utility to customize explorer.exe and, accordingly, get rid of the black screen that appeared as a result of a system failure when booting Windows 7 (XP, 8). If the browser does not open on its own and there is nowhere else to download it, we use this output: we call the R combination and the Run program, enter the iexplore.exe task for it and press Enter (OK):

You can also perform this task through the task manager, if it is running. In this case, press Shift, Esc and Ctrl at the same time on the keyboard, select "File" in the window that appears, and in it the item "New task". Next, in the Create Task utility, enter the iexplore.exe command and click OK:

After Internet Explorer opens, type in http://z-oleg.com/avz4.zip into the search box, and then download and install the AVZ utility on your PC. In it, open the "File" menu and select "System Restore":

In the new window, mark item 8 and item 16 and press the "Run ..." button:

After the program completes the tasks assigned to it, we send the computer to restart. As a result, when you reboot Windows, no matter what version 7, XP, Vista or 8 it is, the black screen should no longer appear.
A black screen at the very beginning of loading Windows 7 / XP / 8 may also appear when a conflict occurs between the system and the antivirus, first of all, with Avast. In this case, to cope with such rudeness of the antivirus program, which partially blocked the system files, you can delete the processes associated with the work of the antivirus in the task manager. Open it by simultaneously pressing Ctrl, Alt and Esc:

Note that this is a temporary solution. To finally get rid of the appearance of a black screen at the same time as loading Windows 7 (8, XP), open the antivirus and enter the exceptions for it from item 6. For the example of Avast, it will look like this:

Then, to start the explorer.exe process, open the task manager and enter this task from the Application tab using the New Task button:

After restarting Windows XP / 8/7, the black screen issues should be gone.
This method will be effective in cases where neither the registry, nor the task manager, nor the Run utility will open on the computer. True, you can use it to solve the problem with the appearance of a black screen at the time the system boots up only on a PC with OS Windows 7 and 8. However, the process on different versions of the OS will be different:
Continuously hold the Shift key on the keyboard for several seconds or press it 5 times until such a window appears:

In this window, click the item "Go to ..." with the mouse, enter the Accessibility Center, enter the word "dis" in the search field:

As a result, Windows 7 will open the "Control Panel", in which you need to select the "System" section, and in the next window - the "System Protection" tab:

After that, in a new window we find and press the "Restore" button:

In the "System Restore" window that appears, click on the "Next" button, and then select the appropriate restore point:


As a result, Windows 7 will rollback, which will restore the old settings for the system and relieve, accordingly, the cause of the black screen when the computer starts.

After that, we perform the following actions one by one:

As a result, having selected a restore point for Windows 8, we will start the process of restoring the old system parameters, which will save you from repeatedly popping up the black screen after the system boots.
From the name it is clear that this method should be used if the problem with the appearance of a black screen appeared immediately after updating Windows 8 to Windows 8.1. First, you need to find and delete the hidden folder C: \ Windows Activation Technologies on your computer. If the uninstallation failed on the first attempt, we can access it using the UnLocker program.

As a result, the program for checking and correcting errors in the Windows system will start. Note that you can use this function not only in Windows 8, but also on 7 and XP:

After that, we start the explorer.exe process, as indicated in step No. 1.5, and restart the computer. As a result, the black screen should not appear when Windows boots up again. Note that you can fix the result in Windows 8 by enabling quick start of the system:

Let's say right away that if the start of the computer in safe mode did not work, you should not really hope that hibernation will help. However, what the hell is not joking. How do I put Windows to sleep? If you are using a laptop / netbook and the power button is exposed to boot the system in sleep mode, press it.
If there is no such function or you are used to working with a stationary PC, you will have to tinker a little. Just a little:
We press the button on the keyboard and thus open the "Start" menu. In it, click "Shutdown", then press Shift and select "Sleep Mode":

We go to "Start", open the "Shutdown" menu and select "Sleep" in it:

Windows 8:
Go to "Options", press Shift and at the same time select "Shutdown" on the screen. In the menu that opens, click "Sleep Mode":

After the system has slept for a few minutes, turn on the computer again. If the black screen disappears, then the problem has been resolved by itself. What if the problem persists? Try running Safe Mode again, but what if it works?
What if the miracle did not happen, and none of the methods described above helped? In this case, all that remains is to restore Windows using an installation disk or image, or, in principle, reinstall the operating system. But that, as they say, is a completely different story.
Today we will talk about how to remove a black screen when starting up a computer and what it is all about.
Let me describe all the reasons that a black screen can cause when the computer boots up, and below I will tell you more about them in more detail, as well as explain how to properly deal with a black screen.
Also, I would like to divide all black screens when loading into 2 categories and you, I think, will agree with me.
Finding out which category your problem belongs to is very simple: If, when the computer boots up, a black screen appears immediately (that is, no symbols appear on the monitor before Windows starts) - you have a hardware problem, and if the PC writes something (and even the system can start to boot) and then goes out, then most likely you have a software problem.(i.e. the problem is in the drivers or the system) The only exception is the hard drive.

When there are problems with the hard disk, the system does not boot (or does it for a very long time) and usually the computer gives an error, for example, of the following format:

The internet is full of instructions on how to check your hard drive. I recommend the Victoria 4.47 program. She also knows how to repair bad sectors.(unless of course they are damaged by software)
Also, if when the computer boots up, there is a black screen on which some kind of error is written, take it and boldly drive this error into the search line. You are not alone in this world with a similar problem. I give you a guarantee that what happened to you today happened to others much earlier. They described their problem and were helped to find a solution. Good luck finding you! =)
So, that I very much delayed the introduction ... let's get down to business, namely Let's go through the list of reasons due to which a black screen appears when the computer boots.
1.Problem with drivers.

Most often, a black screen appears when the PC boots up precisely because of this. And 90% of cases are due to the video adapter driver. Let's say you bought a new video card (or reinstalled the system, or decided to just update the old driver) and after installation the system went to reboot, but it could not fully boot, and instead a black screen hung. (sometimes with a cursor) There are many reasons why this happens: the PC simply does not support a new video card, driver curves, a very old system, (not suitable for new firewood and as a result) too (so to speak) "fancy" firewood for, etc.
Well, we sort of figured out the problem of drivers. Let's move on to the solution now.
And the solution is very simple. You need to press the F8 key when turning on the computer. The following menu will appear:

Here you need to select "Safe Mode" and after it boots up, right-click on the "Computer" icon and select "Manage". Then go to the "Device Manager", select the video adapters tab there, click on it and uninstall the driver you installed. To uninstall a driver, right-click on it and select uninstall. That's all. After that, the system should boot "as usual". You also now need to learn more about how to do this correctly in the section If the system still could not boot normally, then again go into safe mode. Click the "Start" menu, select "All Programs", then "Standard", then "Service" and click "System Restore" Read more about how to do a system restore.
2.Monitor or cable not working


When the computer boots up, a black screen may be due to the fact that the monitor is simply not plugged into a power outlet or the power cable and picture transmission cable have come off a little. Try tucking in all the cables. Also, a black screen at boot time may appear due to the fact that the cable is inserted into the wrong video card... (There are computers that have a video card built into the motherboard and + to this there is a connector on it for another video card (more powerful). In this case, the cable should be inserted into the video card that is inserted into the motherboard slot) Here is an example for you :

It happens that the picture transmission cable or, even worse, the monitor stops working. It is very easy to check this. It is enough to connect the computer to the TV with the same cable. If everything on the TV shows without problems, the monitor is faulty, and if it does not show, then either the cable or the computer is faulty. Read the article further and you will be able to diagnose and solve the problem yourself, because here I describe absolutely all the reasons for which a black screen appears when the computer boots.
3. Reinstall Windows.

When you turn on the PC, a black screen comes out? Everything is simple here. If the system before the "black screen" gave out and generally lived its own life, and now, when the computer boots up, a black screen with errors appears, then it makes sense to check the hard drive, and if everything is in order with it, then reinstall the system.
4.Dust cleaning is required

This is another reason why a black screen may appear when the PC boots.
Any computer needs it sooner or later, and the fact is that dust is a very good conductor and can greatly interfere with the operation of a PC. Also, overheating may cause the computer to shutdown. In my practice, most often it was required to clean the computer from dust. (you need to pull out all the components from their slots and blow them out.) The very first, in case of strong dustiness, the RAM stops working, and I always pulled out the RAM dies first, blew through their slots, cleaned the dies themselves and put them back in. After that, the computer turned on as usual, but I still cleaned it completely (since I started.)
5. Serious hardware problem.
If you tried all of the above and still a black screen hangs when the computer boots, then most likely you are faced with a serious problem. Most often, the video card burns out.

This is preceded by various stripes on the screen and artifacts.

The video card burns out due to the fact that the computer has not been cleaned for a long time and most likely the video card fan is clogged and could no longer cool it normally.
If you have 2 video cards (built into the motherboard and another one that is inserted into the slot), then you have the opportunity to check the video for operability. To do this, remove the video card from its slot and connect the "picture" transmission cable to the video card built into the motherboard. Turn on your computer. If everything worked, go to the store for a new video card. If you have one video card, go to a friend and take out the video card from his computer. Insert it into the slot, connect the cable to it and turn on the computer. If the computer comes to life, go to the store for a new video.
I will not describe more complex hardware problems (replacing a processor, motherboard), since it is too difficult for a simple user, and advanced users solve such problems on their own.
If after reading this article and using ALL the methods that are described here, the problem has not been solved- I recommend contacting the service center for diagnostics and troubleshooting. Wish you luck!
Bell pepper is a wonderful tasty and healthy vegetable that you can ...

A rather specific injury is a fracture of the fifth metacarpal bone with ...

Translation from English: Cand. honey. Sciences Gorelov V.G., Dobrodeev A.S., Candidate of ...