Chronic diseases. If you are chronically ill, for example, with an ulcer, ...


0
Last revision: 03/11/2015
A non-residential attic can become a hotbed of fire due to the presence of a large amount of flammable building materials in it. For this reason, if electrical wiring is laid in the attic, then it must pass in special refractory channels, excluding the possibility of combustion spreading to nearby wooden structures (rafters, crates, etc.).
The following types of protective sheaths can be used for wiring in fire hazardous rooms:
The most reliable of all the above is the option of placing wiring in pipes with an outer diameter of about 4 mm², but in this case, the cost of a set of installation measures increases markedly.
To avoid damage to the wires, the ends of the pipe blanks used for their laying are carefully deburred from both the outside and the inside. Complex electrical wiring in pipes assumes that you have a complete set of connecting elements from the following list:
In addition, you will definitely need a special tool used for threading pipes.
The option of placing wiring in corrugated channels is considered a less reliable way of laying, since in this case there is a high probability of unintentional damage to it. You can use this technique only in cases where you completely exclude such a possibility.
Note! The attic in a private house should not be cluttered. It is not allowed to lay electrical wiring with any random things or objects; it must certainly be open and visible along the entire route.
As for the use of plastic boxes in country houses, approximately the same requirements are imposed on their laying as in the case of the use of corrugated pipes.
With any of the options we have considered, due attention should be paid to the issue of placing so-called electrical installation products in the attic, as well as special protective equipment.

When carrying out installation work in a wooden house, the electrical products included in the electrical wiring (switches, sockets and circuit breakers) must be mounted outside the attic. It is most convenient to place all this equipment on a separate switchboard installed in the room closest to it, using a three-core electric cable of the VVG brand 3 × 2.5 mm² as a wiring. One of its cores will act as a grounding conductor connected to the corresponding shield contact.
Note! The most suitable place to install a light switch is considered to be a wall near the front door.
In addition to the above, you will need to consider the following requirements:

With the right approach to installing electrical wiring in the attic, you can not be afraid that it will cause a fire.
This video shows how to make electrical wiring in a wooden house.
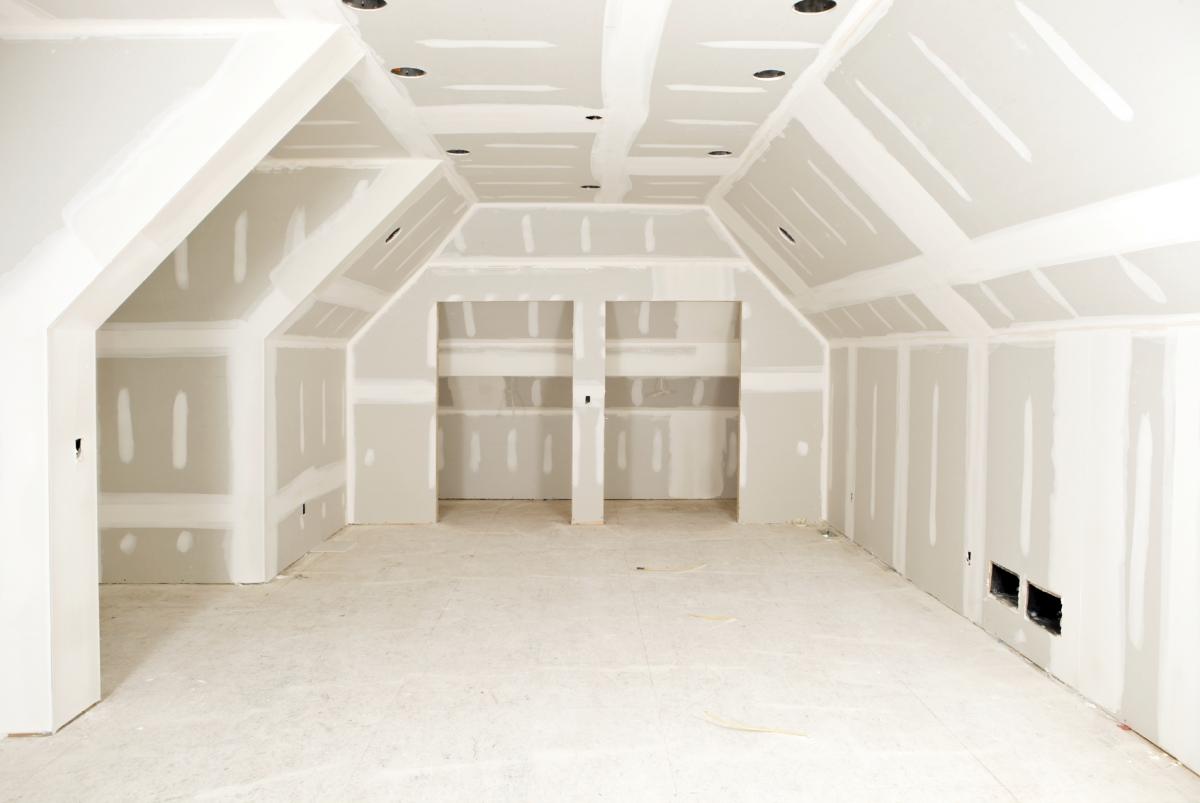
The attic does not have to be one continuous room, especially if its space is large enough. Like other floors, it can be divided into separate rooms for different purposes with the help of partitions. Here it is quite possible to equip bedrooms, a nursery, a living room, or a dining room and a kitchen.
To separate individual rooms, the best option is to use partitions made of gypsum fiber. The design of such "walls" consists of a frame to which the plates are attached. Sympathy has a number of advantages in comparison with brick walls: a relatively low price, weakness and speed of installation, low weight. At the same time, plasterboard partitions are not inferior to brick ones according to the level of heat and sound insulation.
With a complex roof shape or large spans, the rafter concept can be additionally reinforced with braces and posts, the position of which must be taken into account when planning. Often these structural elements are hidden in partitions, while making the frame twice as large to completely hide them. This makes the partitions thicker, but their heat-insulating figures are higher.

The frame of the partitions is a fastened metal U- and C-profiles. U-profiles form the main frame of the frame and are attached to the floor, ceiling and walls; C-profiles are used as intermediate posts and are clamped into U-profiles using special pliers. The length between the posts is selected depending on the size of the plates. The plates are attached to the frame on both sides, and the recess between them is filled with insulation - mineral wool. Mineral wool for this is cut into sheets, the width of which is 1 cm more than the distance between the uprights, and fits tightly into the cavity. The use of soft insulation not only retains heat in heated rooms, but also increases the level of sound insulation in an uncommon way.

As in ordinary walls, it is permissible to lay an electric cable in hollow partitions, although not all types of cable are suitable for this, in this reasoning, when choosing them, it will not be superfluous to consult specialists. The very process of laying the cable, as well as it is better to entrust to a specialist, especially if you do not have experience in such work. In principle, it is quite simple to bring a cable under the monastery and install sockets, so if you have basic knowledge in the field of electrics and minimal skills in working with electrical appliances, you can fully cope on your own. The cable laying sequence is as follows. The wire is passed through the holes in the uprights (C-profiles) in advance of the place where the switch or socket should be located. Under them, you need to temporarily cut holes in the plate of the appropriate size. A rope is passed through the cut hole, and then a socket (switch) is installed in it. Please note that the socket (switch) must be taken specifically for hollow walls.

Another necessary section is the door. It is better to choose and purchase a door with a frame before cutting a hole for it in the Sklifosovsky partition - it is easier to adjust the size of the hole to the volume of an existing product. Doorways come in different sizes and are selected depending on the purpose of the premises. For living rooms, it is usually quite enough to install a door 90 cm wide; the height of the doors can vary between 1.985-2.110 m. The thickness of the door depends on the thickness of the partition, and even in the thinnest wall, you can install the door by adjusting the position of the second casing. To be installed, the door frame must first be carefully aligned and secured on each side with a technical minimum in three places with mounting foam. When the foam is completely dry, the architraves are fixed with special glue in the interest of wood.
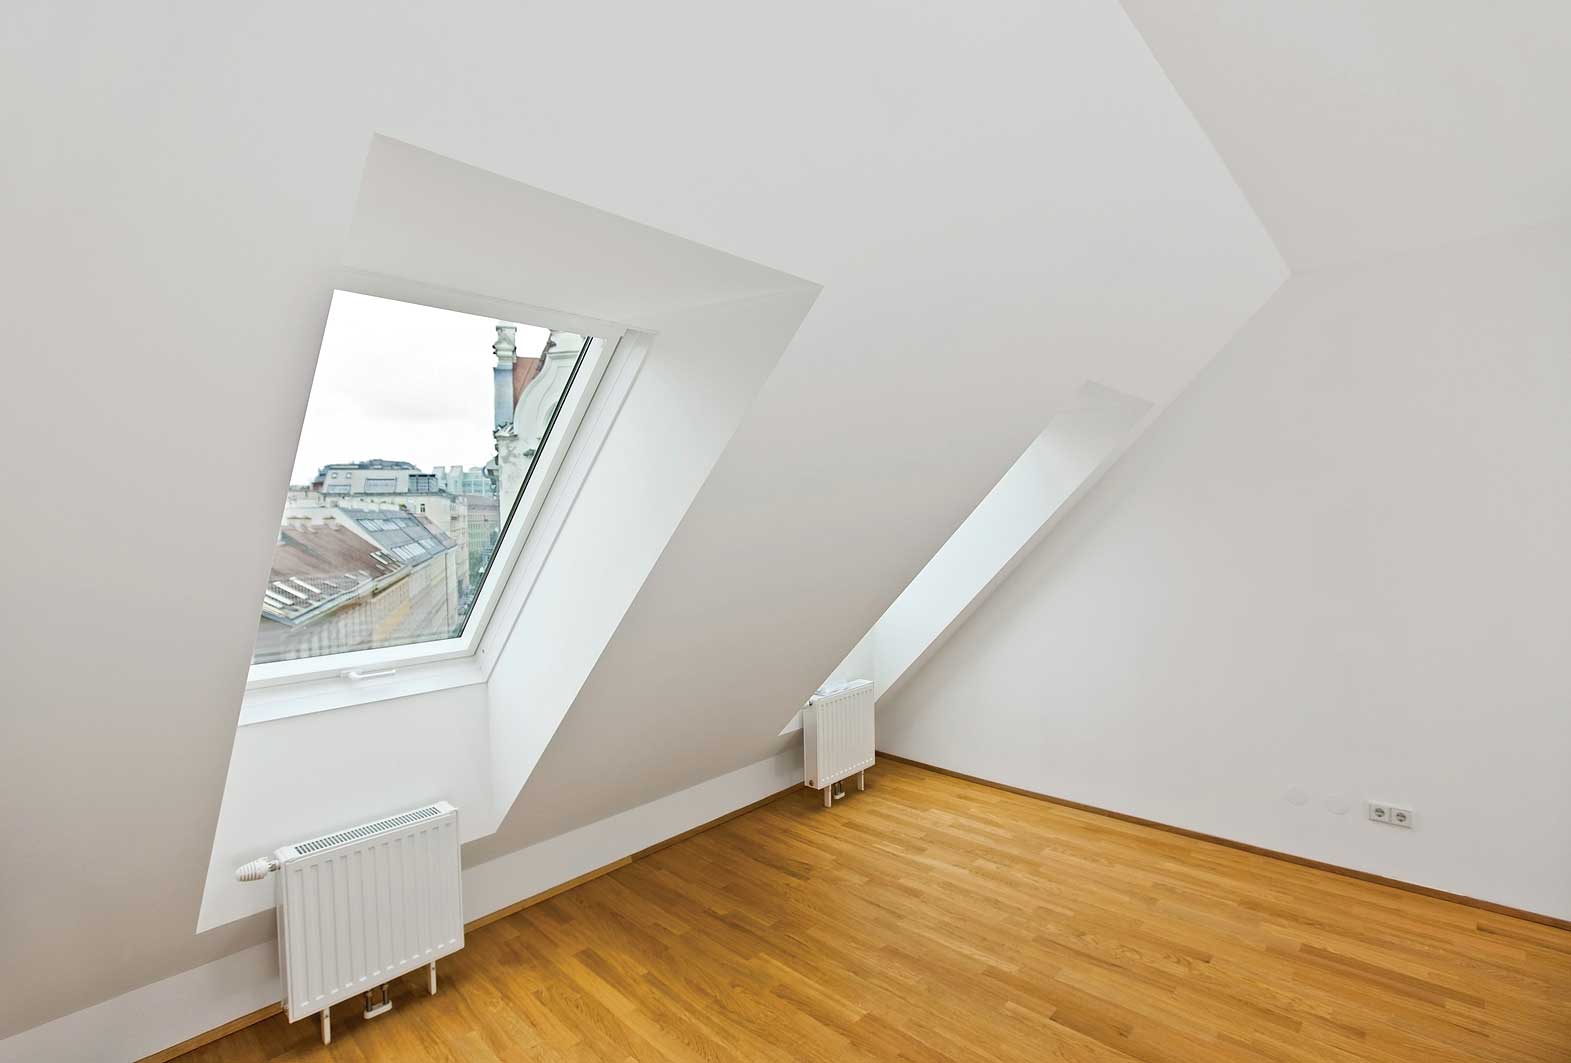
The attic is a non-standard room that can be decorated in a completely different way than other rooms in the house. Its advantage is the natural light coming through the roof window.
However, not all attic rooms have the opportunity to install a window, and it is not always comfortable to depend on the whims of the weather. Therefore, it is better to take care of a sufficient amount of light in the dark and on cloudy days. To do this, you need to successfully place lamps, lamps or a chandelier in the most suitable places in the attic.
How to determine the optimal types of lighting and their best location, we will tell in this article.
The attic room can be filled with light using one or more sources. General lighting is provided by a chandelier with several light bulbs. Local lighting fixtures are especially popular when illuminating such premises. They are of several types.
It is possible to combine several local lighting devices with the main light source. For example, installing a chandelier in the attic in the center, and spotlights around the perimeter of the ceiling will make the room evenly lit throughout the area.


Attic lighting will help enhance the atmosphere of the overall style of the room. The play of light with the help of refraction of rays can be created using mirrors, glass and other reflective surfaces. Chandelier bottles, floor lamps and lamps should be chosen in accordance with the color scheme of the room or make bright contrasts with their help.
If the attic is decorated in an old or classic style, then a chandelier suspended in the center of the beam will become a bright accent. Such lighting will help enhance the effect of the high cost of the presence of antiques in the interior of the room.


The attic, equipped as an office, should have a high level of illumination. This can be achieved thanks to several levels of light, one of which will definitely be near the desktop.
With good attic lighting, this room can be equipped for almost any need. With the help of light and thanks to a large selection of lighting fixtures, you can hide a small area of \u200b\u200bthe room or beat the triangular shape of the roof, as well as draw attention to decorative elements.
High-quality interior decoration of the attic will turn it into an additional room, not devoid of warmth and comfort.
In our previous articles, we described the possibility of converting an attic into an attic and promised to tell you about the next stage - finishing work. Finishing the attic with your own hands is a completely doable task, especially after you have dealt with the installation of the truss frame and the production of roofing. The high cost of finishing material in the current realities is no secret to anyone. But, by applying small construction tricks, and doing everything with our own hands, we, of course, can save a lot. Therefore, armed with a set of necessary electric and hand tools, we can get to work. But for starters, it would be nice to think over the whole process as a whole, draw up a work plan for yourself and calculate the required amount of consumables.
Let's start with the floor. Having previously taken care of the thermal insulation of the interfloor space with mineral wool, we proceed to installation. We have ready-made logs on which the slabs are laid. You can use DSP board (cement strand board) or OSB (oriented strand board). Such a coating option will allow us to further improvise with the main (final) floor covering: from standard, boring linoleum to everyone, to decorative and rich in choice of colors and textures of the laminate. You can, of course, follow in the grandfather's footsteps and close the floor with a 25-40 mm edged board. It will also be nice, especially if it is pre-treated and then opened with stain and varnish.
 Finishing OSB with plates is considered a universal option.
 To finish the walls, as well as the under-roof space (), all of the above materials are used, but drywall can also be added to them - a material that has proven itself from the best side for ease of processing and installation. All this motley slab and sheet row is fastened without problems with ordinary self-tapping screws. The slabs are cut to size with an electric jigsaw, and the GK sheets with a construction knife. Therefore, there will be no issues with the installation, despite the square of the sewing, which can initially be frightening. It is recommended to pay special attention to the slopes of the roof windows, if any. This is not a flat plane, so you need to be extremely accurate when marking. It does not matter which of the listed materials you use when sewing the attic interior. The main thing is that everything fits correctly, without large gaps and protruding irregularities. All this can subsequently lead to overspending of building mixtures.
Advice!
If, suddenly, as a result of an uneven cut when cutting DSP or OSB boards, you have a gap at the joints (which happens when you do not use a jigsaw for professional use), and it is not possible to use a new sheet, this technical flaw can be filled in the puttying process with a mixture of putty and sawdust.

 The best way to finish attic slopes is plasterboard cladding
 The next step, of course, will be the installation of translucent structures. In each attic, their number and configuration, of course, vary. Some generally completely glaze gables, some are limited only to windows, and in some places they put glass door blocks to exit to the balcony. We will not raise the topic of skylights now. You can learn about this from other articles on our website. We will try to describe, in as much detail as possible, the sequence of installation of vertical translucent structures using the example of installing a banal PVC window. First you need to know what the window actually consists of. Its components (standard for all window, door and stained glass translucent structures):

 Skylights are a great source of daylight
 For self-assembly of a translucent structure, in our case, a window, we need the following tools:
Putting the window against the wall, remove the glazing beads, prying them with the sharp end of the knife blade and using it as a lever. Carefully remove the glass and plastic inserts. We insert the frame that has become light into the opening, and with the help of the level we set it horizontally and vertically, making the appropriate marks with a pencil. Make sure that the gaps between the frame and the perimeter wall are approximately the same. With a drill for metal (8 mm), we drill the PVC profile (and with it the reinforcement profile) to half. If we have a wooden base, and self-tapping screws are used as fasteners, then the second half with a 6 mm drill. Using a screwdriver or screwdriver, screw the self-tapping screw into the hole until it stops. Make sure that when tightening the self-tapping screw, the frame does not deform. To do this, use wood trimmings as substrates.

 Installation of skylights should be carried out only according to the instructions and with a constant check of the quality of installation
 Advice!
For fasteners in a brick, foam concrete or concrete wall, it is best to use anchor bolts. In this case, the holes are drilled through, taking into account the length and diameter of the anchor.
You can also use mounting plates inserted into the grooves at the ends of the PVC profile. In this case, the profile is not drilled. The plates are attached to the slopes and subsequently closed with decorative inserts with mandatory insulation. We check by level the absence of distortions in the frame and you can install a double-glazed window. We put the plastic inserts back, put the glass on them and fix it with glazing beads. If you do not have a special rubber mallet for such manipulations, you can use a soft wood block and a regular hammer. If the bead is too tight, bend it and insert the ends first and, moving towards the middle, gently put it in place. After the double-glazed window has taken its place, we can start foaming the perimeter. There is no rush in this matter. The foam should fill the gap evenly. After standing (a day, at least), the excess is cut off without problems with a construction knife. It remains only to adjust the fittings (where it is provided). Our translucent structure is installed, and you can do the slopes.

 Proper installation of the roof window will ensure its reliability and durability.
 We should probably go back a little and say a few words about electrical wiring separately. Wiring is done immediately before stitching.
Important!
The wires are laid in a corrugation to provide additional security, and only the terminations are brought out.
Holes are cut using a special nozzle on a drill. The wires brought out are twisted into a knot. It is worth noting that any electrical work begins with drawing up a wiring diagram. Only careful planning of the locations of lighting fixtures and power points will save your walls from unnecessary, unnecessary holes.

 Electrical wiring in the attic is a factor of increased danger, because the roof structure mainly consists of wooden, and, therefore, fire hazardous elements
 Well, let's assume that you did an excellent job with the attic sheathing, and wires are already peeking out of the neat holes, waiting in the wings. And the translucent structures are pleasantly pleasing to the eye, along the way protecting from drafts. Time to move on to finishing work. For this we need quite a bit:
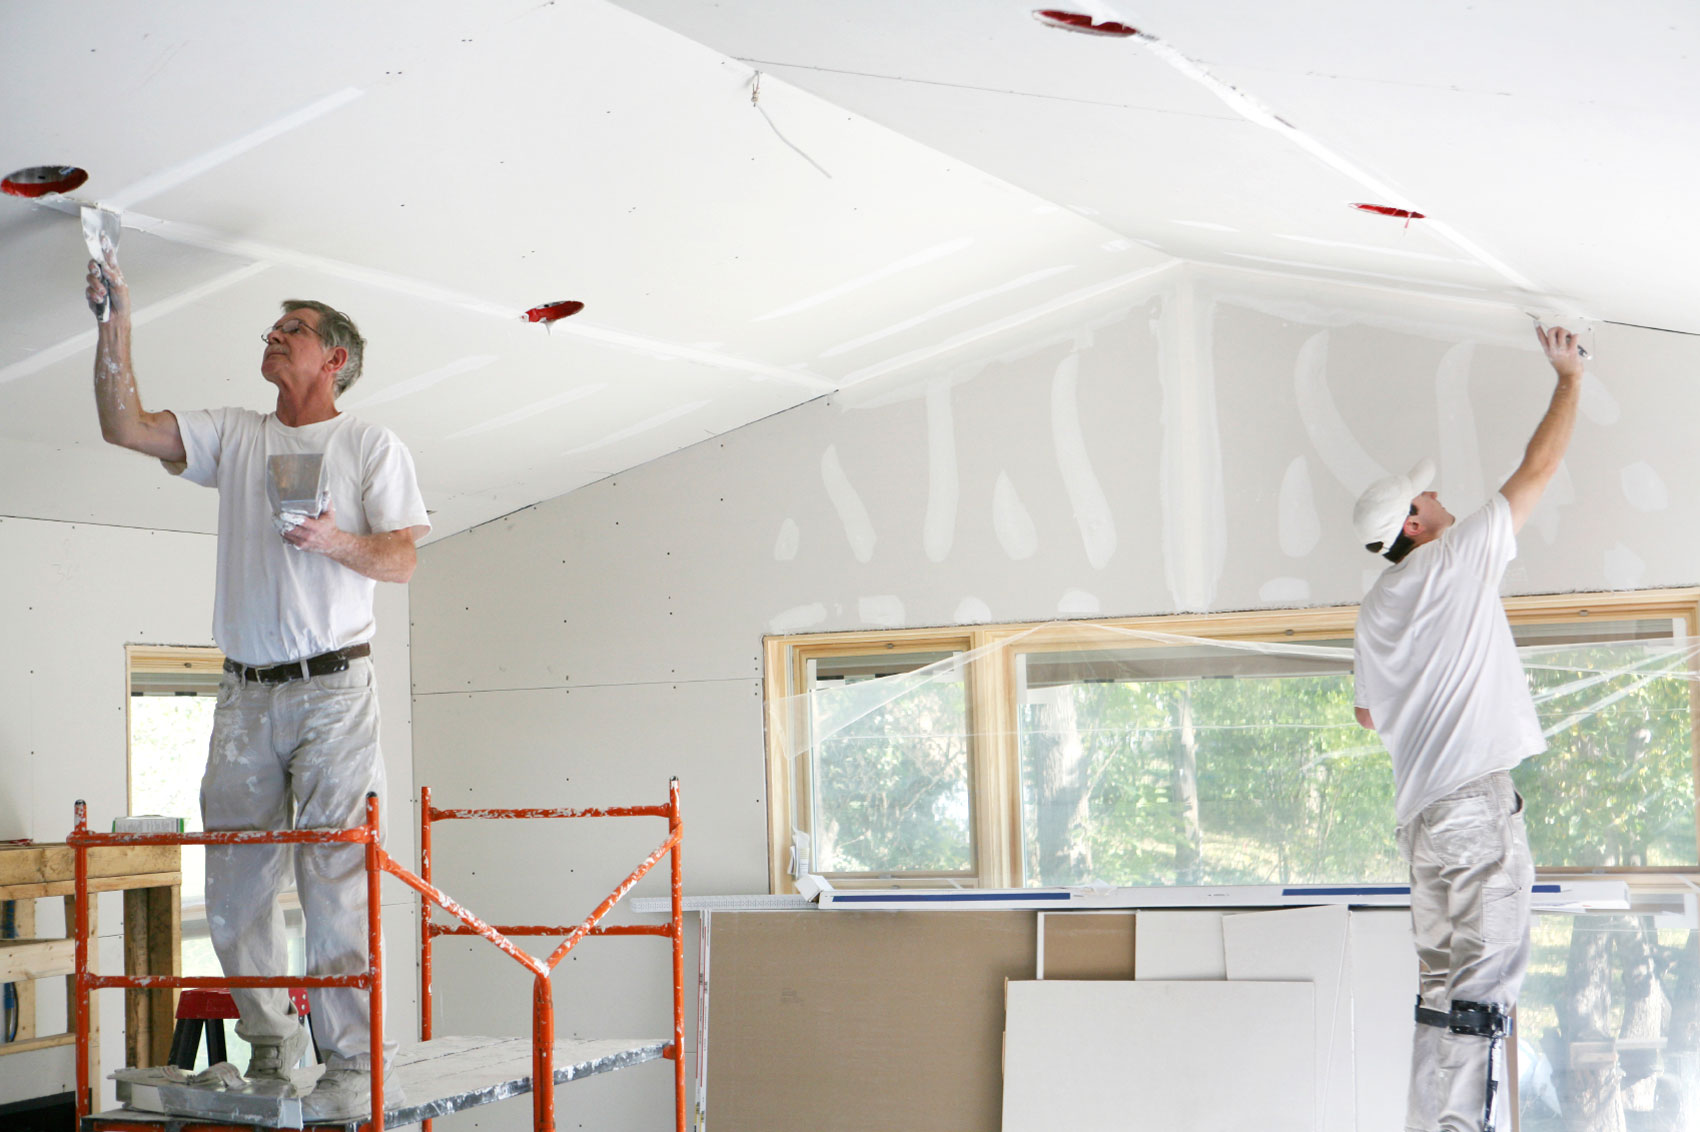
 Seal joints and seams of drywall on walls and ceilings
 On even walls, you can immediately use the finishing putty, after carefully priming the entire surface. Particular attention should be paid to mixing building mixtures. Putty should be brought to the consistency of thick sour cream. To do this, having kneaded it with a mixer once, we leave the mixture for five minutes and only when it is normally soaked, knead it completely. Add water in small doses so that the putty does not turn out to be too liquid and does not “float”. When the mixture is ready, taking a wide spatula (40-50 cm) in one hand, and a narrower spatula in the other, apply the mixture across the entire width of the wide spatula, as if with strokes. Now we take a wide spatula in our working hand and carefully apply a layer of putty to the wall. You should get an even layer 1-2 mm thick. After repeating this manipulation several times, and eventually getting about a square meter of a “closed” area, we moisten the spatula with water and smooth out the resulting irregularities. We strengthen the joints of any material with a tape putty mesh. Don't worry if it doesn't work the first time. It is necessary, as they say, "to fill your hand."
 The service life of the attic room depends on the quality of the putty
 Important!
An important nuance is that the spatulas are always clean and in the bucket (or any other vessel) where you prepare the mixture, there is no putty dried from the last batch.
This will lead to the formation of stripes, scratches and other unpleasant "surprises". Therefore, do not be lazy after making each batch, thoroughly wash the container and spatulas. If you still have such defects, do not rush to correct them “raw”. Let the putty dry. After processing the desired place with a sanding grid, and then carefully apply putty with a small spatula. After it dries, you will see that there is no trace of the grooves left. It remains only to walk over this place with a grinding grid again. A flat and smooth surface is guaranteed. On such a surface, you can apply paint, glue wallpaper, ceramic tiles, and, in principle, anything. Finishing a room in the attic or in any other room includes a lot of work, each of which is very important to achieve the final, desired result, and one of them should not be neglected.
 For finishing surfaces, it is recommended to use light colors that scatter light well in all directions.
 Another option is wood trim. By and large, here you can do without sewing with sheets of DSP, OSB and GK. It is enough just to fix the transverse beam between the elements of the truss frame. The size of 50x50 mm is enough. It can be fixed using metal corners with holes for self-tapping screws. Having prepared a similar frame, you can safely proceed to the sheathing. Clapboarding is usually practiced, but other, more interesting options can be found, for example, imitation of a log house. The tree is selected in a completely different way than for load-bearing structures. Here, the more knots, the better.
Important!
With self-preparation of wood, the mandatory stages are grinding and treatment with an antiseptic.

 If you want to organize the design in an eco-style, then the attic wood trim is suitable for you.
 Coating with stains and varnishes, as they say, is a matter of taste. Natural wood has been and remains one of the most sought-after materials for finishing work, especially in country houses. Its natural structure will not leave anyone indifferent, the main thing is to present it correctly.
Has your attic already acquired a residential look? Well, almost residential. Now it's time to tackle the lighting. We install sockets, switches and lamps in the holes prepared in advance. When the backlight is on, the interior decoration of the attic walls will take on a residential and finished look. And, in general, trust your imagination and do everything according to technology. The results will pleasantly surprise you.
1.
2.
3.
4.
The use of mansard roofs has been practiced in construction for a long time. In megacities, where the cost of land is constantly growing, the construction of an attic is the only best option for increasing living space. Initially, the attic floors were intended for poor people who could not rent a room for a high rent.
The modern installation of the attic roof is significantly different from what was offered before, and the use of various building materials facilitates the process of its insulation and protection (read: ""). For independent work, it is enough to familiarize yourself with the main stages of the construction of the attic.
At the preliminary stage of construction, the developer must decide on the type of roof of the future attic space. You can equip an attic for further living under any pitched roof. The roof of the mansard roof should be built taking into account the requirements for the room.
There are 2 types of rooms that can be seen in the photo:
The walls of the attic are located both obliquely at a slight angle and vertically. When choosing a hip gable or four-pitched roof, it is possible to fully utilize the entire area of \u200b\u200bthe room.
Before starting work, you should create a project for the roof structure and obtain permission for the attic, outline the location of the front door and consider where the staircase will be installed. The main advantages of design include the accuracy of calculating the necessary materials for rafters, vapor and waterproofing, laying the roof, and finishing the entire structure as a whole.
If the attic is to be used as permanent housing, then the attic must be wired, the walls, floor and ceiling must be insulated, and heating must be installed.
The attic will turn out to be reliable and will last for a long time only if it is initially created strong. When erecting an attic in a wooden house from a bar, the upper crowns of the log house will be the basis for the rafter system. If the walls are built of brick or concrete, then a reinforced concrete reinforced belt is installed on top, which will help not only to level the walls, but also to install the truss system. Regardless of the option chosen, the mansard roof pie is built according to the same principle.

The reinforced belt also serves as the basis for the Mauerlat, mounted on galvanized metal studs.
Mauerlat - the main load-bearing rafter, the installation of which depends on the shape of the roof:
Floor beams are laid on the Mauerlat, and a boardwalk is laid on top of them, which will become the basis for laying the floor. After that, proceed to the construction of rafters in accordance with the selected type of roof. A gable roof is made quite quickly and simply, but working with a four-pitched hip roof will be much more stressful, especially if an attic is being built from lstk or other similar materials.
Rafter legs are attached to the Mauerlat with small notches on the rafters. To lengthen the legs, you need to splice the boards, and strengthen the resulting joint with the same board more than 50 cm long. Since the reliability of the entire structure depends on the strength of the attachment points, various struts, struts, crossbars, etc. are widely used here.

If the house was built with reinforced concrete floors, then the main part of the work will be similar to if the attic was built on pillars, but there are some distinctive points. For example, puffs should be mounted on the rafter legs at the places where triangles are formed, which will later be used as lags for the floor of the room. Vertical racks resting on the rafters are attached to the same puffs. Fixation of individual elements of the system is carried out using metal brackets, corners, bolts, nails and self-tapping screws.
As soon as the rafter system is completely ready, you can start working with vapor barrier and crate.
Features of mounting the crate:
At this stage, a thorough check of all the elements on which the mansard roof will be installed is carried out - if necessary, they are additionally strengthened, the rafter system undergoes antiseptic treatment. After that, the waterproofing material and the roof itself are laid.

Insulation of the attic space is carried out only after the dismantling of the walls and ceiling of the future living space. A crate is mounted to the walls, made according to the dimensions of the mineral insulation boards (read: ""). Without such a frame, during the operation of the attic, slipping of the insulation is often observed, which will lead to freezing and blowing through bare walls.
It is quite feasible to do it yourself, but throughout the work you should follow the technology of building an attic and take even minor details seriously.
The next step, during which the roofing pie of the attic roof will be completely finished, is insulation. The construction market offers a wide range of heat-insulating products for, among which the most suitable for the attic floor can be insulation made of expanded polystyrene, mineral wool and fiberglass.
Experienced builders point to the greater efficiency of mineral wool raw materials, which are able to envelop the truss system much better, which prevents the formation of cold bridges and condensation. When working with foam boards, it is impossible to achieve the integrity of the coating - the resulting joints are not sealed even with mounting foam. The advantage of mineral wool and glass wool is the ability to completely fill the space of any shape without gaps and cracks.
Vapor barrier in a roofing pie, how to avoid mistakes, details on the video:
Insulation of the under-roof space is carried out as follows. The insulation is placed between the rafters, filling the entire area, a vapor barrier is attached on top of it, if it is done using a vapor barrier film with a foil layer, then it is better to turn it inside the room. For reliable fixation of vapor barrier materials, building brackets are used. At the final stage, it is performed or drywall.
In a word, for self-assembly of a mansard roof, it is enough to have a little construction experience and comply with all the requirements listed above.
Chronic diseases. If you are chronically ill, for example, with an ulcer, ...

Heaviness in the stomach is a familiar phrase, well known to most ...

Almost everyone has experienced discomfort in the stomach. Noting...